Making barbecue with your own hands.

  • WELCOME TO THE NEW SERVER!

    If you are seeing this you are on our new server WELCOME HOME!

    While the new server is online Scott is still working on the backend including the cachine. But the site is usable while the work is being completes!

    Thank you for your patience and again WELCOME HOME!

    CLICK THE X IN THE TOP RIGHT CORNER OF THE BOX TO DISMISS THIS MESSAGE
Status
Not open for further replies.

Borisov-54

SatelliteGuys Guru
Original poster
Jan 4, 2013
146
85
Minsk Belarus
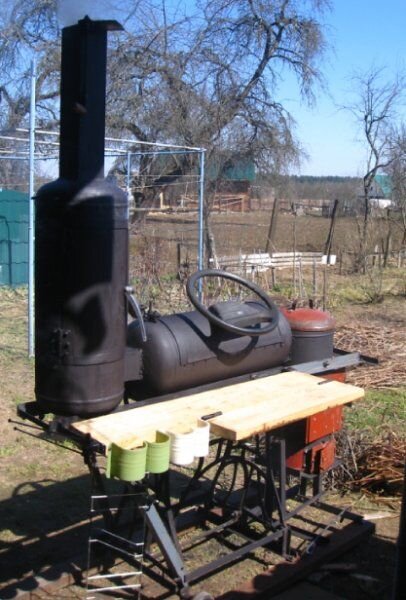
My grill of three gas cylinders.

This is how I myself make a barbecue from three gas cylinders.Your attention will be about 200 photos.The initial and final process.
-I watched all our craftsmen on YouTube, well done guys. Although there is a lot of plagiarism, but everyone does it in his own way. I have some plagiarism too, but I will try to bring something different.
-I liked these two stories more.


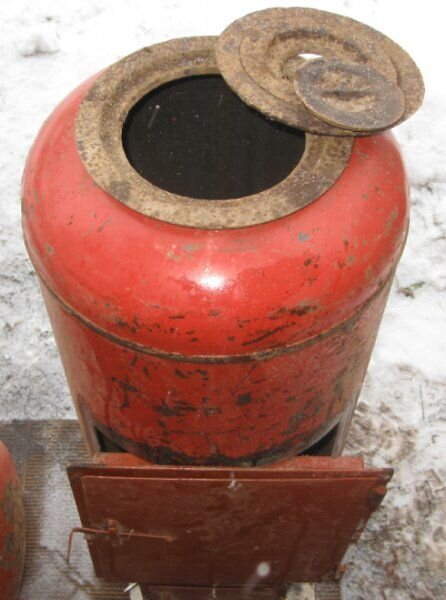
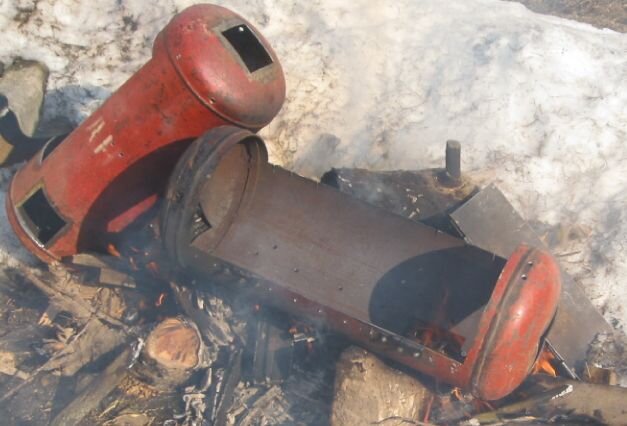
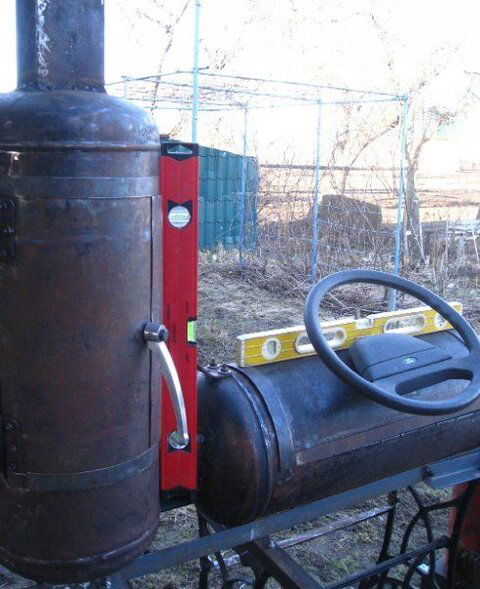
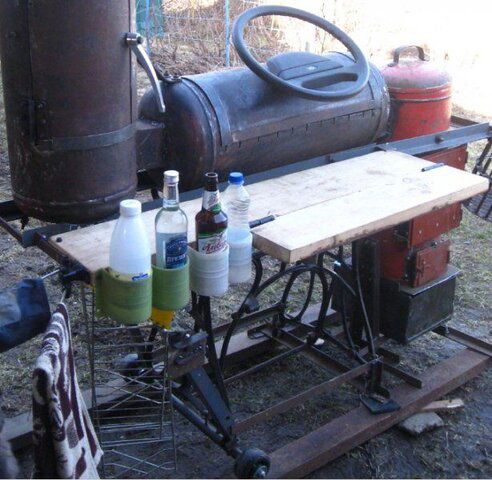
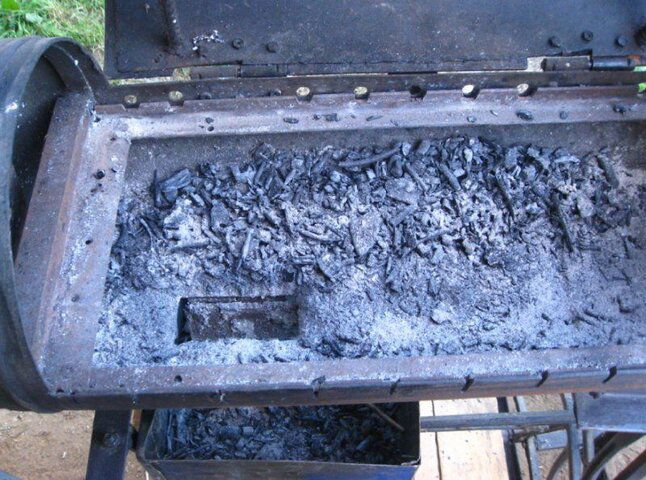
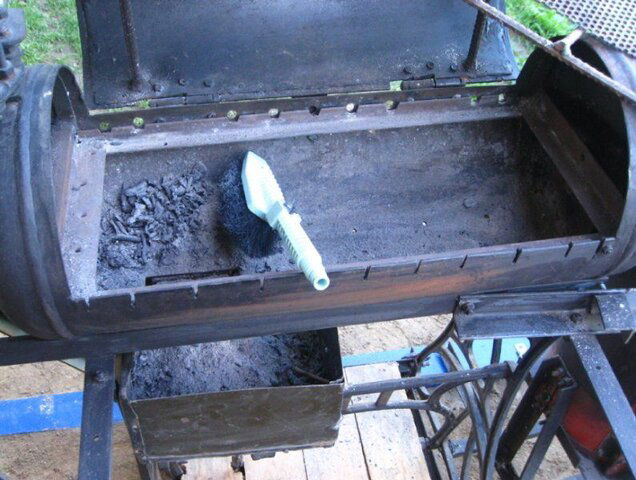
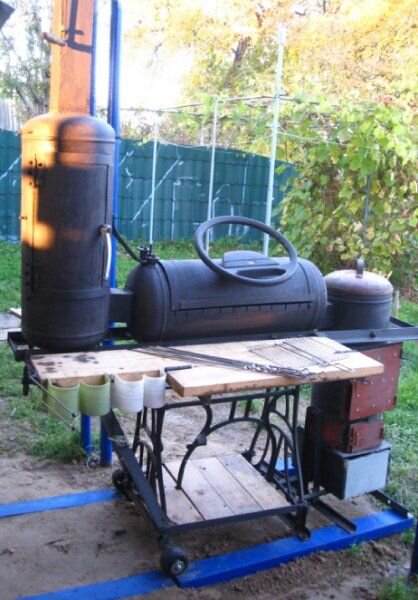
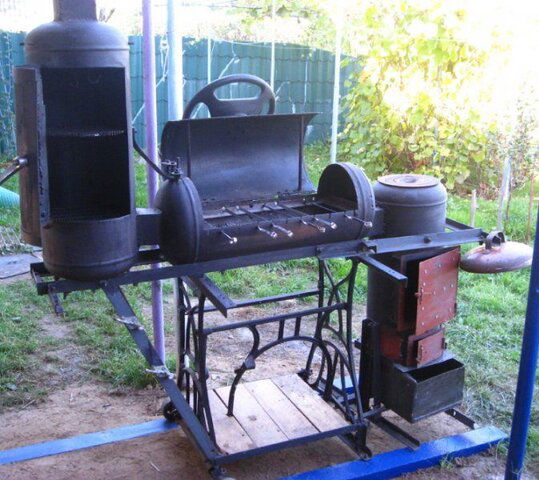
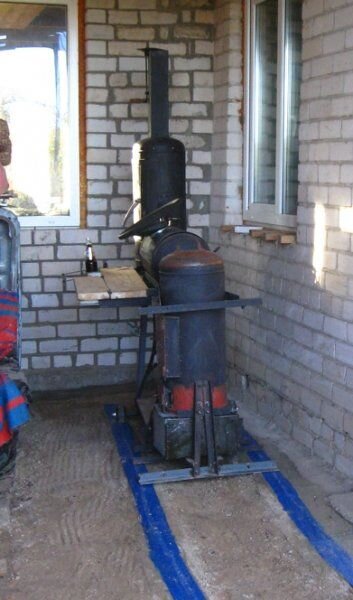
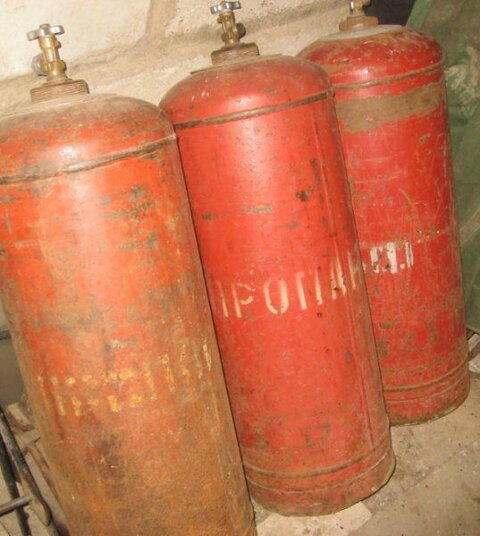
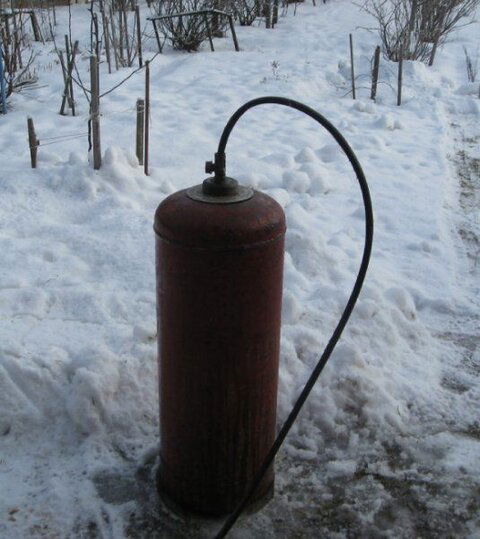
I had three gas cylinders of 50 liters each. Only gathering dust in the garage. And in the winter of this year, in one month, I handed over such a unit.
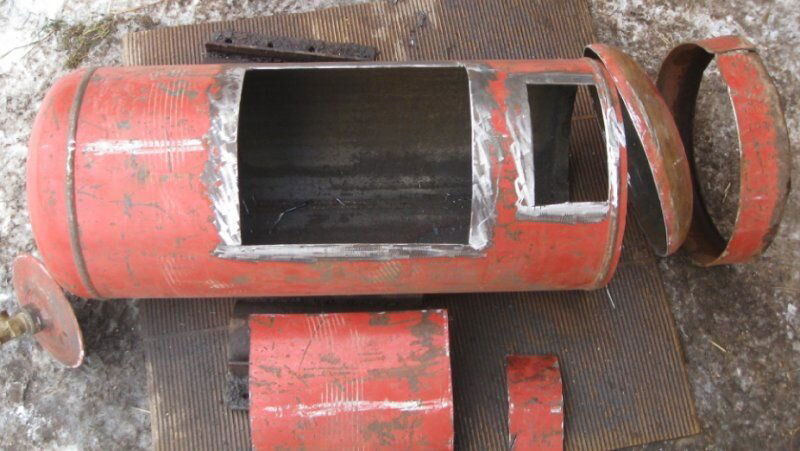
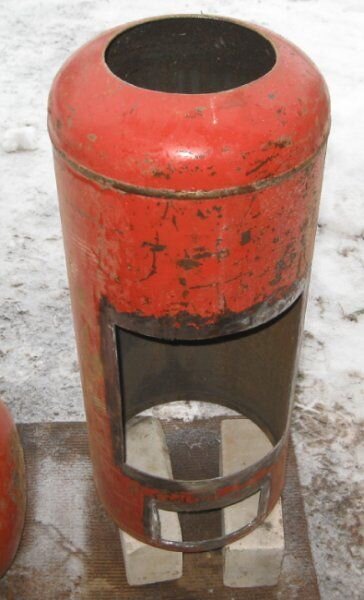
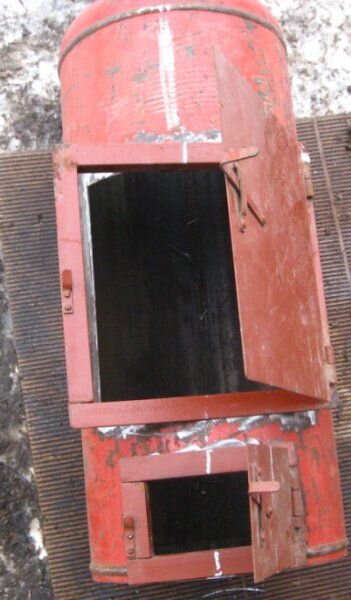
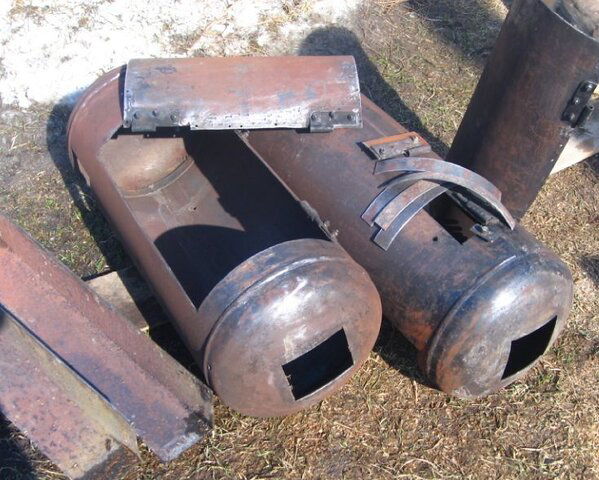
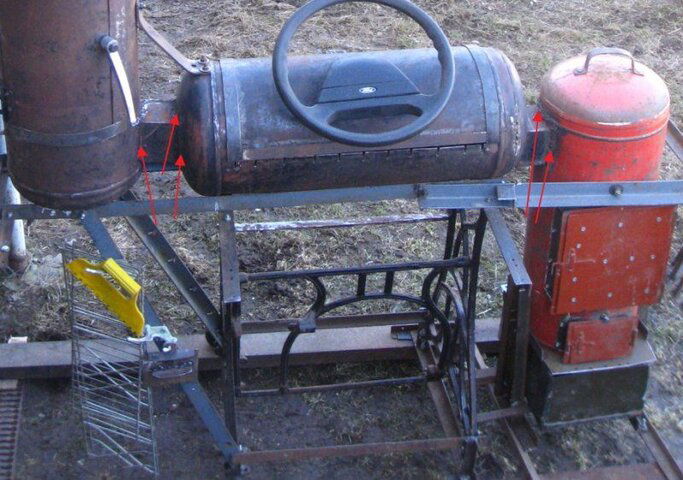
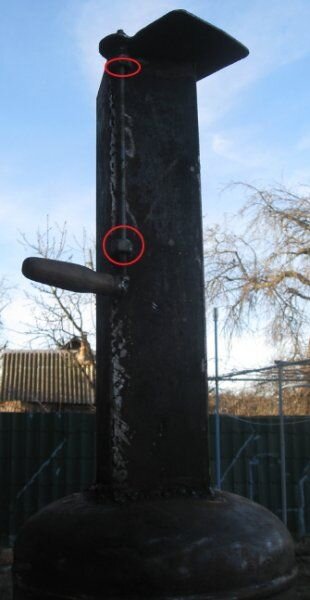
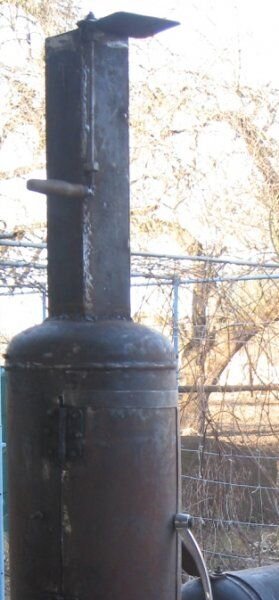
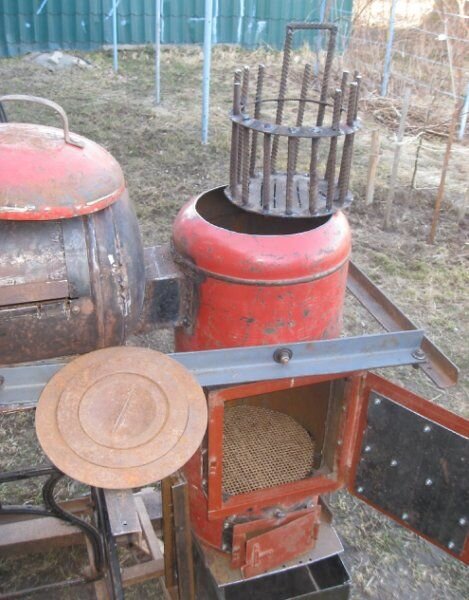
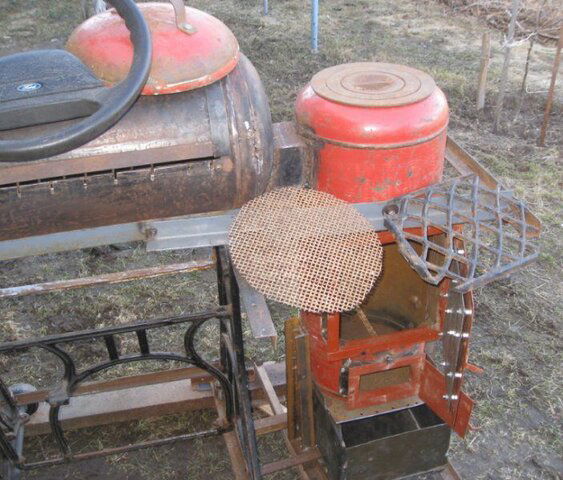
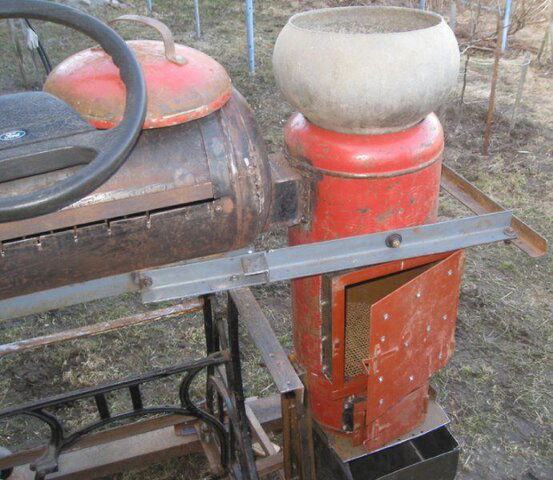
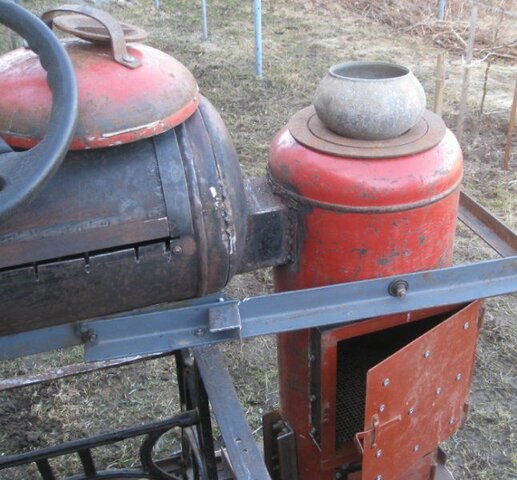
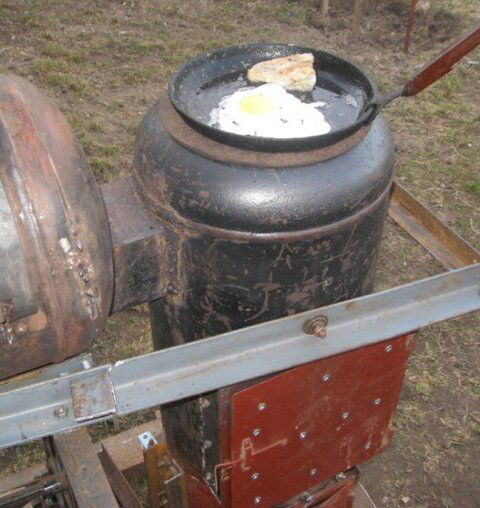
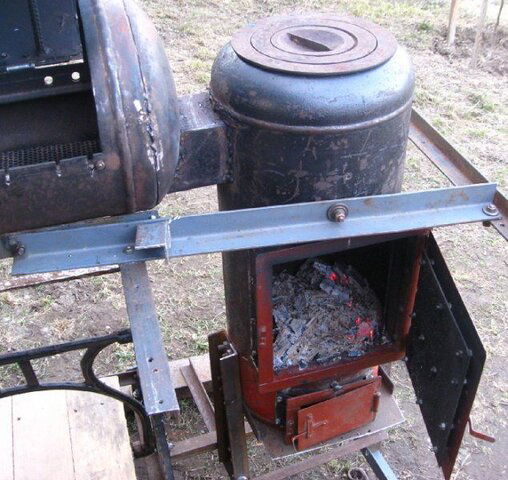
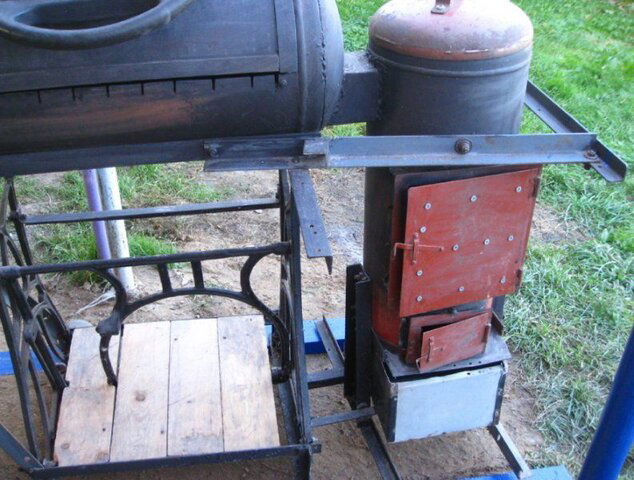
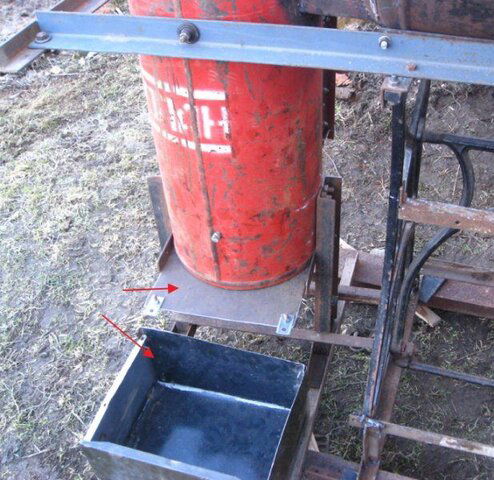
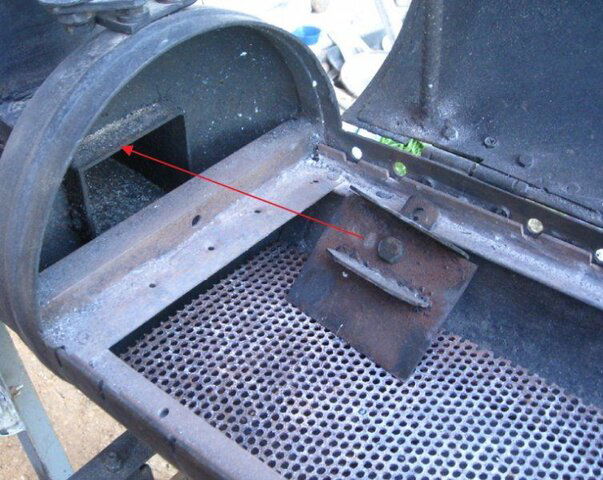
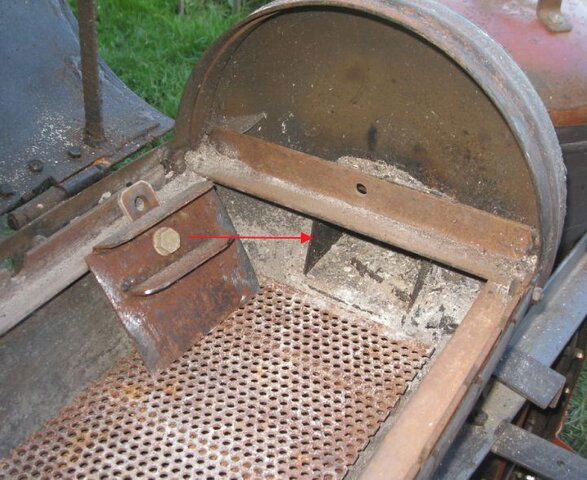
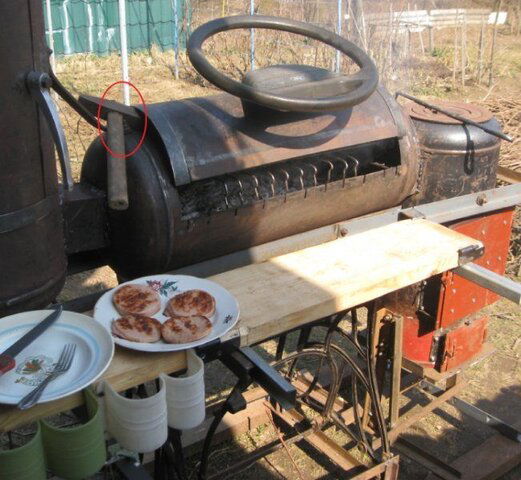
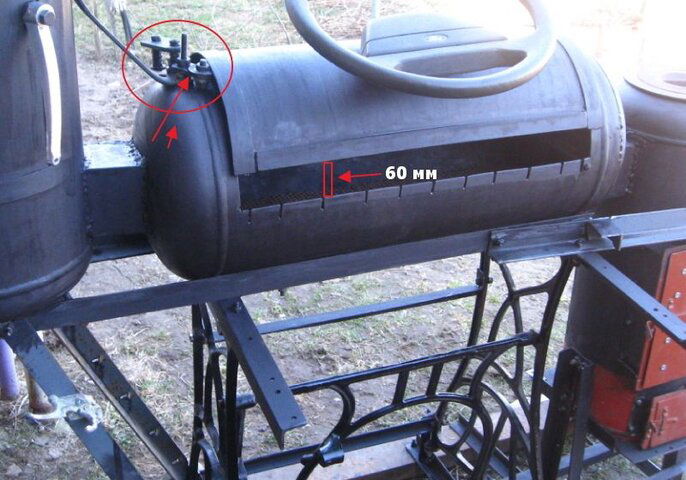
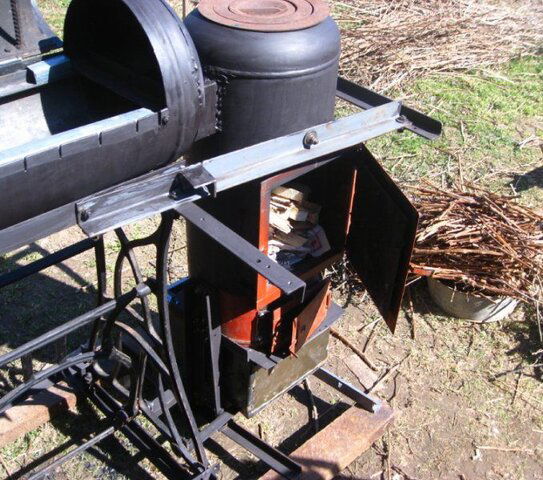
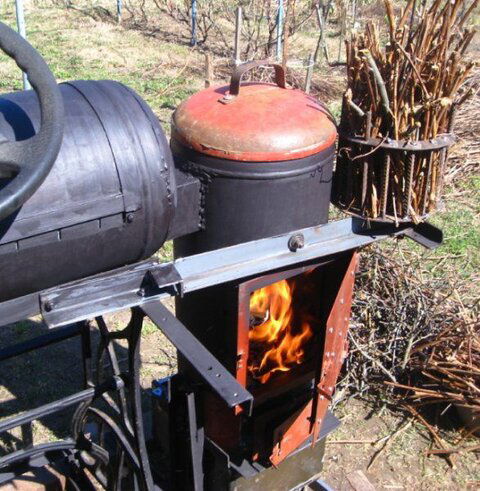
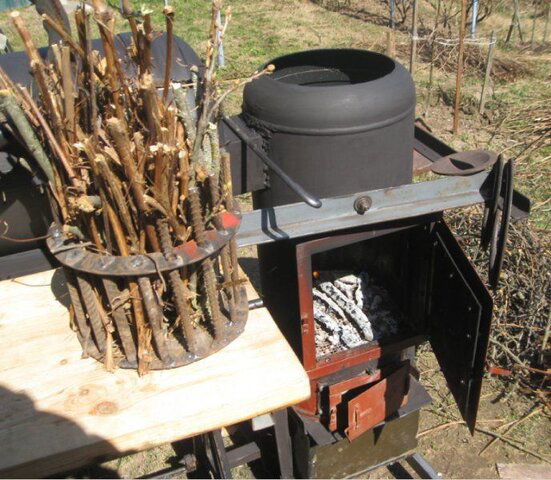
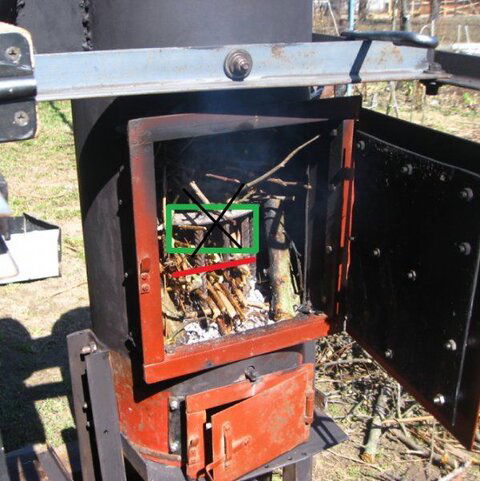
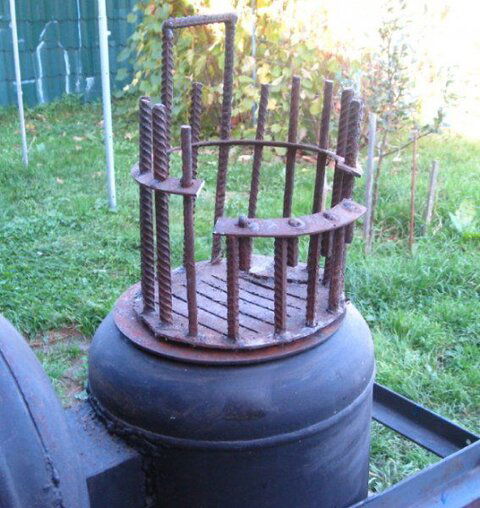
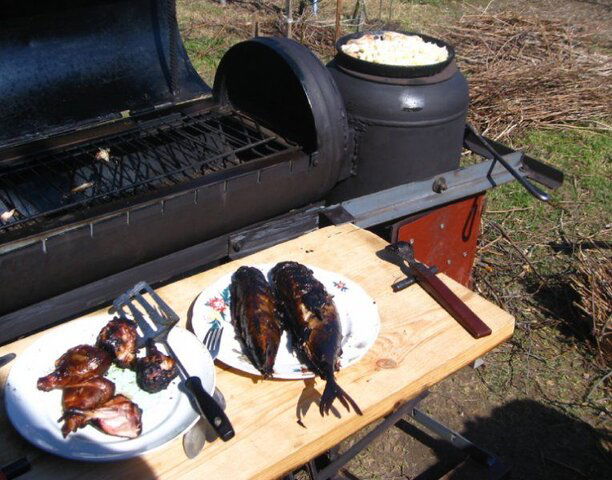
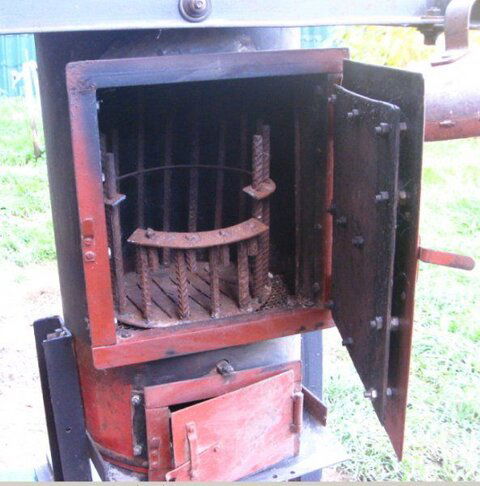
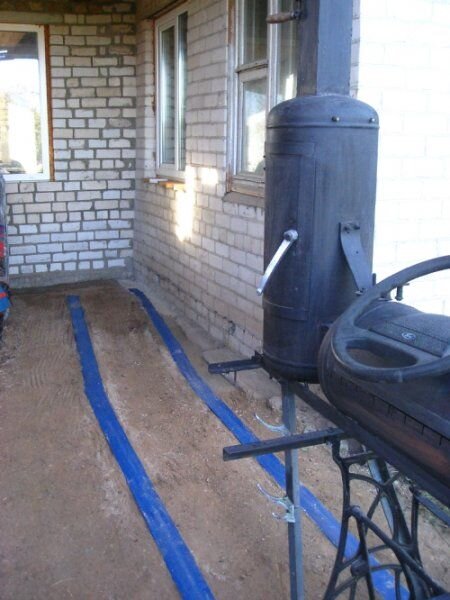
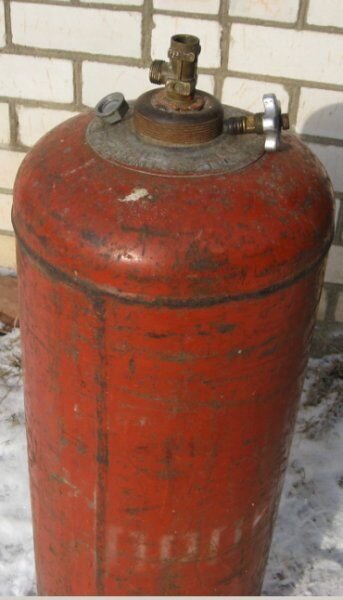
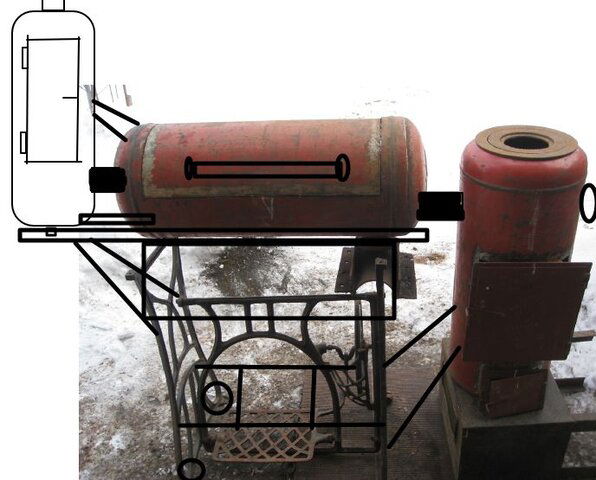
On the right, this is a furnace, plus a smoke generator is inserted there. You can fry and cook various soups from above.
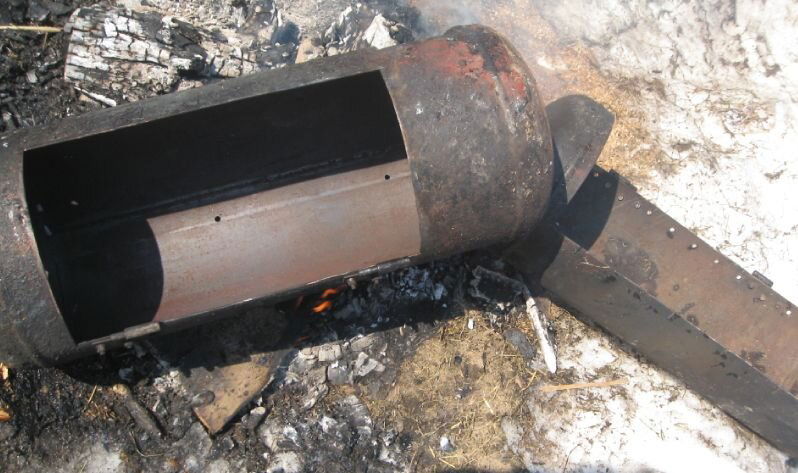
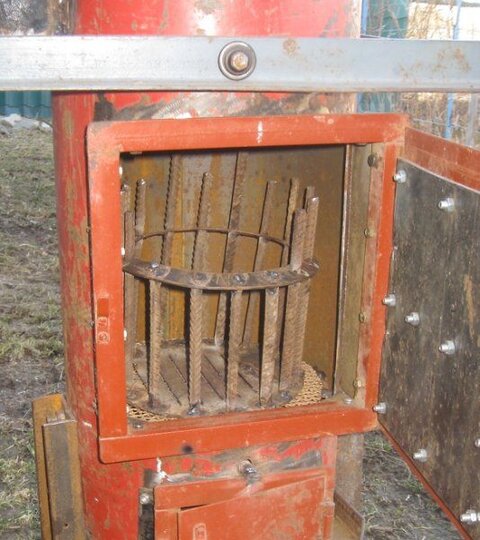
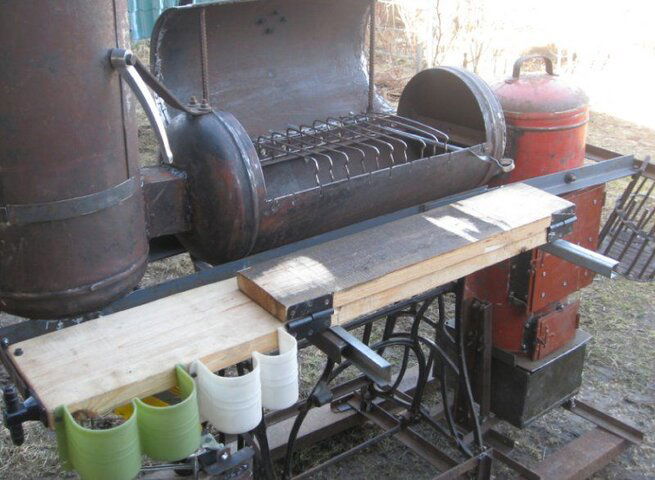
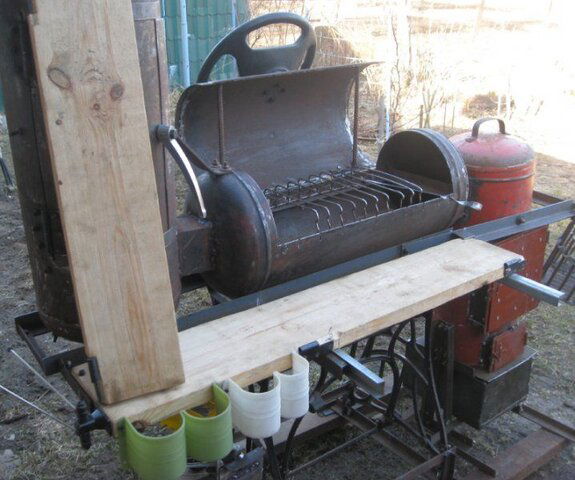
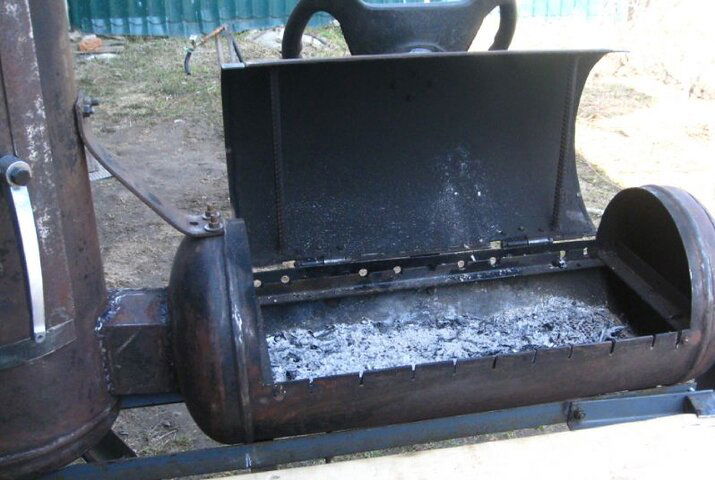
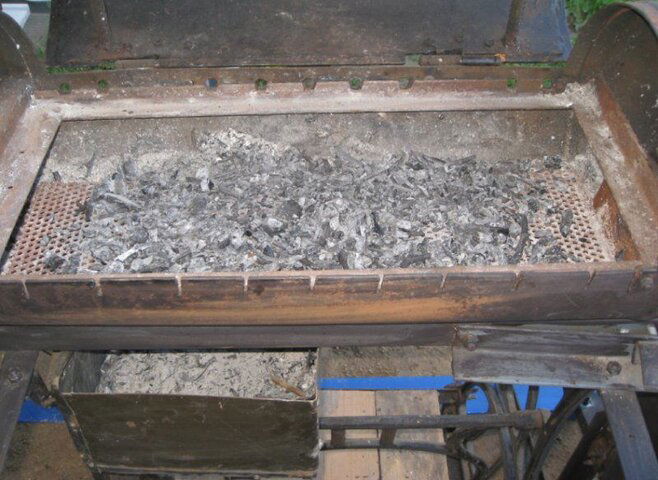
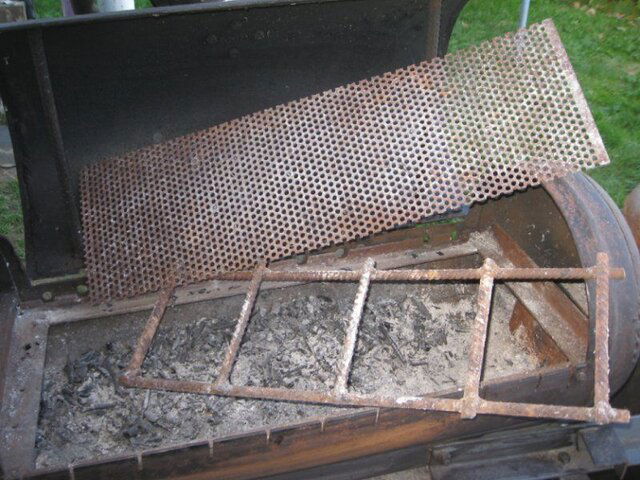
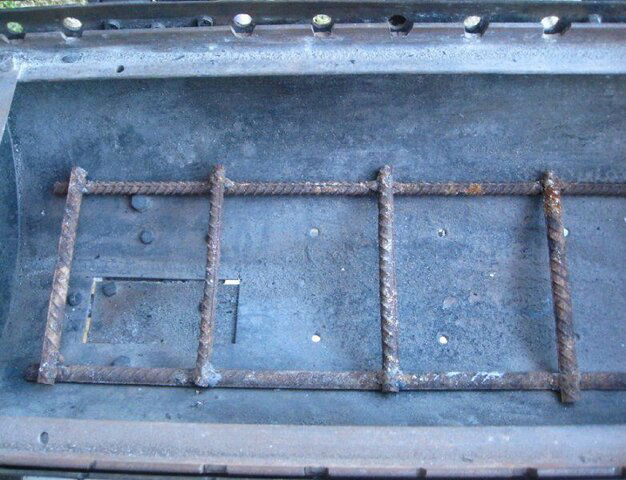
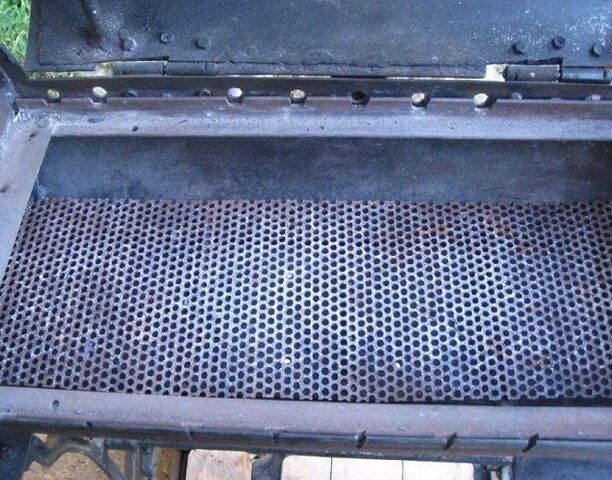
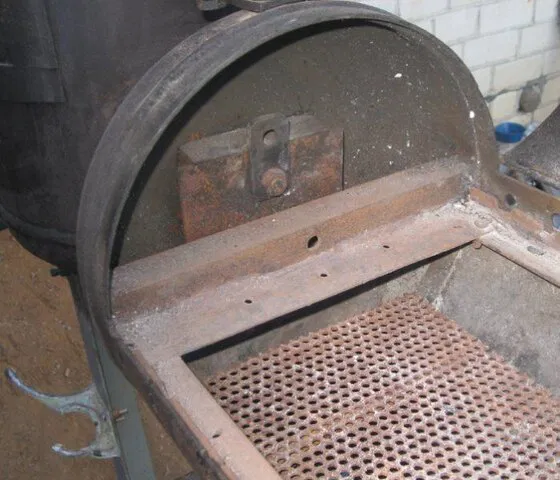
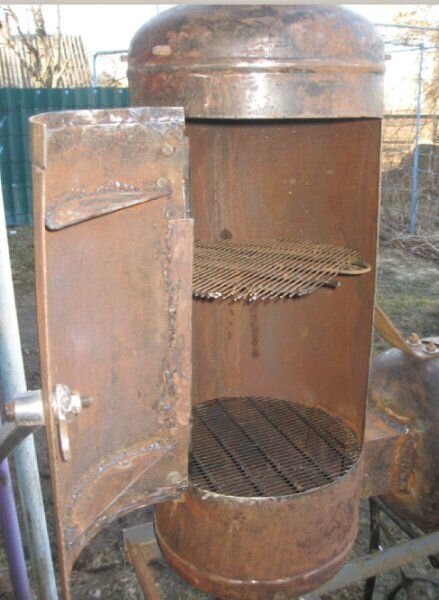
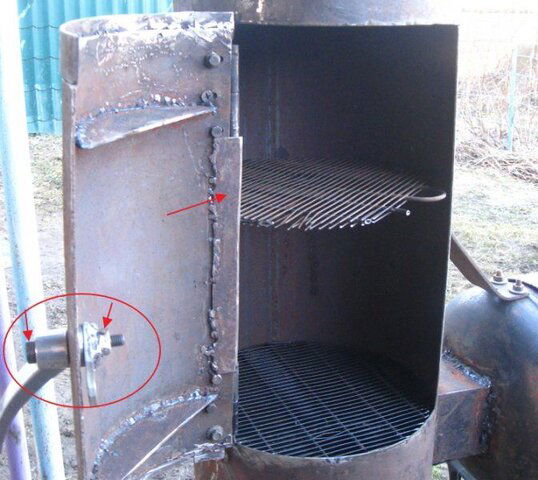
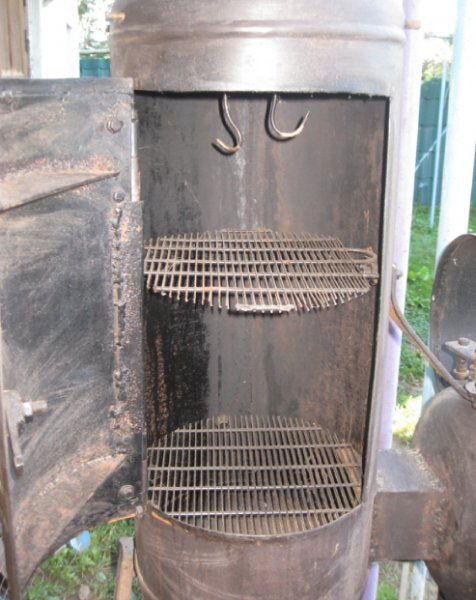
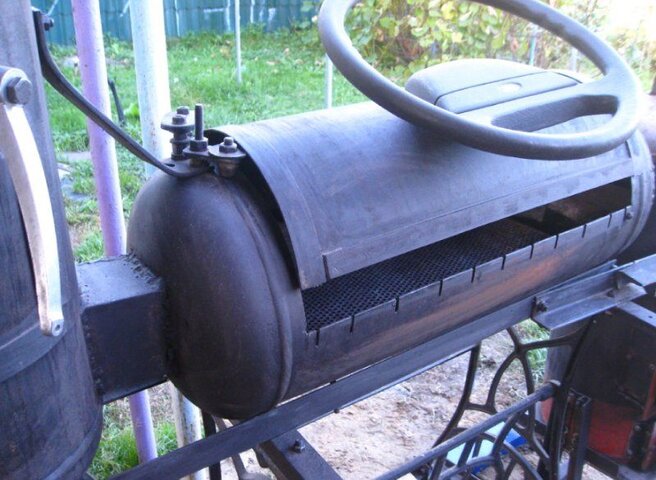
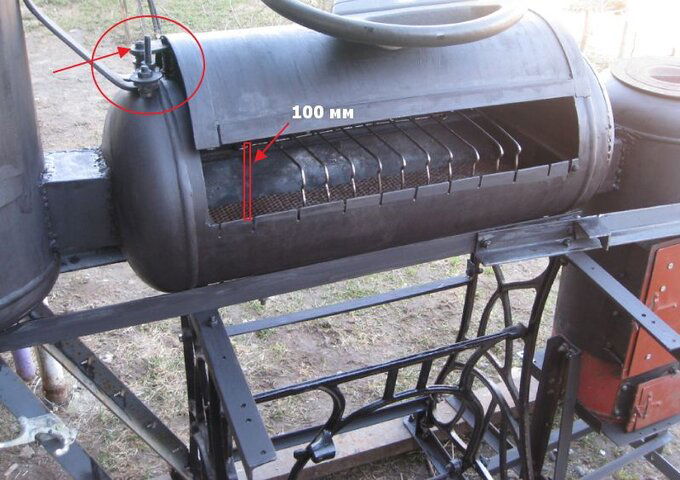
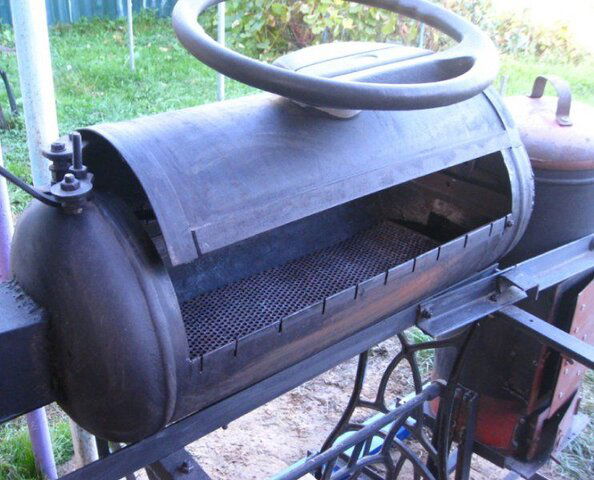
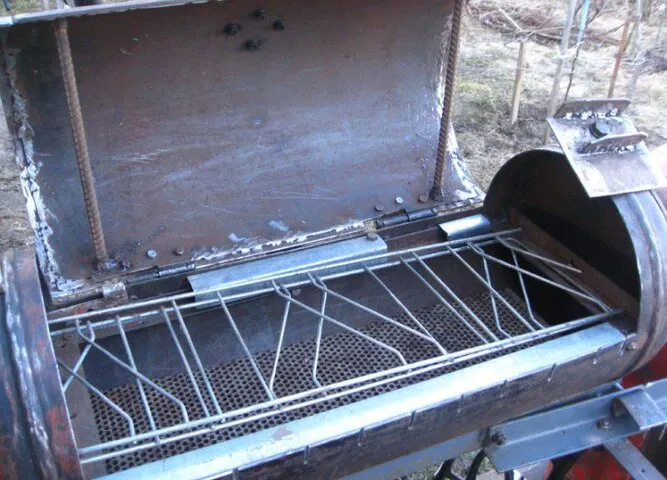
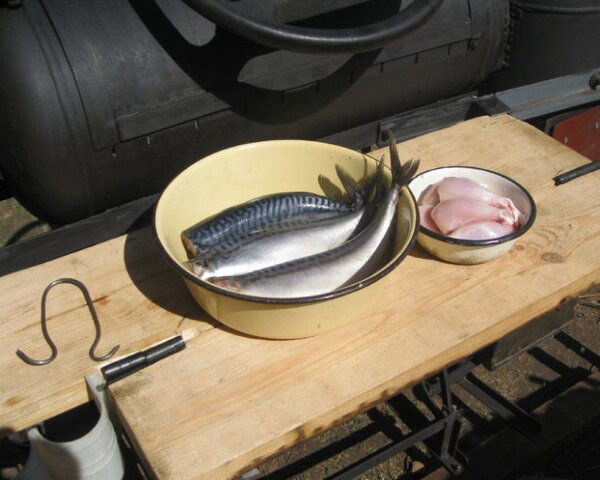
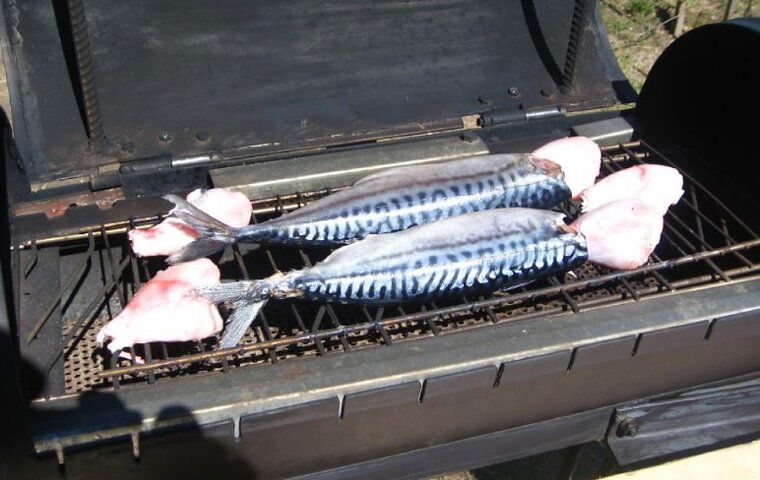
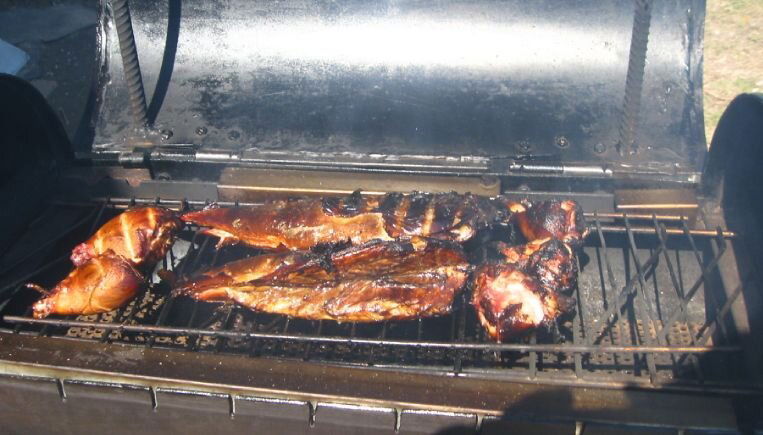
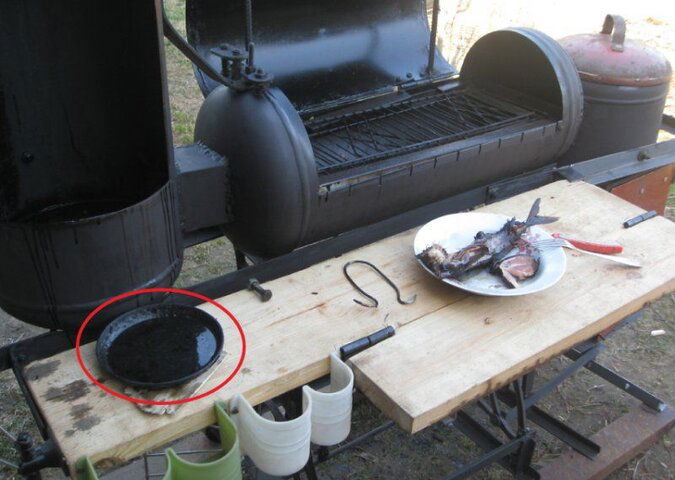
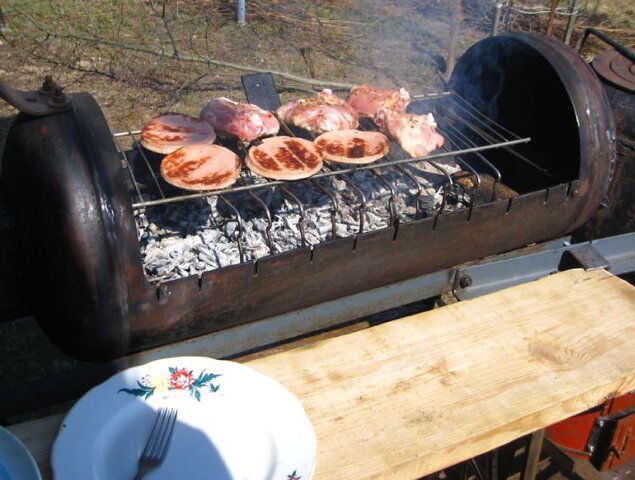
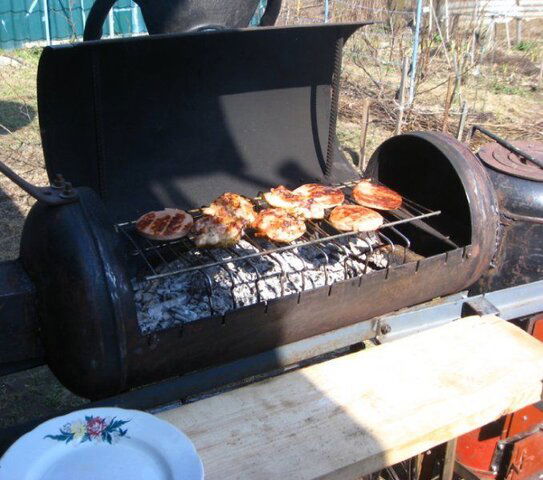
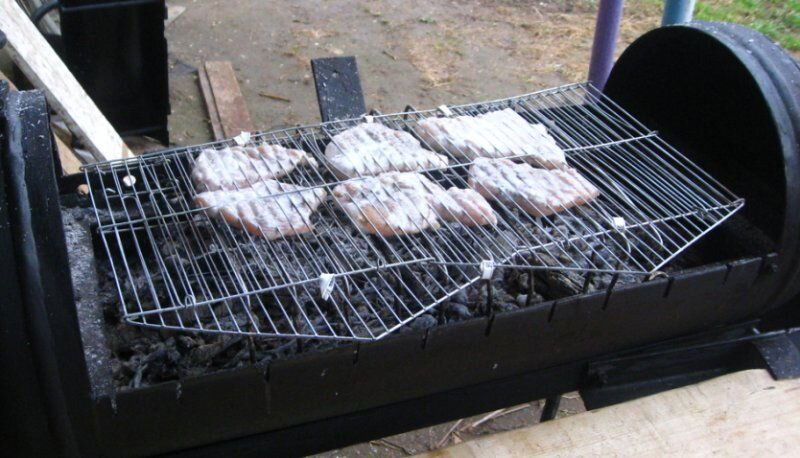
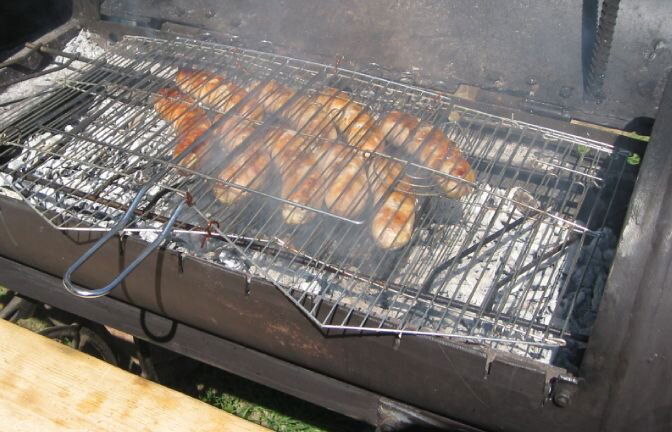
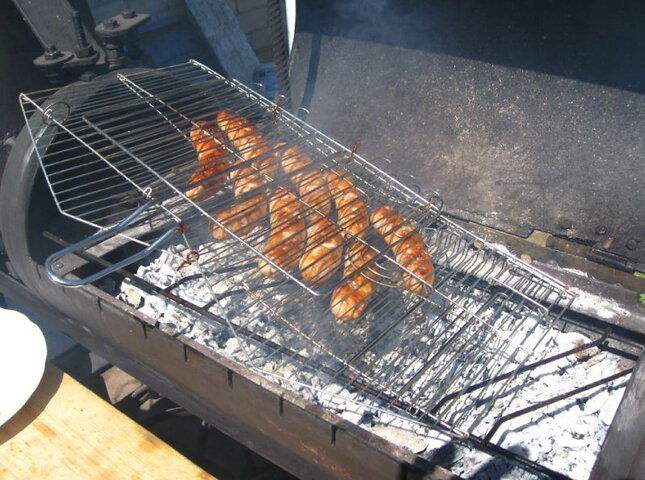
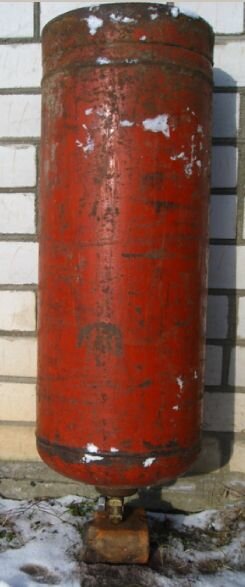
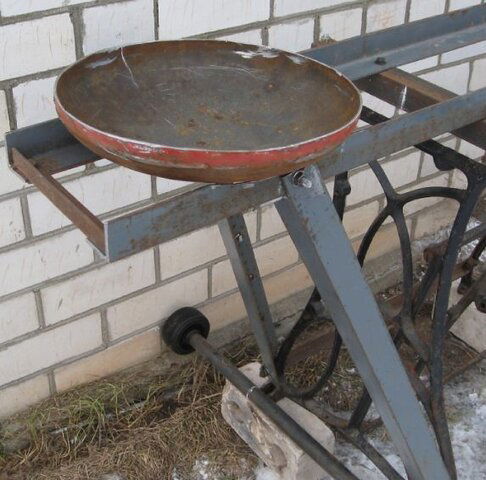
In the middle, a brazier. For frying a shish kebab, a barbecue, hot-smoked fish, meat, vegetables.
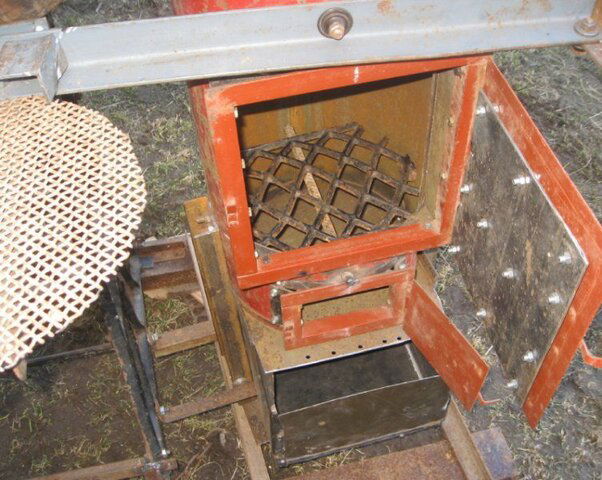
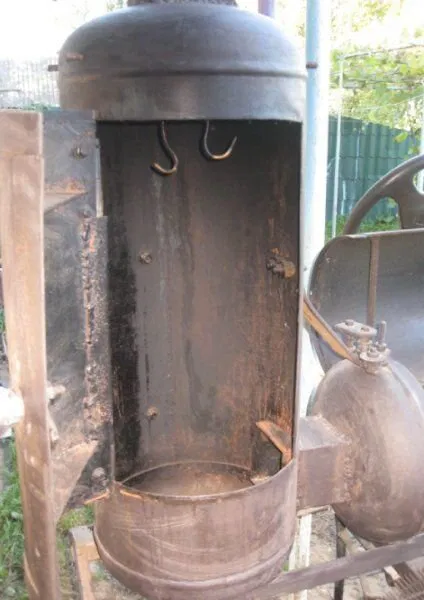
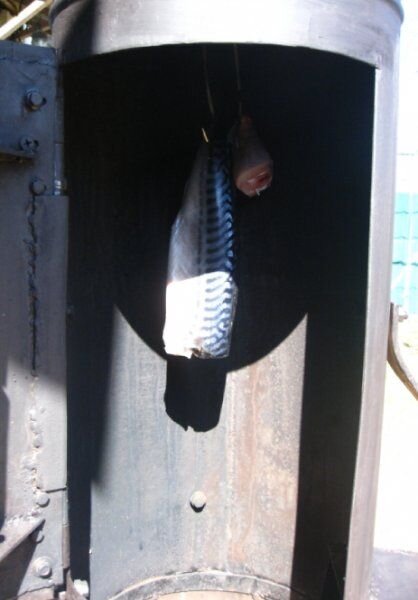
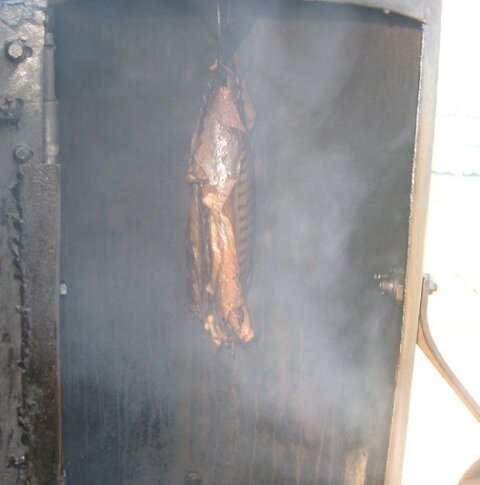
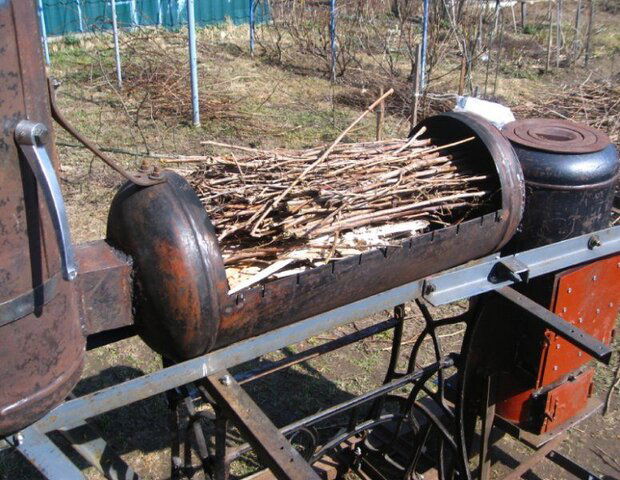
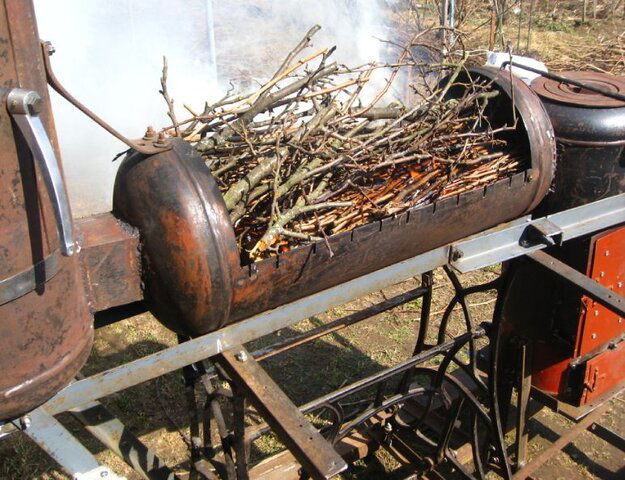
On the left, cold smoked for meat and fish.

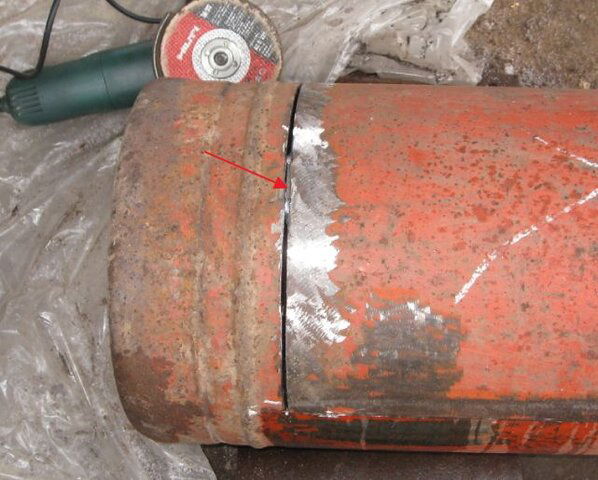
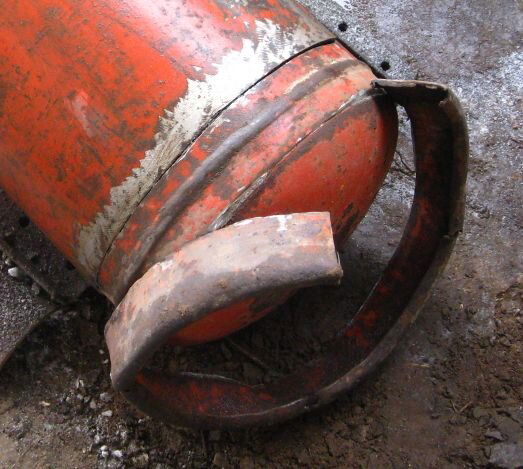
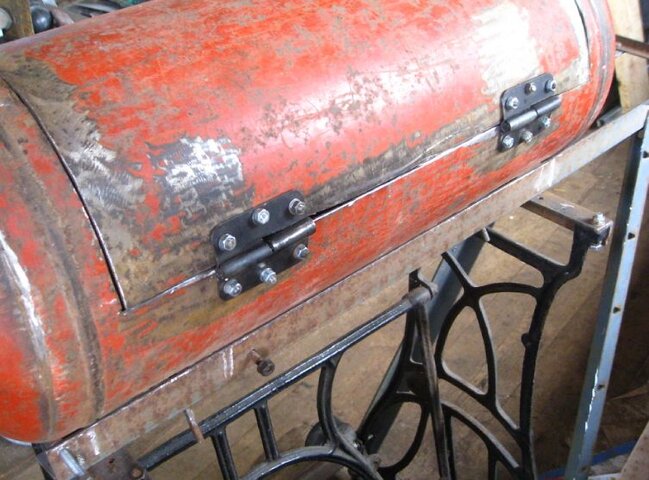
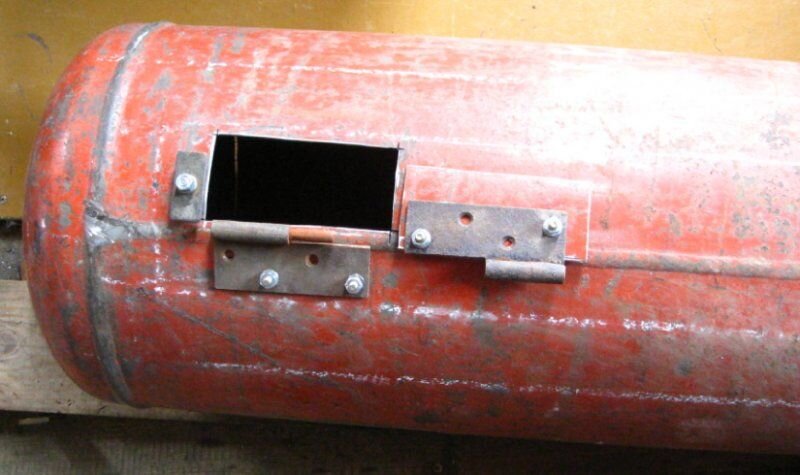
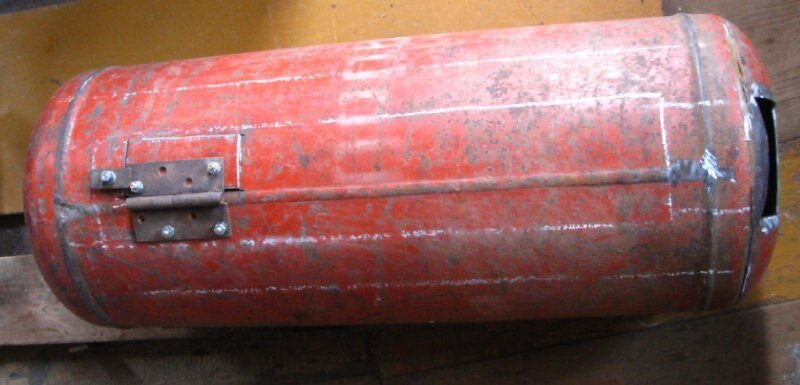
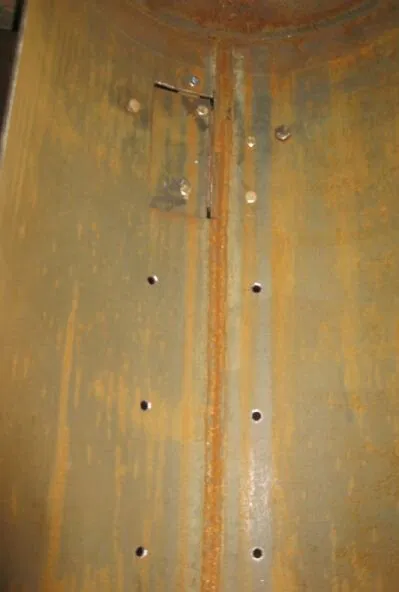
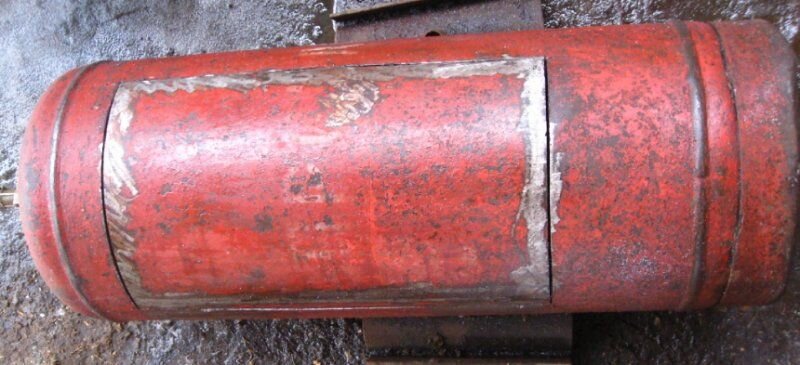
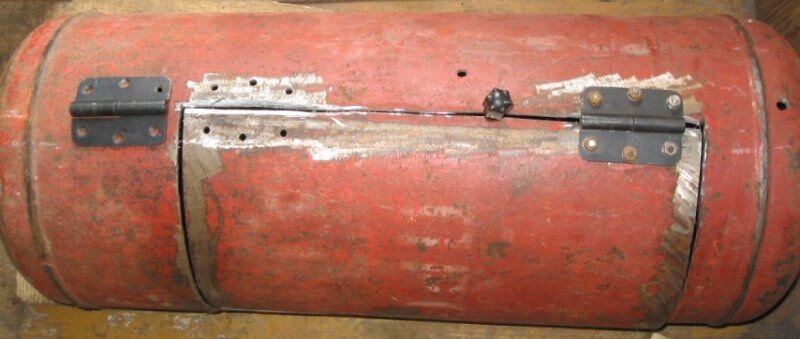
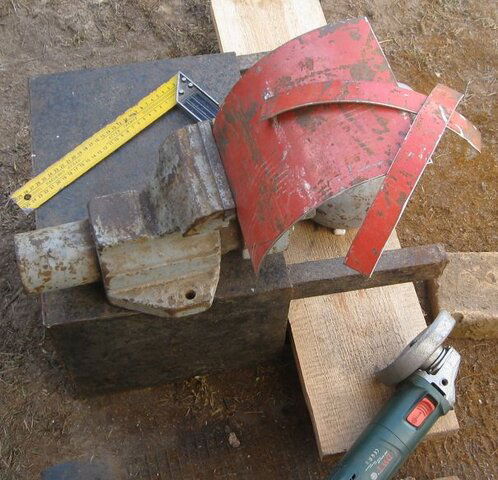
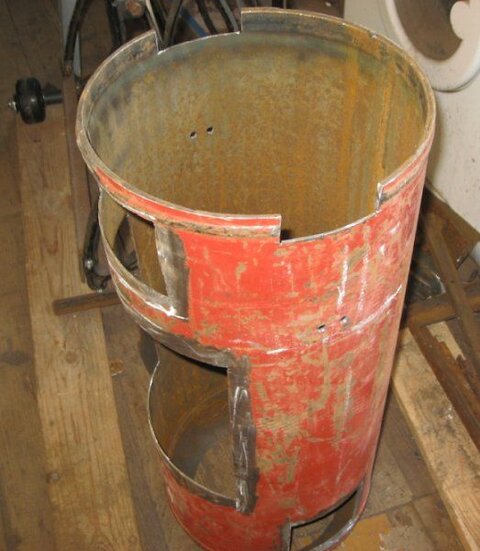
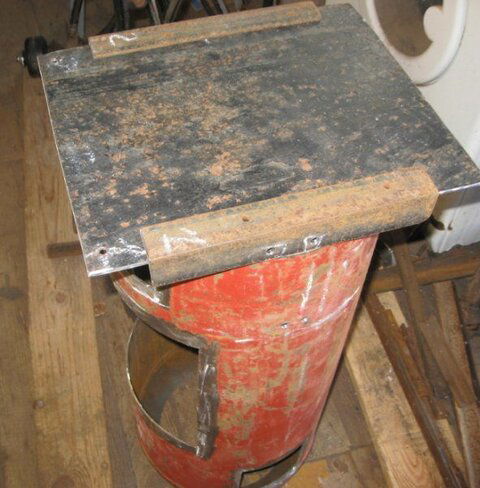
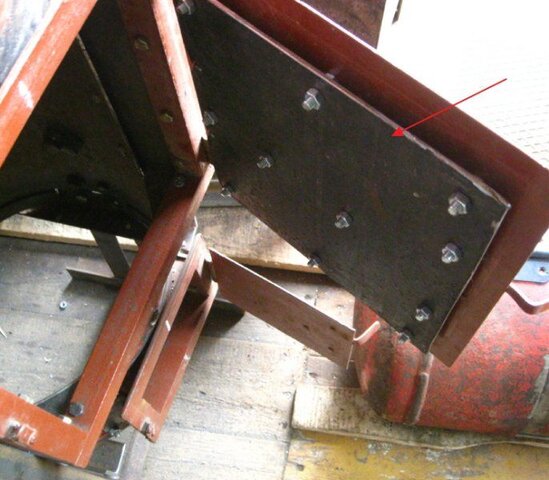
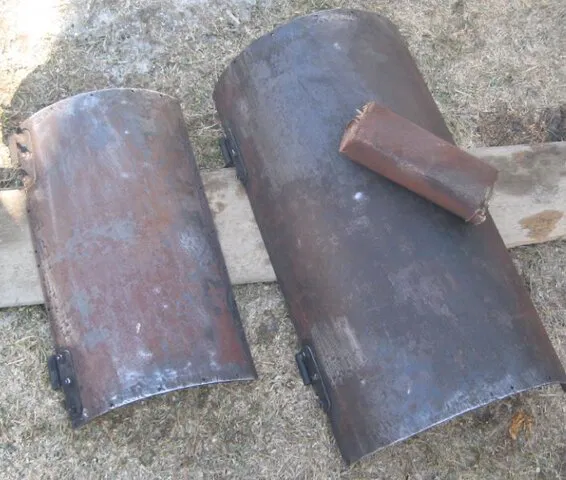
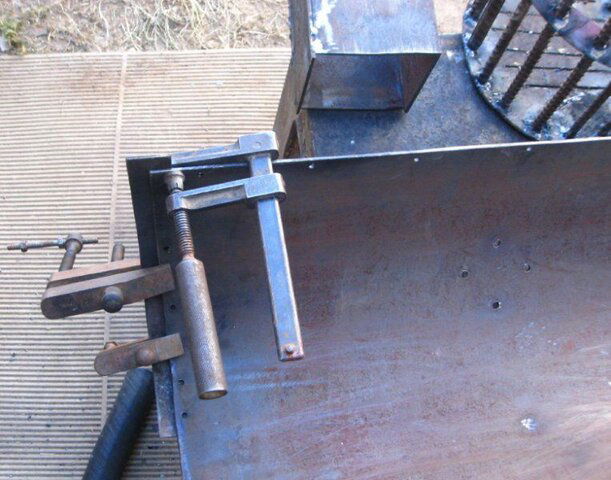
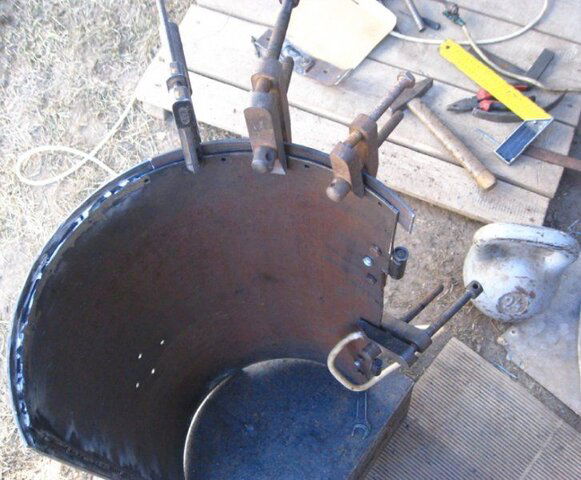
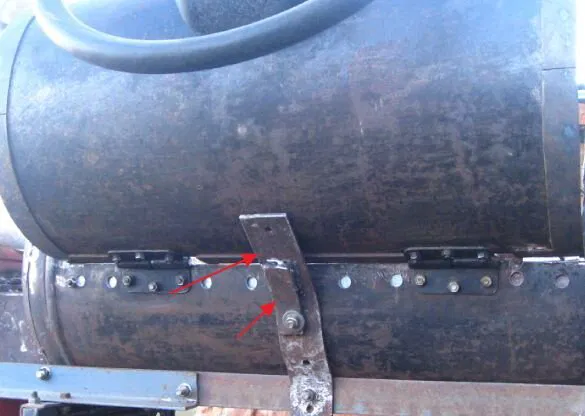
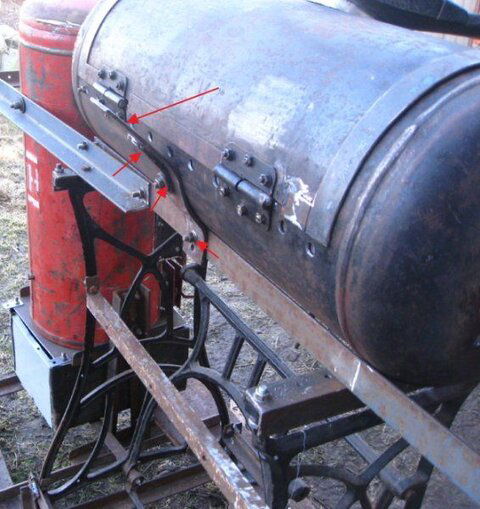
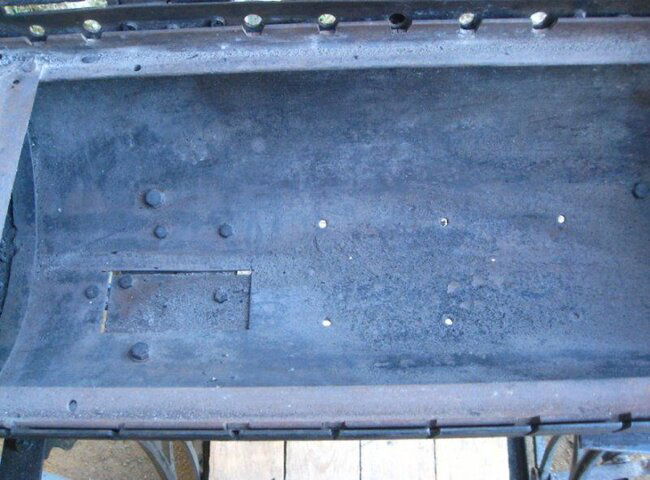
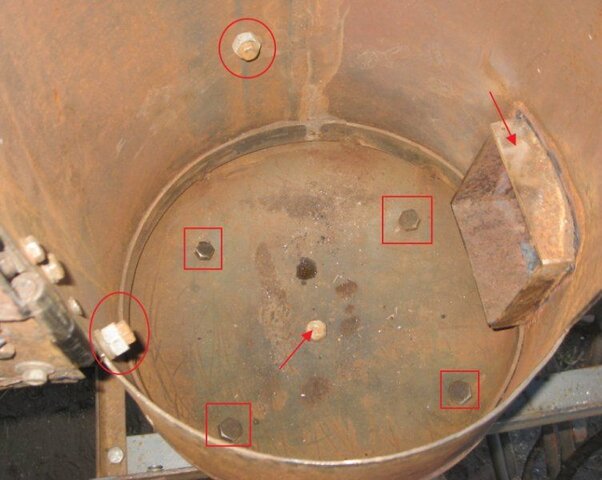
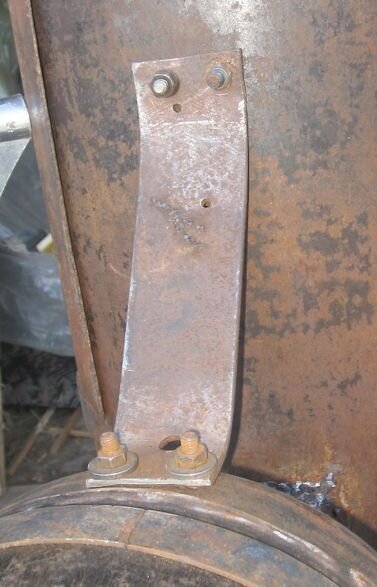
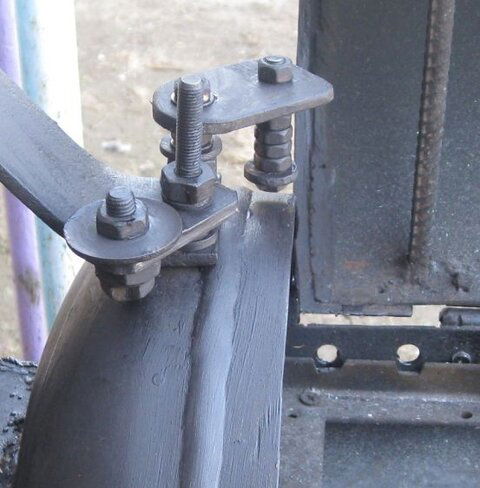
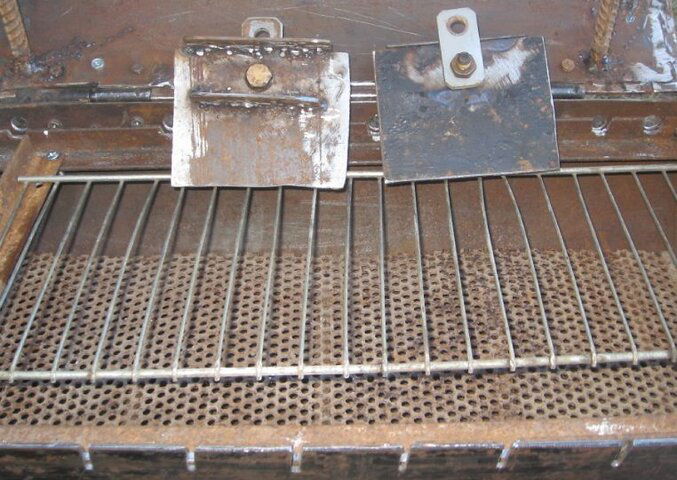
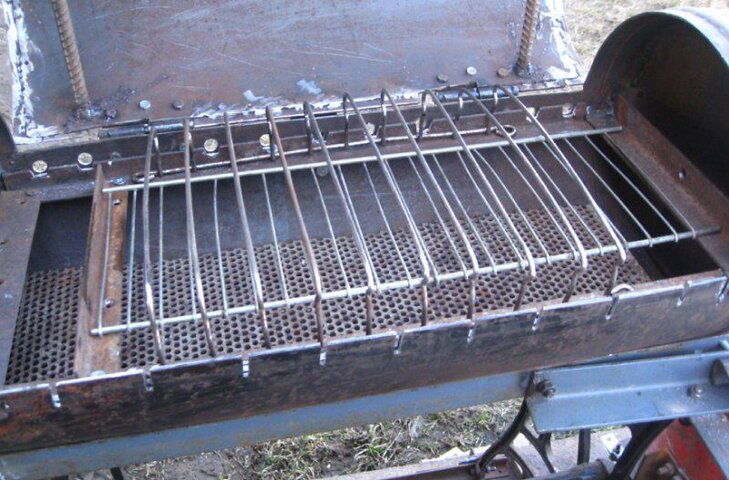
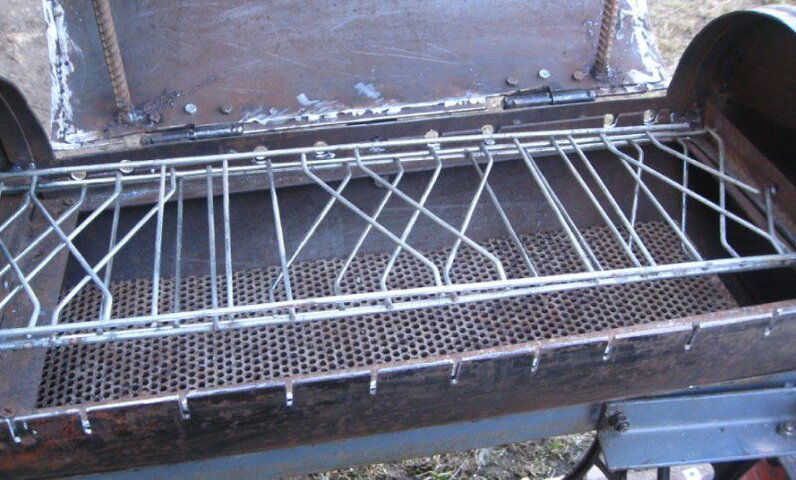
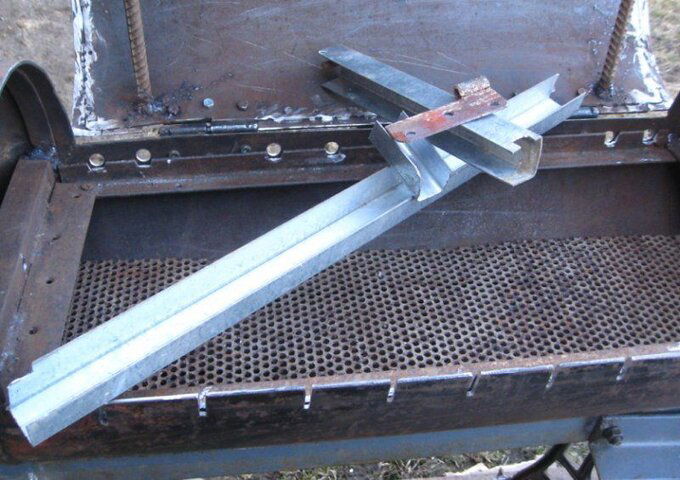
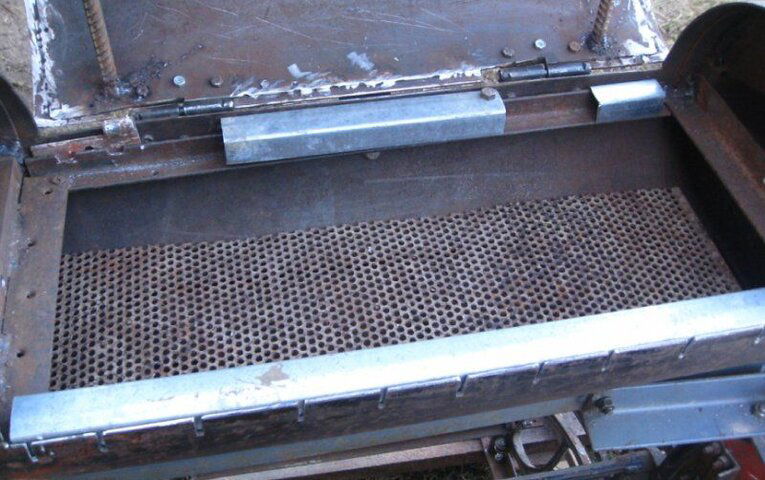
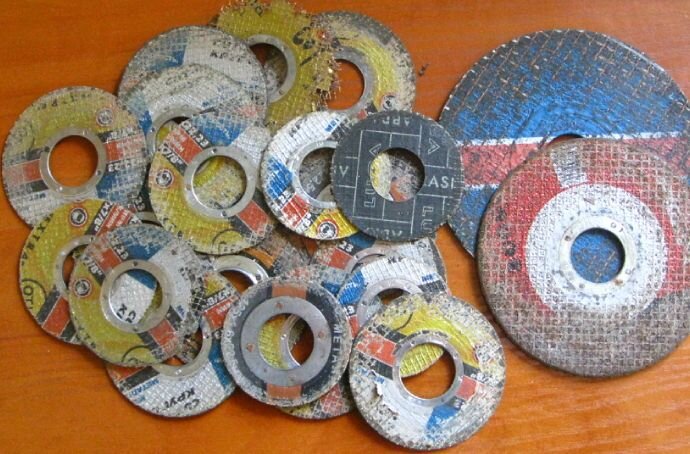
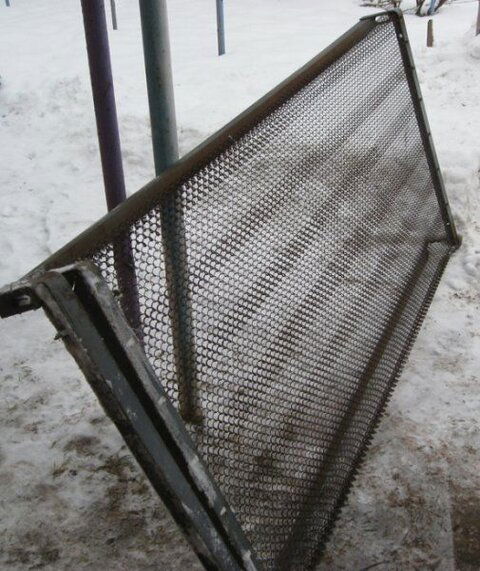
There were few welding works with the brazier, mostly drilled, cut iron corners and everything was assembled on various bolts. I took the removable hinges for the doors. At any moment the door can be removed.

Precautionary measures

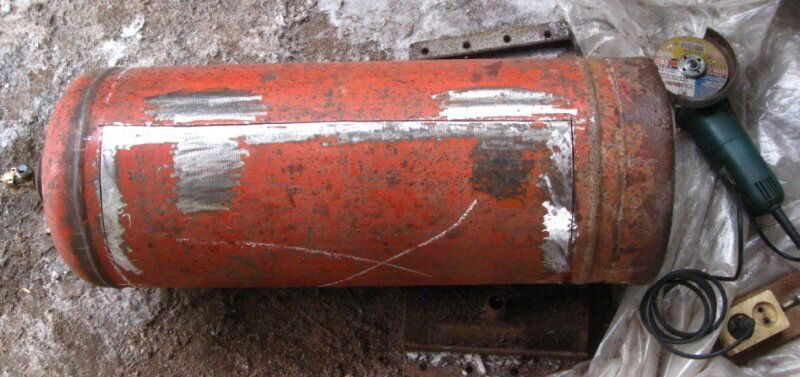
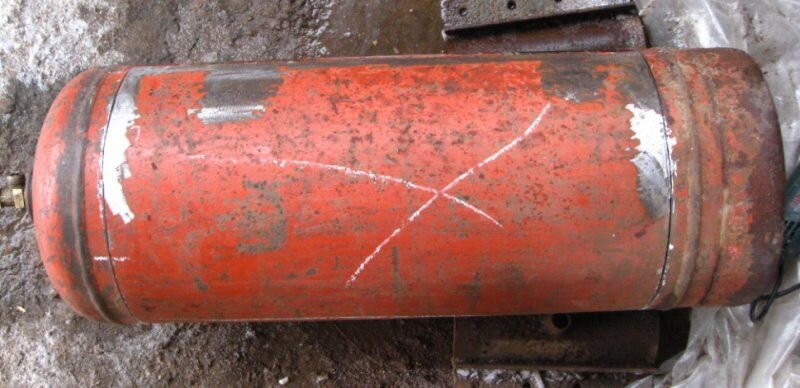
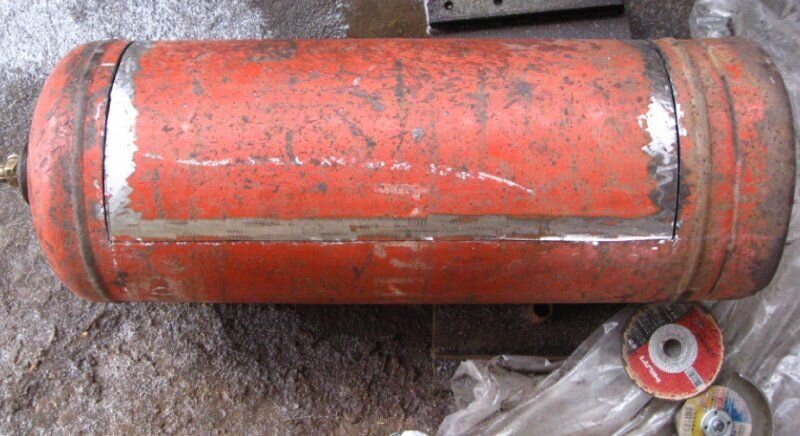
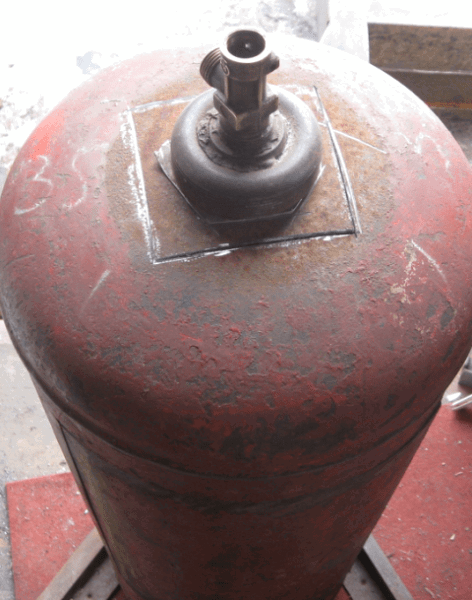
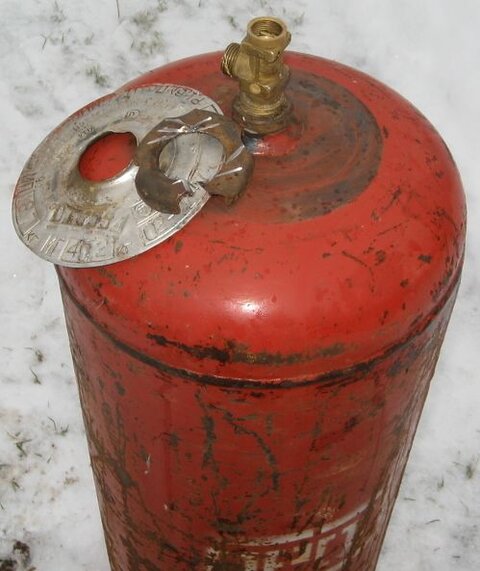
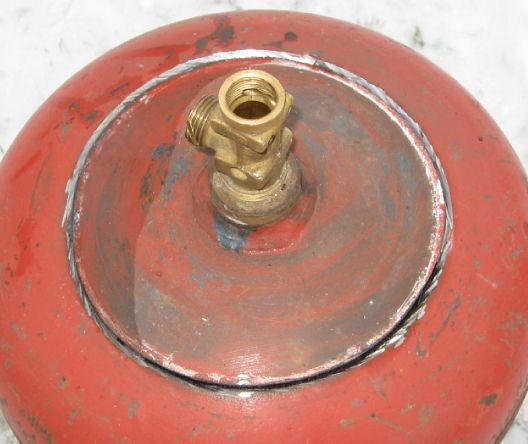
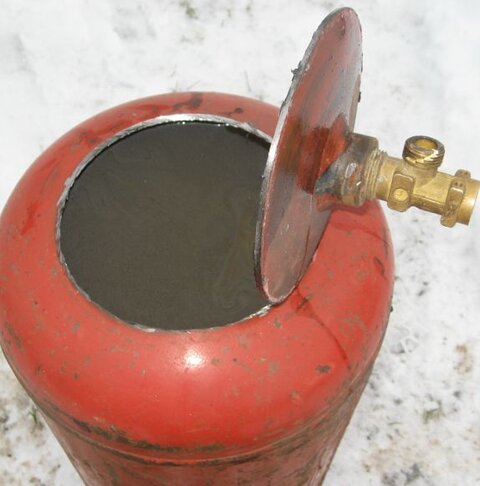
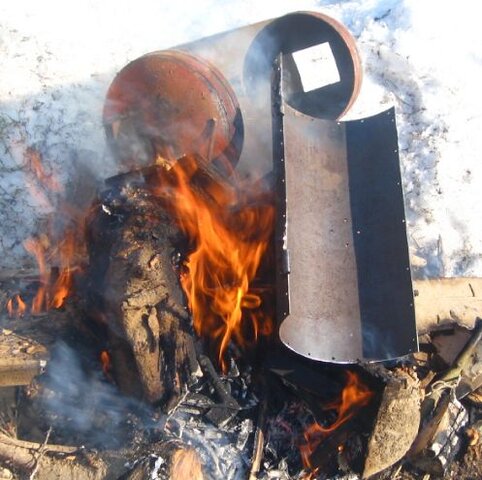
When working with a brazier from a cylinder, you should think about how to protect yourself from an explosion. Even if you completely unscrew the valve and there is no gas inside, you should not hurry to cut the metal. Despite the fact that the pressure in the cylinder is identical with the atmospheric pressure, there are still hazardous substances inside: condensates, propane.

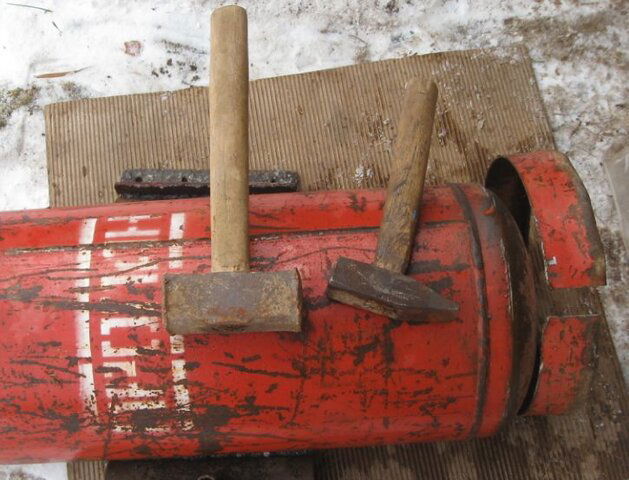
Cut the hacksaw 1 or 2 studs, remove them and unscrew the valve in the cylinder
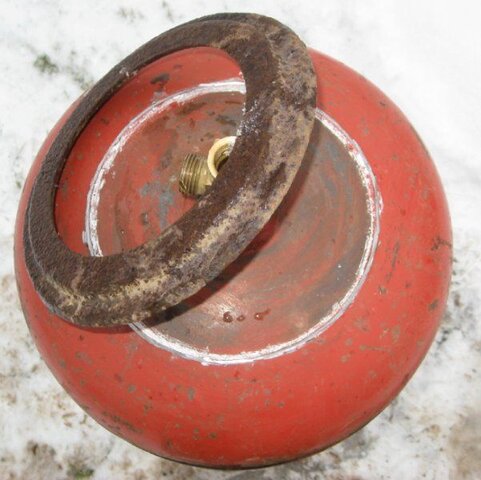
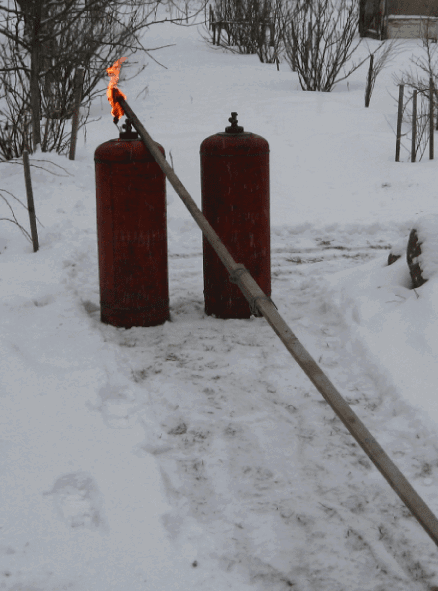
-Invert the cylinder so that the condensate remains. Put the iron container to drain the condensate .. Then ignite the condensate.
- we fill in water in a cylinder and we leave for 1-2 days.
-after 2 days for reinsurance, bring the fire to the balloon at a distance. It didn’t jerk, it means everything is great. You can cut it, but you can make the first cut with filled water

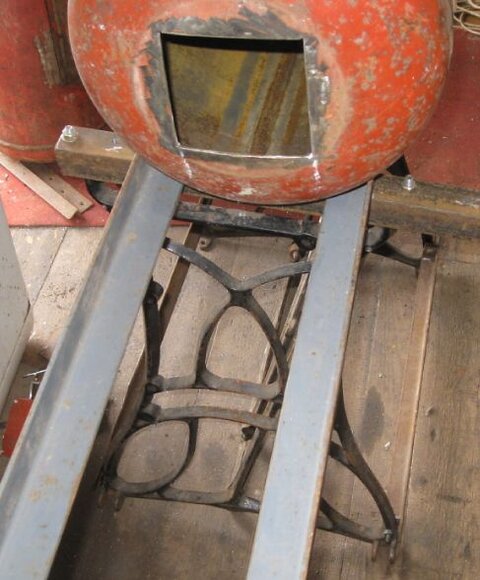
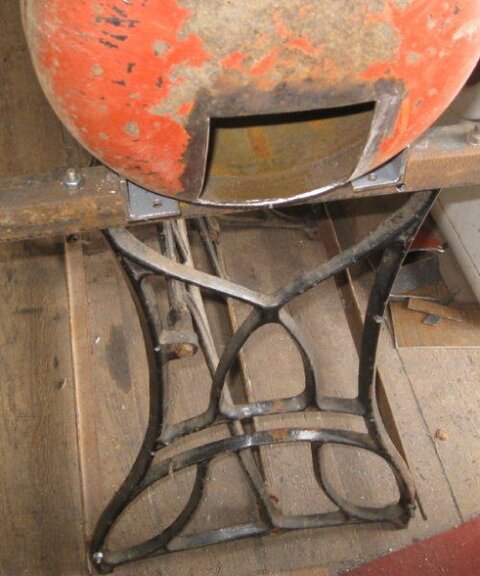
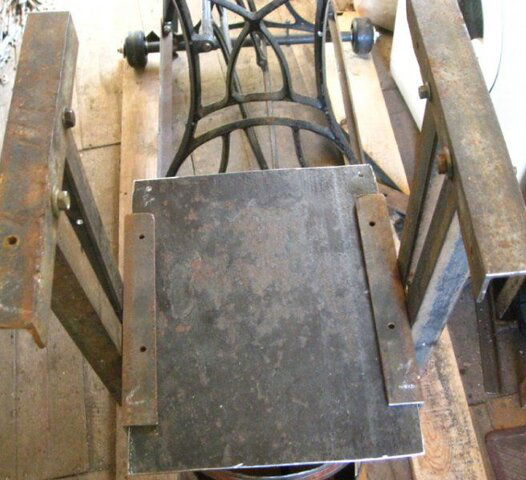
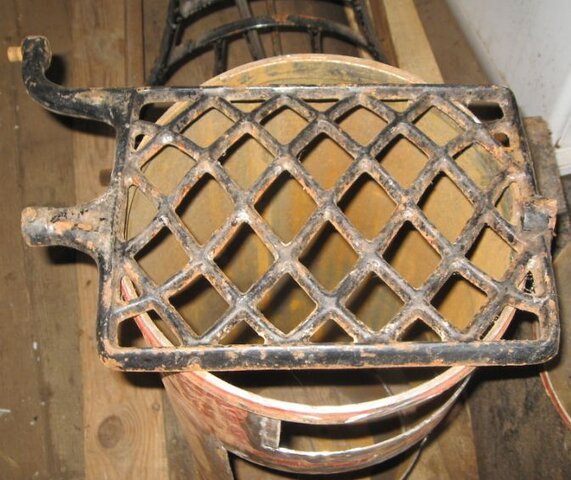
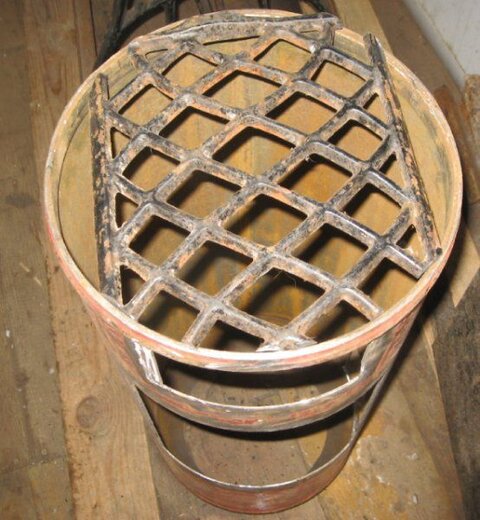
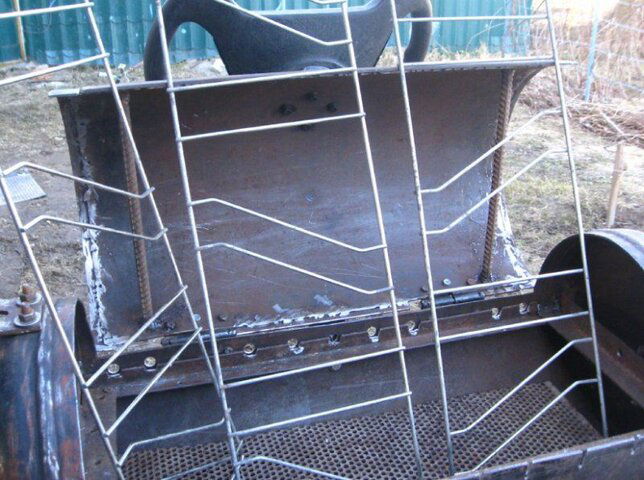
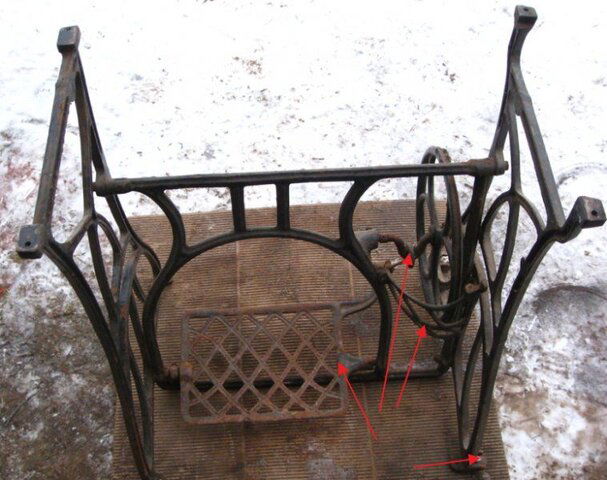
-and it was an ancient foot sewing machine was with me. I took it for the basis of the whole construction. I cut off the extra details. They also went into business. Made the grate for the furnace.
-Drawn a picture of what my grill will look like.
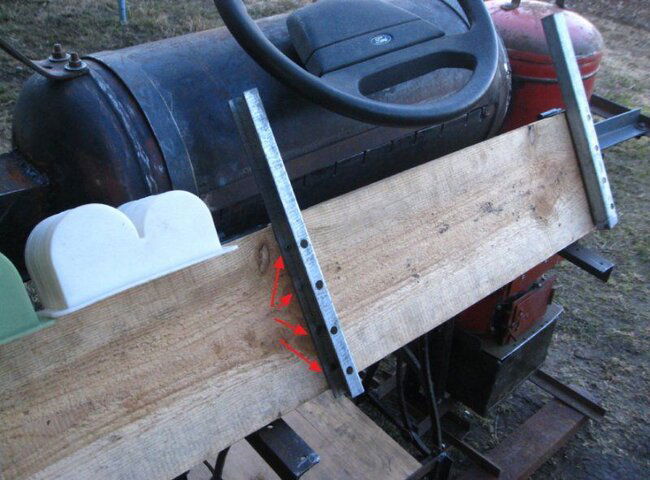
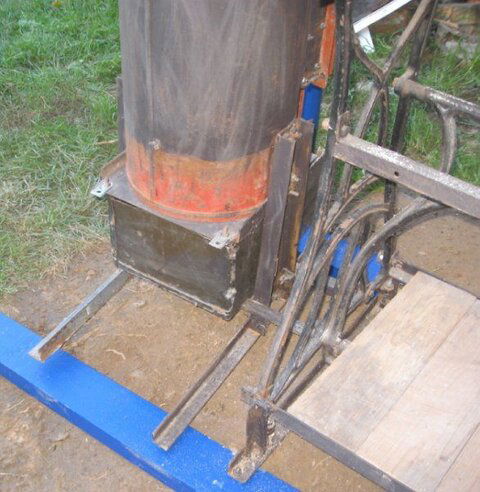
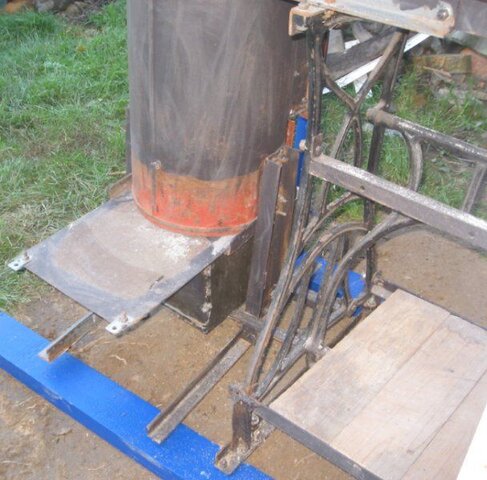
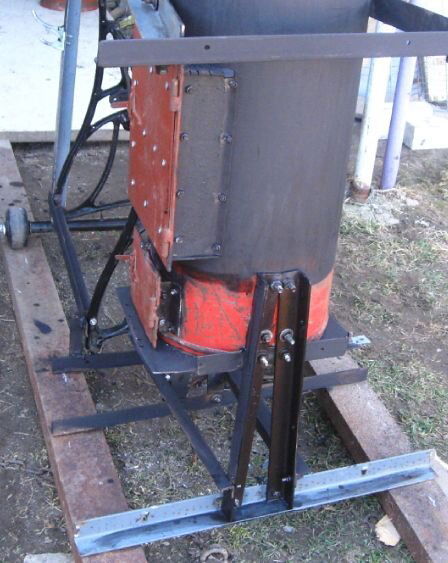
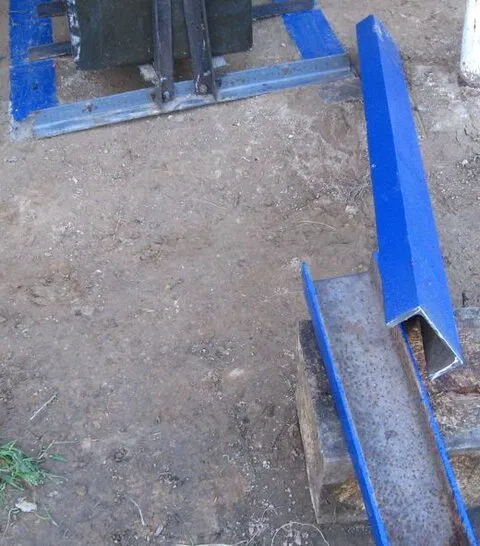
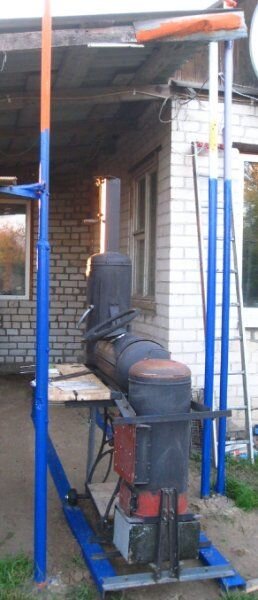
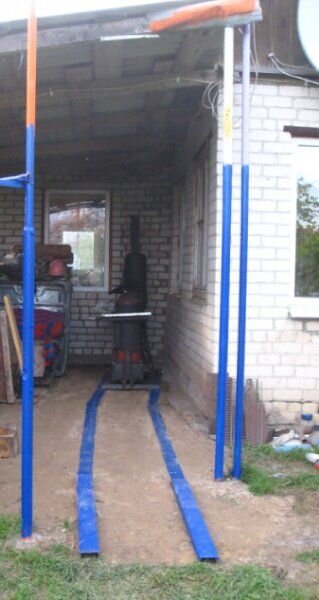
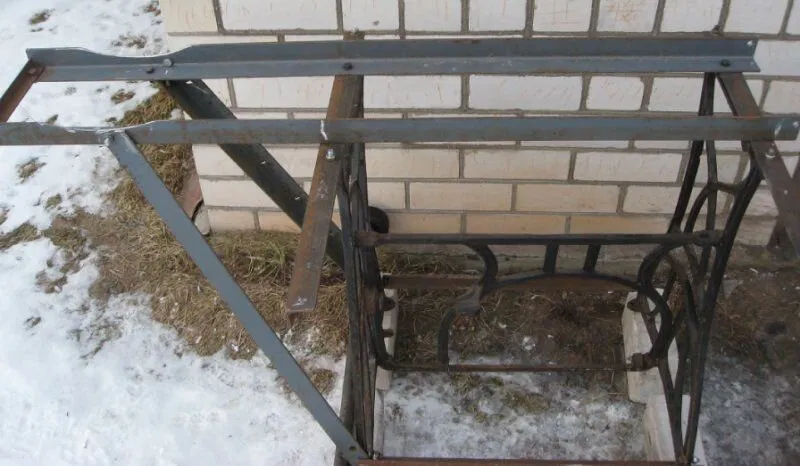
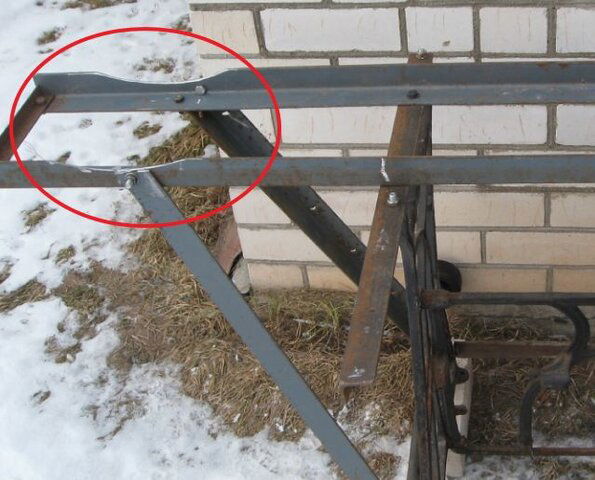
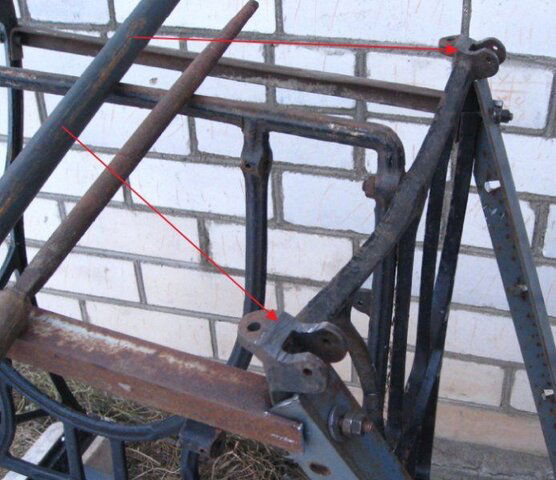
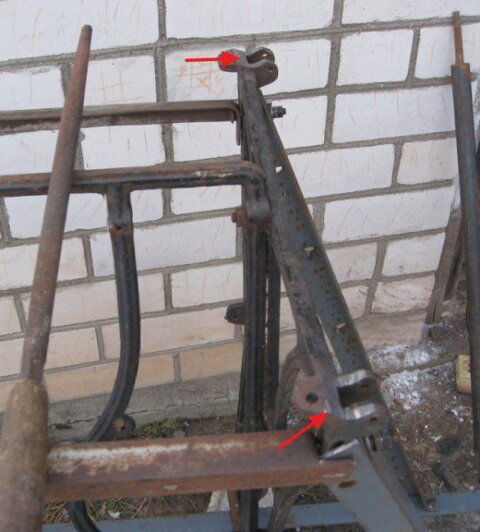
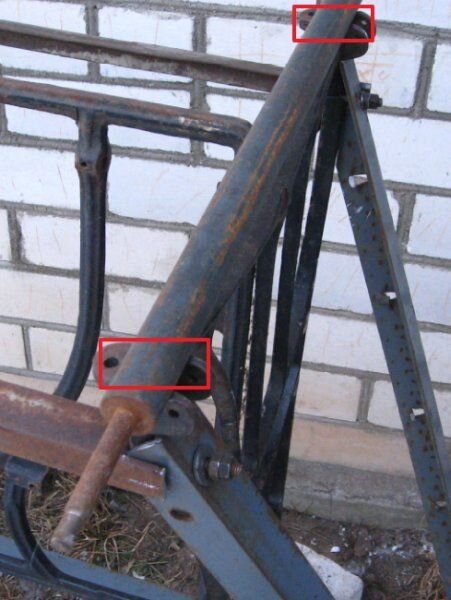
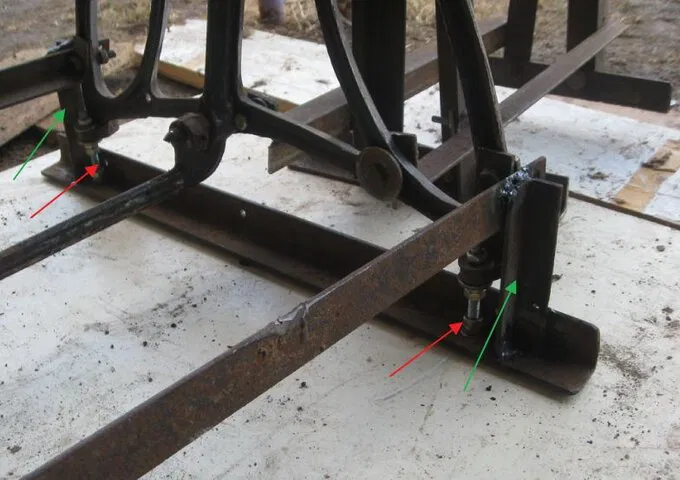
I took a metal corner from the old army bed. I drilled it and screwed it to the bed of the sewing machine. So this kind of base turned out to be where the two cylinders would lie and fixed the side of the cylinder for the stove.
-bought in the store these 2 wheels. One wheel cost $ 5
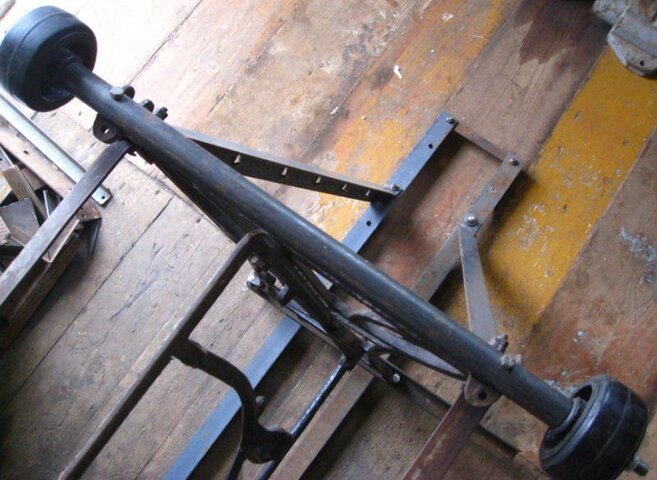
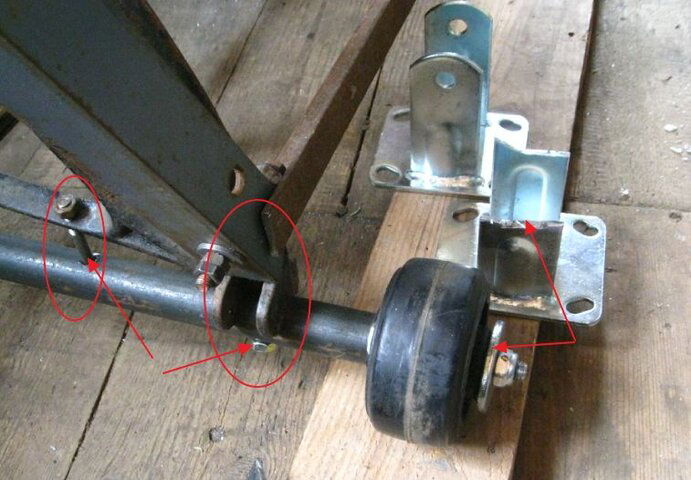
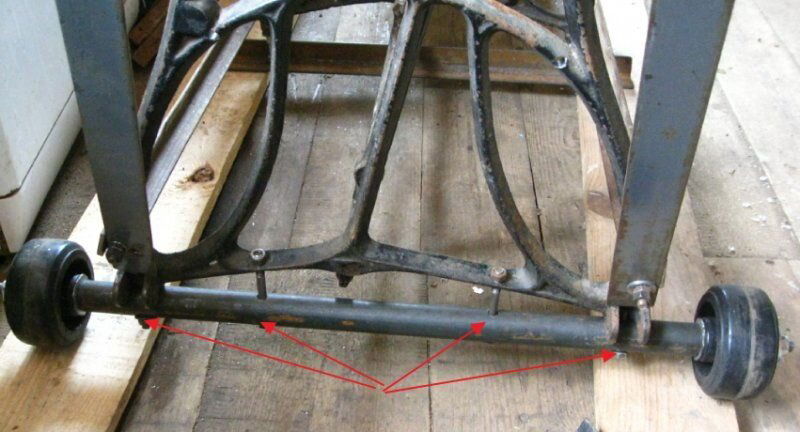
I turned the bed over and did everything to fix the axle with the wheels. So it happened.

Continuing in the evening.
 

Attachments

  • ?-18-4-.jpg
    ?-18-4-.jpg
    60 KB · Views: 189
  • ?.jpg
    ?.jpg
    52.3 KB · Views: 209
  • ?-1.jpg
    ?-1.jpg
    31.1 KB · Views: 210
  • ?-2.jpg
    ?-2.jpg
    24.8 KB · Views: 192
  • ?-6-?.?.jpg
    ?-6-?.?.jpg
    25.9 KB · Views: 213
  • ?-3-?.?.jpg
    ?-3-?.?.jpg
    53.3 KB · Views: 194
  • ?-?-?-?.png
    ?-?-?-?.png
    119 KB · Views: 203
  • ?-?.jpg
    ?-?.jpg
    82.6 KB · Views: 182
  • ?-??.jpg
    ?-??.jpg
    58.8 KB · Views: 199
  • ?-??.jpg
    ?-??.jpg
    66.9 KB · Views: 203
  • ??.jpg
    ??.jpg
    72.7 KB · Views: 196
  • ?-?-?-1.jpg
    ?-?-?-1.jpg
    59 KB · Views: 191
  • ?-?-?-2.jpg
    ?-?-?-2.jpg
    58 KB · Views: 207
  • ?-?-1.jpg
    ?-?-1.jpg
    73.6 KB · Views: 186
  • ?-?-3.jpg
    ?-?-3.jpg
    51 KB · Views: 197
  • ?-?-2.jpg
    ?-?-2.jpg
    49.2 KB · Views: 189
  • ?-?.jpg
    ?-?.jpg
    83.8 KB · Views: 201
  • ?-?-????.jpg
    ?-?-????.jpg
    69.4 KB · Views: 191
  • ?-?-????-1.jpg
    ?-?-????-1.jpg
    64.2 KB · Views: 194
  • ?-1.jpg
    ?-1.jpg
    69.5 KB · Views: 192
Central cylinder.
- we mark with chalk, from a seam on 24 cm on the sides. On the sides of a seam we recede 1.5-2 cm. I took 1.5 cm
-with the beginning of a circle of cutting, circle thickness 1.2mm, walked the size of half the thickness of the metal. And then cut. I advise you not to completely cut the lid. Leave metal around the edges, about 1 cm. Water can be drained through the slots.
Remove the paint for welding. Then weld the hinges, or drill holes for the removable hinges that will be fixed on the bolts. Remove the thin circle, put a 2.5 mm and walk them on three sides., Two sides and where it will open.
A small window was cut out on the bottom of the bottle on average, fastened one loop, and the window would be used to remove ash.
From two sides cut two holes of the same size. They will serve to connect with other cylinders.
Drill holes for blowing air and holes for fastening the container to the frame.

Left cylinder. Smokehouse.

The action is the same as when cutting the door of the central cylinder. Only the door is smaller in size.
Drilled 4 holes for fasteners to the frame and a central hole for draining waste fat.
Cut strips. Welding to the doors, close the gap.
 

Attachments

  • ?-?-1.jpg
    ?-?-1.jpg
    68 KB · Views: 187
  • ?-?-3.jpg
    ?-?-3.jpg
    64 KB · Views: 169
  • ?-?-4.jpg
    ?-?-4.jpg
    60.7 KB · Views: 180
  • ?-?-5.jpg
    ?-?-5.jpg
    76.2 KB · Views: 165
  • ?-?-6.jpg
    ?-?-6.jpg
    53.8 KB · Views: 202
  • ?-?-8.jpg
    ?-?-8.jpg
    73.1 KB · Views: 169
  • ?-?-41.jpg
    ?-?-41.jpg
    82.1 KB · Views: 170
  • ?-?-2.jpg
    ?-?-2.jpg
    58.4 KB · Views: 194
  • ?--?-2.jpg
    ?--?-2.jpg
    39.7 KB · Views: 181
  • ?-?-?-1.jpg
    ?-?-?-1.jpg
    48.9 KB · Views: 199
  • ?-??.png
    ?-??.png
    145.6 KB · Views: 186
  • ?-??-2.jpg
    ?-??-2.jpg
    49.1 KB · Views: 171
  • ?-??-1.jpg
    ?-??-1.jpg
    54.2 KB · Views: 182
  • ?-?-???.jpg
    ?-?-???.jpg
    24.3 KB · Views: 176
  • ?-?-1.jpg
    ?-?-1.jpg
    64.9 KB · Views: 171
  • ?-?--1.jpg
    ?-?--1.jpg
    45.7 KB · Views: 188
  • ?-?-???.jpg
    ?-?-???.jpg
    62.6 KB · Views: 204
  • ?--31-?-.jpg
    ?--31-?-.jpg
    61.3 KB · Views: 178
  • ?-??.jpg
    ?-??.jpg
    78.9 KB · Views: 191
Furnace furnace. Ballon on the right.

Here I did not cut under the door like everyone else.
-And they got their time almost forgotten 2 iron doors. Purchased back in 1992.
-carved a hole under the door.
-below the seam cut the bottom of the balloon. The lid was received, close the top.
- Cut to the size of the top hole for cast iron circles.
-In the furnace, secured 2 corners from below and inserted a sheet of iron into the gap. You take out the sheet and the ash is poured into a small box.
The grate in the furnace, cast-iron from the sewing machine and on top will be a grid with smaller holes.
Strengthened a furnace door. Attached an additional sheet of iron on bolts.
-on the fire = fried = 2 cylinders and their doors, plugs. To remove the factory paint. I cleaned everything with a large emery paper.
 

Attachments

  • ?-?-10.jpg
    ?-?-10.jpg
    68.6 KB · Views: 162
  • ?-?-1.jpg
    ?-?-1.jpg
    43.9 KB · Views: 179
  • ?-?-3.jpg
    ?-?-3.jpg
    55.3 KB · Views: 175
  • ?-?-5.jpg
    ?-?-5.jpg
    33.1 KB · Views: 173
  • ?-?-6.jpg
    ?-?-6.jpg
    37.5 KB · Views: 177
  • ?-?-16.jpg
    ?-?-16.jpg
    36.9 KB · Views: 180
  • ?-?-12.jpg
    ?-?-12.jpg
    39.4 KB · Views: 153
  • ?-?-15.jpg
    ?-?-15.jpg
    44.7 KB · Views: 178
  • ?-?-1-?.jpg
    ?-?-1-?.jpg
    51.8 KB · Views: 175
  • ?-?-?-2.jpg
    ?-?-?-2.jpg
    63.3 KB · Views: 171
  • ?-?-31.jpg
    ?-?-31.jpg
    70.7 KB · Views: 170
  • ?-?-7.jpg
    ?-?-7.jpg
    77.1 KB · Views: 177
  • ?0?-???.jpg
    ?0?-???.jpg
    70.5 KB · Views: 162
  • ?-?-?-1.jpg
    ?-?-?-1.jpg
    68.2 KB · Views: 173
  • ?-??-1.jpg
    ?-??-1.jpg
    49.2 KB · Views: 187
  • ?-??-2.jpg
    ?-??-2.jpg
    44 KB · Views: 165
  • ?-??-3.jpg
    ?-??-3.jpg
    76.7 KB · Views: 152
  • ?-??-4.jpg
    ?-??-4.jpg
    77.9 KB · Views: 173
  • ?-??-6.jpg
    ?-??-6.jpg
    95.1 KB · Views: 182
  • Like
Reactions: martin-f
Welding work.

- I welded strips on the doors, smoke generator, connections.
- Welded transformer is powerful with me. The voltage 220V-50 Hz, had to reduce the current through the additional resistance. The device works for me for almost 30 years. It did not break. Eternal ...
-Electrodes with a diameter of 4 mm. 1 kg cost about $ 2.5.
- assembled all 3 cylinders assembled, everything under the level should be. I welded the connectors in the extreme cylinders, disassembled everything. I welded all the connectors around the perimeter and reassembled the final cylinder. I welded the center of 80 kg to weld to the bottom .
-The interior of the furnace
 

Attachments

  • ?-?-4.jpg
    ?-?-4.jpg
    68.2 KB · Views: 159
  • ?-??-2.jpg
    ?-??-2.jpg
    79.1 KB · Views: 159
  • ?-2.jpg
    ?-2.jpg
    62.2 KB · Views: 154
  • ?-?-1.jpg
    ?-?-1.jpg
    87.5 KB · Views: 180
  • ?-?-2.jpg
    ?-?-2.jpg
    80.7 KB · Views: 163
  • ?-?-3.jpg
    ?-?-3.jpg
    79 KB · Views: 168
  • ??-2.jpg
    ??-2.jpg
    46.1 KB · Views: 157
  • ??.jpg
    ??.jpg
    58.9 KB · Views: 173
  • ?-??.jpg
    ?-??.jpg
    97.2 KB · Views: 169
  • ?--32-?-?.jpg
    ?--32-?-?.jpg
    25.6 KB · Views: 169
  • ?--32-?-1.jpg
    ?--32-?-1.jpg
    32.3 KB · Views: 152
  • ?--33-??-1.jpg
    ?--33-??-1.jpg
    38.9 KB · Views: 155
  • ?--33-??.jpg
    ?--33-??.jpg
    68.7 KB · Views: 158
  • ?-12-?.jpg
    ?-12-?.jpg
    61.6 KB · Views: 165
  • ?--12-?.jpg
    ?--12-?.jpg
    65.9 KB · Views: 150
  • ?--8-?.jpg
    ?--8-?.jpg
    93.3 KB · Views: 147
  • ?--9-?.jpg
    ?--9-?.jpg
    98.8 KB · Views: 162
  • ?--10-?.jpg
    ?--10-?.jpg
    83.9 KB · Views: 155
  • ?--11-?.jpg
    ?--11-?.jpg
    75.8 KB · Views: 160
  • ?-?-1.jpg
    ?-?-1.jpg
    63.6 KB · Views: 149
The table is removable in me. If the galley- / belly / interferes with the preparation of kebabs, the near board leans back, or you can remove it from the hinges.
Ash removal.
In the last photo, these 2 plugs are in the central balloon. When the fat is skewered or barbecued, the left and right side is closed. Keep the heat.

It remains a bit, tomorrow will be the last photo.
 

Attachments

  • ?--4.jpg
    ?--4.jpg
    74.7 KB · Views: 168
  • ?--6.jpg
    ?--6.jpg
    77.7 KB · Views: 167
  • ?--7.jpg
    ?--7.jpg
    73.4 KB · Views: 176
  • ??-4.jpg
    ??-4.jpg
    84.2 KB · Views: 169
  • ?-?-2.jpg
    ?-?-2.jpg
    88.2 KB · Views: 182
  • ?-35-.jpg
    ?-35-.jpg
    99.3 KB · Views: 167
  • ?-34-.jpg
    ?-34-.jpg
    69.2 KB · Views: 151
  • ?-33-.jpg
    ?-33-.jpg
    68.9 KB · Views: 159
  • ?-34-?-?.jpg
    ?-34-?-?.jpg
    91.1 KB · Views: 160
  • ?-?-?.jpg
    ?-?-?.jpg
    68.2 KB · Views: 178
  • ?-13-.jpg
    ?-13-.jpg
    90.3 KB · Views: 185
  • ?-14-.jpg
    ?-14-.jpg
    105.2 KB · Views: 163
  • ?-15-.jpg
    ?-15-.jpg
    119.6 KB · Views: 167
  • ?-16-.jpg
    ?-16-.jpg
    93.9 KB · Views: 163
  • ?-17-.jpg
    ?-17-.jpg
    80.5 KB · Views: 166
  • ?-18-.jpg
    ?-18-.jpg
    95.8 KB · Views: 156
  • ?-19-.jpg
    ?-19-.jpg
    129 KB · Views: 166
  • ???-?.jpg
    ???-?.jpg
    99.3 KB · Views: 175
  • ???-??.jpg
    ???-??.jpg
    89.8 KB · Views: 174
  • ?-22-.jpg
    ?-22-.jpg
    75.1 KB · Views: 160
? ?????,????????? ????????.
????????? ?????? ?? 4 ?????-/ ? ????? ???? ????????? ??? ????? ???? ????? ?????????????/ , ? ??? ?????????? ????????? ???????? ??????? 5??.- ?? ???????.?????? ?????? ????? ?????? ? ?????? ??? ???????.??????? ????????? ?? 3 ?????.? ????? ?????????? ????????? ??? 2-? ????????? ??????-/??????? ?????? ? ?????.
???? ???? ?????????? ?? ????? , ??????? ??????? ???????. ??????? ??????? ?? ??????? ???????????? ????????.? ????? ?? ???????????? ????? ???????????? ??????? ??? ???????? ????????.
????? ???????? ?? ??????? ?????? ?????????.??????? ????,????????? ????????? ????????? 3??,??????? ?????? 3??,??????? ?????? ?????? ? ???????? ? ???????? ???????.
???????? ????? ? ????????? ????????,??????? ???? ?????,? ?????? ??????????? ??????????? ??????? ?? ??????? ???????? ??????.????? ????? ?????????? ????????,????? ?????????? ??????? ?? 3 ?? ????? ? ?????? ? ???????????? ???????.
???? ?????? ??? ?????,?????? ???????? ??????.

And on the left, cold smoked.
The cylinder is fixed on 4 bolts / in the center of the bottom a hole for draining the fat after preparation /, and for reliability it is fixed with an iron strip of 5 mm.– on bolts. Inside the bolt head serves also as a support for the grille. The grilles are based on 3 points. 2 armaturin thin- / hook up hooks with fish.
If the fish is dimensional in length, remove the middle grid. Grill cut from the old refrigerator Minskoe. By the way from the refrigerator you can adjust the grill for hot smoking.
He made a handle from an ancient manual meat grinder. He inserted a bolt, drilled a hole with a diameter of 3mm, inserted a 3mm nail, cut off the excess size and turned it on the reverse side.
I welded the nut to a small piece of iron, one washer outside, and inside I adjusted it with several washers to close the door tightly. When I tightened the welded nut, I also drilled a 3 mm nut with a bolt with a drill and secured it with a nail.
Slit the door where the hinges, welded strip inside.

Mangal
so as not to back up with a hammer, or another piece of iron. Attached the other bolts and made swivel mounts for supporting the cover.
I used all these grills for frying and smoking from old refrigerators and gas stoves. And it was fun to make a barbecue. I fitted this grid from a parrot cage. I removed the lower part of the tree and put the iron together, that's all. And I didn’t have to buy it in the store.
-when smoking fish or meat, you need to close all the holes in the grill. I fit such iron things.
 

Attachments

  • ?=???.jpg
    ?=???.jpg
    61.3 KB · Views: 164
  • ?--28-?.jpg
    ?--28-?.jpg
    46.9 KB · Views: 168
  • ?--29-?-?.jpg
    ?--29-?-?.jpg
    73.2 KB · Views: 153
  • ?-34-?.jpg
    ?-34-?.jpg
    39.1 KB · Views: 163
  • ?-24-.jpg
    ?-24-.jpg
    55 KB · Views: 158
  • ?-25-.jpg
    ?-25-.jpg
    42 KB · Views: 168
  • ?-?-5.jpg
    ?-?-5.jpg
    79.7 KB · Views: 169
  • ?-??-0.jpg
    ?-??-0.jpg
    83.9 KB · Views: 164
  • ?-29-.jpg
    ?-29-.jpg
    88.3 KB · Views: 150
  • ?-??-3.jpg
    ?-??-3.jpg
    86.5 KB · Views: 163
  • ?-30-.jpg
    ?-30-.jpg
    85 KB · Views: 154
  • ?-??-4.jpg
    ?-??-4.jpg
    47.6 KB · Views: 172
  • ?-12-.jpg
    ?-12-.jpg
    77.3 KB · Views: 158
  • ?-15-?.jpg
    ?-15-?.jpg
    92.8 KB · Views: 161
  • ?--14-?.jpg
    ?--14-?.jpg
    95.2 KB · Views: 161
  • ?--17-?.jpg
    ?--17-?.jpg
    88.2 KB · Views: 151
  • ?--18-?.jpg
    ?--18-?.jpg
    100.5 KB · Views: 166
  • ?--25-?.jpg
    ?--25-?.jpg
    90.5 KB · Views: 155
  • ?--26-?.jpg
    ?--26-?.jpg
    81.4 KB · Views: 151
  • ?--27-?.jpg
    ?--27-?.jpg
    94.6 KB · Views: 160
Hot and cold smoking.

-before painting all the bottles with heat-resistant paint, smoked fish and chicken. Grilled sausage-barbecue.
- smoke generator, which is 9 photos, later I redid it.
- on 15 photos to the left, this is so much fat ran out of mackerel.
 

Attachments

  • ?-?-?.jpg
    ?-?-?.jpg
    146.8 KB · Views: 169
  • ?-?-?-2.jpg
    ?-?-?-2.jpg
    110.1 KB · Views: 172
  • ?-?-?-3.jpg
    ?-?-?-3.jpg
    94.5 KB · Views: 174
  • ?-?-?-8.jpg
    ?-?-?-8.jpg
    95.5 KB · Views: 161
  • ?-?-?-4.jpg
    ?-?-?-4.jpg
    64.3 KB · Views: 161
  • ?-?-?-6.jpg
    ?-?-?-6.jpg
    65.3 KB · Views: 170
  • ?-?-?-7.jpg
    ?-?-?-7.jpg
    30.2 KB · Views: 174
  • ?-?-?-9.jpg
    ?-?-?-9.jpg
    58.4 KB · Views: 173
  • ?-?-?-10.jpg
    ?-?-?-10.jpg
    75.1 KB · Views: 159
  • ?-11-.jpg
    ?-11-.jpg
    75.8 KB · Views: 159
  • ?-?-?-11.jpg
    ?-?-?-11.jpg
    64.6 KB · Views: 153
  • ?-?-?-12.jpg
    ?-?-?-12.jpg
    32.5 KB · Views: 158
  • ?-?-?-14.jpg
    ?-?-?-14.jpg
    42.3 KB · Views: 168
  • ?-?-?13.jpg
    ?-?-?13.jpg
    97.1 KB · Views: 181
  • ?-?-?-17.jpg
    ?-?-?-17.jpg
    69 KB · Views: 158
  • ???-?.jpg
    ???-?.jpg
    60 KB · Views: 172
Barbecue and stuff.
And this turned out to be my arrival at the garage for barbecue .. Protection from rain and snow.
Such heat-resistant paint painted in one layer.
So many cutting circles went to work.

A bit of bookkeeping.
-all I did not buy it, but it was in my presence. I bought only 2 wheels, cutting wheels and electrodes.

And so I counted how many meters of metal and reinforcement you need if you buy everything.

-3 bottles
-stank foot sewing machine
-2 wheels
-os to turn on the lathe under the wheels
- Corner - 40x40 - 3m.
--- // ----- 33x33 - 6,4m
--- // ----- 25?25 - 3,2m
- fittings of various diameter - 7m
- iron sheet - a little go.
- + paint, cutting wheels, drills of various diameters. files, sandpaper.
-if no - Buy Bulgar- / better under a circle diameter of 125mm /. Electric drill. Welding machine.

That's all. Goodbye.
 

Attachments

  • ?-?-1.jpg
    ?-?-1.jpg
    121 KB · Views: 181
  • ?-?-2.jpg
    ?-?-2.jpg
    114.6 KB · Views: 167
  • ?-?-3.jpg
    ?-?-3.jpg
    96.6 KB · Views: 160
  • ?-?-4.jpg
    ?-?-4.jpg
    77.9 KB · Views: 170
  • ?-?-6.jpg
    ?-?-6.jpg
    73.7 KB · Views: 175
  • ?-?-?.jpg
    ?-?-?.jpg
    77.8 KB · Views: 171
  • ?-?-2.jpg
    ?-?-2.jpg
    64.7 KB · Views: 156
  • ?-?-3.jpg
    ?-?-3.jpg
    106.5 KB · Views: 165
  • ?-18-4-.jpg
    ?-18-4-.jpg
    60 KB · Views: 145
  • ???.jpg
    ???.jpg
    89.4 KB · Views: 187
  • ?-??-7.jpg
    ?-??-7.jpg
    52.6 KB · Views: 171
  • ??.jpg
    ??.jpg
    23 KB · Views: 180
  • ?-2.jpg
    ?-2.jpg
    81.6 KB · Views: 168
  • ?-1-.jpg
    ?-1-.jpg
    64.2 KB · Views: 182
  • ?-18-3-.jpg
    ?-18-3-.jpg
    33.8 KB · Views: 164
  • ?-36-.jpg
    ?-36-.jpg
    50.1 KB · Views: 160
  • ?-40-.jpg
    ?-40-.jpg
    40.5 KB · Views: 163
  • ?-=-.jpg
    ?-=-.jpg
    34.8 KB · Views: 178
  • ?-31-.jpg
    ?-31-.jpg
    81.9 KB · Views: 181
  • ?-??.jpg
    ?-??.jpg
    122 KB · Views: 171
Very nice work. I wish I had such skills. I was going to learn welding, but my friend and boss at the time discouraged me.

I’ve only gotten a chance to watch the first video so far, but it was very impressive. Even if the cat didn’t think so.


Sent from my iPhone using SatelliteGuys
 
Status
Not open for further replies.

Users Who Are Viewing This Thread (Total: 0, Members: 0, Guests: 0)

Who Read This Thread (Total Members: 1)