

Social Feed
First,I want you to know that I am electronically challenged! lol
Now that I got that out of the way,would somebody please help me(walk me thru-step by step) with connecting the wires and cables and such.
The problem is the color coding,according to the manual there should be certain colors for the wires but not all the wires are the colors the book specifies.
There are two cables with wires,one with 3 wires and one with 5 wires.
Its the 5 wire cable that's giving us fits! It has a brown,blue,black,red and (was) yellow-it got stripped off now its just a silver wire and the book-which only gives basic connections,gives the colors as orange, green and brown?? and then it doesn't tell you where to connect the other 2 wires-I mean it points you to where they go but doesn't specify which color wire goes where!
So if someone would explain this to me I would be grateful.
Also.I was reading some of the other posts and if I understand it correctly,even if we get this dish set back up it will need a convertor box of some sort for digital signal?? Is that right?
Thanks in advance,
Daisymae
Now that I got that out of the way,would somebody please help me(walk me thru-step by step) with connecting the wires and cables and such.
The problem is the color coding,according to the manual there should be certain colors for the wires but not all the wires are the colors the book specifies.
There are two cables with wires,one with 3 wires and one with 5 wires.
Its the 5 wire cable that's giving us fits! It has a brown,blue,black,red and (was) yellow-it got stripped off now its just a silver wire and the book-which only gives basic connections,gives the colors as orange, green and brown?? and then it doesn't tell you where to connect the other 2 wires-I mean it points you to where they go but doesn't specify which color wire goes where!
So if someone would explain this to me I would be grateful.
Also.I was reading some of the other posts and if I understand it correctly,even if we get this dish set back up it will need a convertor box of some sort for digital signal?? Is that right?
Thanks in advance,
Daisymae
10 Replies
·
3082 views


Staff member
HERE TO HELP YOU!
Cutting Edge
Sometimes a thread gets so many posts in it that is can cause issues for the server so that why today we introduce The Song Name Game Part 3!
So let the game continue!
The last song was added by Bobby who posted...
One Meat Ball - Andrews Sisters
CONTINUE ON AND HAVE FUN! WELCOME HOME TO SATELLITEGUYS.US!
Here are the original rules for the game as posted by WebbyDude back in 2006. http://www.satelliteguys.us/threads/68645-Song-Name-Game
Just name a song title and the band who performed it. The next person does the same thing, but needs to list a song title or band name which includes a word from the previous entry. Pick songs from any genre.
Example:
Long Live Rock and Roll -- Rainbow
Rainbow in the Dark -- Dio
Another example:
Ride the Lightning -- Metallica
Lightning Strikes -- Ozzy Osbourne
Get it?
An additional note: we all know that song titles, sometimes, use profane words. Because this is a family friendly website it is advised that you clean up that title up a bit. This is accomplished by using something like sh!t instead of the real word. Thanks....
So let the game continue!
The last song was added by Bobby who posted...
One Meat Ball - Andrews Sisters
CONTINUE ON AND HAVE FUN! WELCOME HOME TO SATELLITEGUYS.US!
Here are the original rules for the game as posted by WebbyDude back in 2006. http://www.satelliteguys.us/threads/68645-Song-Name-Game
Just name a song title and the band who performed it. The next person does the same thing, but needs to list a song title or band name which includes a word from the previous entry. Pick songs from any genre.
Example:
Long Live Rock and Roll -- Rainbow
Rainbow in the Dark -- Dio
Another example:
Ride the Lightning -- Metallica
Lightning Strikes -- Ozzy Osbourne
Get it?
An additional note: we all know that song titles, sometimes, use profane words. Because this is a family friendly website it is advised that you clean up that title up a bit. This is accomplished by using something like sh!t instead of the real word. Thanks....
68498 Replies
·
2670746 views


TWiT Tech Podcast Network
Time for another AWESOME video from the TWIT Network!
View: https://www.youtube.com/shorts/mWtSrS4fvE0
Direct YouTube Link - AI Proofs Humans Can't Understand? Math's Future #shorts
TWIT's Website
TWIT Live Feed
View: https://www.youtube.com/shorts/mWtSrS4fvE0
Direct YouTube Link - AI Proofs Humans Can't Understand? Math's Future #shorts
TWIT's Website
TWIT Live Feed
0 Replies
·
0 views

Staff member
HERE TO HELP YOU!
159 Replies
·
3328 views

Lifetime Supporter
Schedule drops tomorrow. Mandatory mini camps in June. Hall of Fame game August 6th.
109 Replies
·
1589 views




Booredatwork.com
Time for another AWESOME video from BoredAtWork!
View: https://www.youtube.com/watch?v=u6OwilvE-Po
Direct YouTube Link - ASUS ProArt P16 RTX Spark: Creator Beast or Secret Gaming Laptop?
Booredatwork.com Website
Booredatwork on Facebook
View: https://www.youtube.com/watch?v=u6OwilvE-Po
Direct YouTube Link - ASUS ProArt P16 RTX Spark: Creator Beast or Secret Gaming Laptop?
Booredatwork.com Website
Booredatwork on Facebook
0 Replies
·
2 views
TWiT Tech Podcast Network
Time for another AWESOME video from the TWIT Network!
View: https://www.youtube.com/shorts/vdi0y_S8a_0
Direct YouTube Link - AI Agents: Can We Trust Today's LLM Technology? #shorts
TWIT's Website
TWIT Live Feed
View: https://www.youtube.com/shorts/vdi0y_S8a_0
Direct YouTube Link - AI Agents: Can We Trust Today's LLM Technology? #shorts
TWIT's Website
TWIT Live Feed
0 Replies
·
5 views

Supporting Founder
Really excited for this season with Kentucky having a new coach and some really exciting recruits. Probably won't last long, but here's hoping this season is great.
142 Replies
·
1393 views


Pub Member / Supporter
Lifetime Supporter
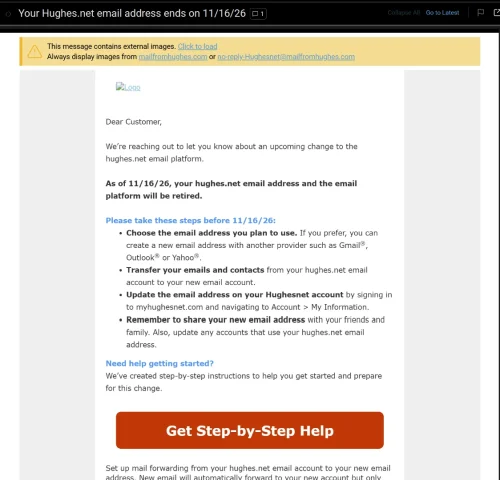
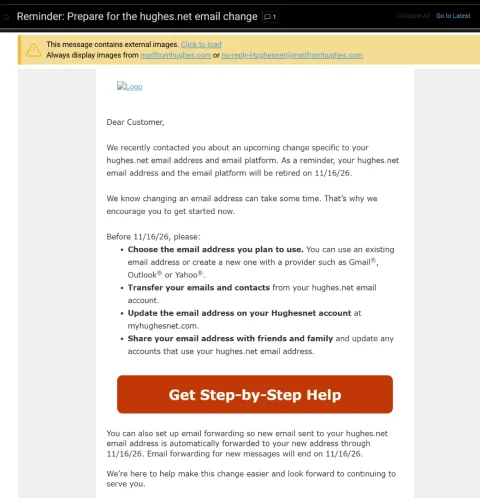
Wasn't exactly sure where to post this. Just had a customer come in inquiring about internet. He has HughesNet and had heard good things about mine. He asked if we provided email addresses and it kinda caught me off guard. I said he should be able to keep whatever email he had been using....my sister in law is still using a BellSouth email addy and they haven't been around here for many years. He said he had gotten a letter from HughesNet stating that they had until Nov 16th to save, move, forward, whatever, their Hughesnet emails because they would lose them after that date.
I have never heard of a company simply mass-deleting email accounts (the customer still has his HughesNet service). From what I understand, in the past, the company who was ditching their email service simply sold the customer base to a company like Google.
Anyone else getting this letter. He said he would show it to me tomorrow when I go out there and set up his internet.
I have never heard of a company simply mass-deleting email accounts (the customer still has his HughesNet service). From what I understand, in the past, the company who was ditching their email service simply sold the customer base to a company like Google.
Anyone else getting this letter. He said he would show it to me tomorrow when I go out there and set up his internet.
9 Replies
·
179 views




Staff member
Pub Member / Supporter
Cutting Edge
The TPN Map Excel Presents all DIRECTV Channels:
Understanding the TPN Map
Making Sense of the TPN Map Display Conventions
National (50-States or wide/NAT+PR beams)
Local (Local-Into-Local or narrow/Spot beams)
Local (Local-Into-Local or narrow/Spot beams)
Additional tabs provide:
OTA the (Over-The-Air) Database
VOD (Video On_Demand) Records
Offline Records
Engr Records
Net Decoder a graphic presentation of all satellites and transponders
VOD (Video On_Demand) Records
Offline Records
Engr Records
Net Decoder a graphic presentation of all satellites and transponders
Domestic Satellites
@99W...... D11, D14
@101W.... D16
@103W.... D12, D15
@110W.... D5
@119W.... D8
@99W...... D11, D14
@101W.... D16
@103W.... D12, D15
@110W.... D5
@119W.... D8
Understanding the TPN Map
Making Sense of the TPN Map Display Conventions
2140 Replies
·
927992 views


Supporting Founder
Lifetime Supporter
For the naysayers who did not think this service would make it, just added another 4.9M subscribers and that was after the removal of 1.2M Russia subscribers.
This is even better, Paramount+ revenue grew 120% and Subscription revenue grew 74% year-over-year ( 2nd quarter 2021/ 2nd quarter 2022) to $830M, principally reflecting paid subscriber growth on Paramount+.
Now compare that to Peacock with only 13 million paid, 13 million free.
This is even better, Paramount+ revenue grew 120% and Subscription revenue grew 74% year-over-year ( 2nd quarter 2021/ 2nd quarter 2022) to $830M, principally reflecting paid subscriber growth on Paramount+.
Now compare that to Peacock with only 13 million paid, 13 million free.
665 Replies
·
61590 views


