
10' CM Perf on AJAK H180
- Thread starter Magic Static
- Start date
- Latest activity Latest activity:
- Replies 138
- Views 23K
You are using an out of date browser. It may not display this or other websites correctly.
You should upgrade or use an alternative browser.
You should upgrade or use an alternative browser.
- Status
- Please reply by conversation.
Take your time, but tell us more
Previous 10'er on stock AJAK 180, is a Winegard Pinnacle, deep-dish?
Is Ku better because this is a flatter dish, with higher numerical F/D?
What feed are you stuffing your laser into, there?")
Or is motor positioning better, thanks to the magnet wheel mod?
Okay, good to hear. But I've lost track.I got this dish dialed in
Previous 10'er on stock AJAK 180, is a Winegard Pinnacle, deep-dish?
Is Ku better because this is a flatter dish, with higher numerical F/D?
What feed are you stuffing your laser into, there?
Or is motor positioning better, thanks to the magnet wheel mod?
Good News Bad News
As I said in post one I was replacing the Laser C/Ku reflector. The CM is outfitted with the same Bullseye II with Norsat PLLs. That's the feed with the laser pointer in it. While aiming this dish it became obvious to me it was a better reflector than the Laser. Getting great numbers on my AI Turbo meter. I'm seeing way better KU signal than the Laser did. The bad news is the sensor. Not reliable! The VBox X misses counts, especially when trying to move one count at a time. I will see the counts on the scope but the controllor misses them I ended up pulling one read switch and running a stock count.
As far as the comparison to the Pinnacle, I'm going to observe this a little more. They both have a microHD attached so I can get some side by side comparisons. First impression is the CM will come out on top, but I don't want to judge too early.

As I said in post one I was replacing the Laser C/Ku reflector. The CM is outfitted with the same Bullseye II with Norsat PLLs. That's the feed with the laser pointer in it. While aiming this dish it became obvious to me it was a better reflector than the Laser. Getting great numbers on my AI Turbo meter. I'm seeing way better KU signal than the Laser did. The bad news is the sensor. Not reliable! The VBox X misses counts, especially when trying to move one count at a time. I will see the counts on the scope but the controllor misses them
I ended up pulling one read switch and running a stock count. As far as the comparison to the Pinnacle, I'm going to observe this a little more. They both have a microHD attached so I can get some side by side comparisons. First impression is the CM will come out on top, but I don't want to judge too early.
More positioner woes! The VBox still misses counts even after reverting back to the stock sensor. Not a lot but it's going to be aggravating non the less. The sad thing is the LaserC/Ku with a VonWeis was 25% more accurate than a stock AJAK and rarely missed a count. I have zero problem with the AJAK on the Pinnacle run by a GBox. So I wish I had another GBox for sure.
The dish performs very well. Outstanding signal quality improvements! I spent a whole 10 minutes aiming this dish too. I think the extra time I spent aligning the dish to the dish-ring was an important factor in the set-up. Also used a square to set the mount to due south. Then moved the dish the number of counts to aim at my due south satellite. Couple twists on the elevation adjustment and little tweak on the azimuth and I was right on 55W ~ 139W
The dish performs very well. Outstanding signal quality improvements! I spent a whole 10 minutes aiming this dish too. I think the extra time I spent aligning the dish to the dish-ring was an important factor in the set-up. Also used a square to set the mount to due south. Then moved the dish the number of counts to aim at my due south satellite. Couple twists on the elevation adjustment and little tweak on the azimuth and I was right on 55W ~ 139W
sorry to hear that. you going to play with more ?More positioner woes! The VBox still misses counts even after reverting back to the stock sensor. Not a lot but it's going to be aggravating non the less.
have had a VBox setting here a year now..... big hurry to mess with it now..not
do you have a old ird around to test with ?
good luck
For me the VBox will be better than dealing with old IRDs. It's not perfect, but will do untill something better comes along, or I find a GBox. I'm not done playing with the sensors or any other stuff just yet ") Knowing the limitations of the VBox just keeps me from wasting time on other related stuff. I'm sure I won't run out of ideas or projects I want to try. I've been thinking about a "gravity motor" lately.... but then that's not exactly FTA
Knowing the limitations of the VBox just keeps me from wasting time on other related stuff. I'm sure I won't run out of ideas or projects I want to try. I've been thinking about a "gravity motor" lately.... but then that's not exactly FTA
Knowing the limitations of the VBox just keeps me from wasting time on other related stuff. I'm sure I won't run out of ideas or projects I want to try. I've been thinking about a "gravity motor" lately.... but then that's not exactly FTA Maybe you need to go old-school. Find some shielded sensor wire, and ground the shield at one end only. Maybe you can use RG-6 coax as a sensor wire if nothing else.
Update to the sensor problems and project. It turns out the stock AJAK sensor has a faulty reed switch. It would totally drop out when the barometric pressure dropped. The other AJAK with the Uni-Mesh Dish I had dug up also had a defective reed switch. Fortunately while trying to improve on the AJAK sensor, I had managed to make a sensor that would replace the AJAK sensor and provide the same counts. One of those now runs in that Uni-Mesh with no issues I have been wanting a new controller to continue my sensor development with. I just have the PowerMax VBox X to work with. It has a couple of quirks in the way it works but I've learned some work-a-rounds.
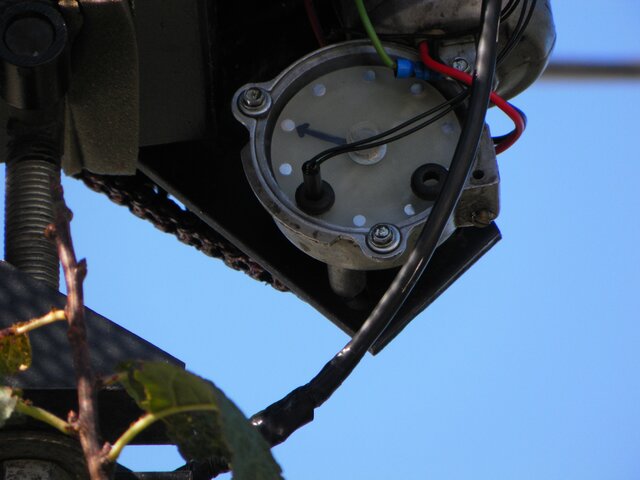
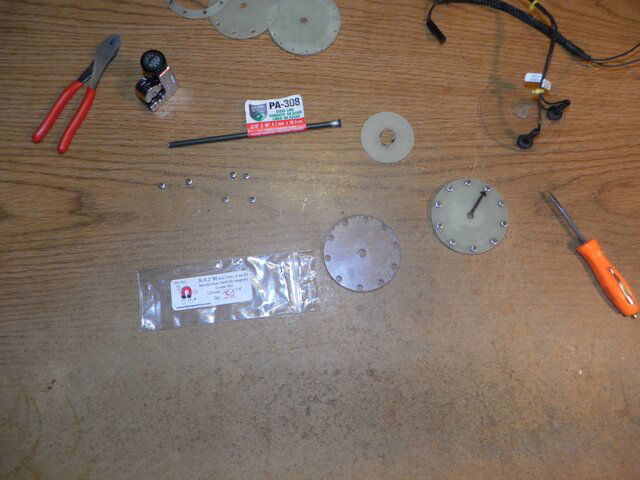
The big unknown when designing a magnet wheel for me is the shape and strength of the magnetic fields. So we end up with lots of trial and error. I have discovered that I can't get more than 10 magnets on a wheel that size before it's overcrowded. While weaker magnets will trip the reed switches, you need a stronger more positive action for high speed switching. Because the size of the wheel limits the number of magnets, I decided to double the counts using two reed switches. Placement of the switches is critical. The wheel is at max with the 10 magnets and spacing must be exact. This project would be a cakewalk if you just double the size of the magnet wheel. But that wouldn't fit inside that covers on the AJAK.
I have been wanting a new controller to continue my sensor development with. I just have the PowerMax VBox X to work with. It has a couple of quirks in the way it works but I've learned some work-a-rounds.The big unknown when designing a magnet wheel for me is the shape and strength of the magnetic fields. So we end up with lots of trial and error. I have discovered that I can't get more than 10 magnets on a wheel that size before it's overcrowded. While weaker magnets will trip the reed switches, you need a stronger more positive action for high speed switching. Because the size of the wheel limits the number of magnets, I decided to double the counts using two reed switches. Placement of the switches is critical. The wheel is at max with the 10 magnets and spacing must be exact. This project would be a cakewalk if you just double the size of the magnet wheel. But that wouldn't fit inside that covers on the AJAK.
?.. The dish performs very well. Outstanding signal quality improvements! I spent a whole 10 minutes aiming this dish too.
I think the extra time I spent aligning the dish to the dish-ring was an important factor in the set-up. Also used a square to set the mount to due south.
If you wouldnt mind, could you elaborate on what you did to align the " dish to the dish-ring"? Do you mean alignment to ensure the dish face plate is parallel to the dish ring?
Posted Via The SatelliteGuys Reader App!
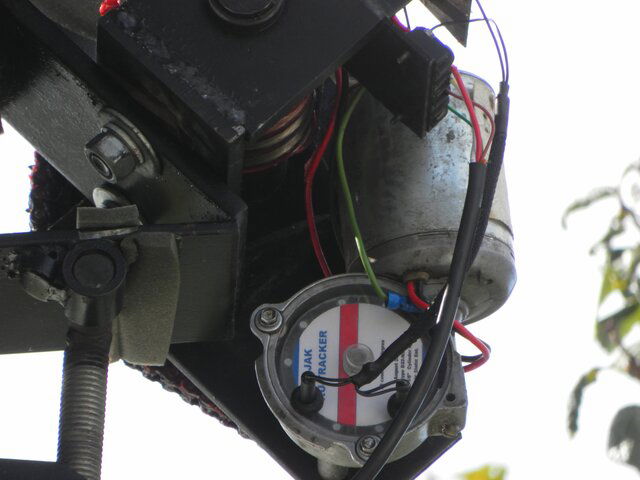
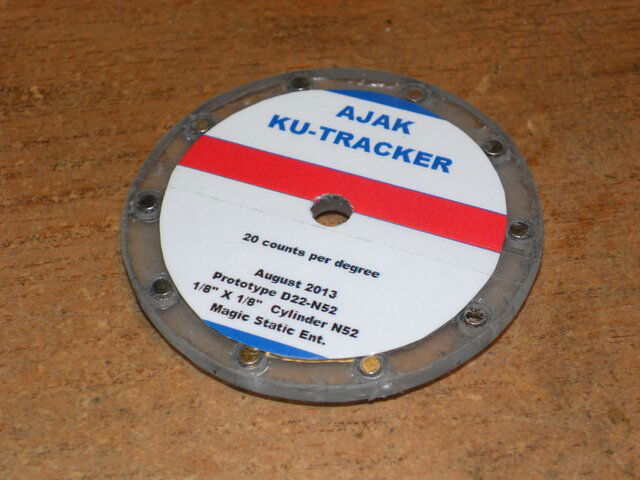
AJAK KU-Tracker
It was a nice fall day and I have had some new magnet wheels I wanted to try out even though I still have not replaced the VBox. I built another 16 magnet wheel to use with a single switch. But bench tests had proved it would not function. While I was getting promising results with a 10 magnet wheel and dual reed switches, it would not run with acceptable performance on the VBox. I was sure I needed a better controller. But I still built some more wheels with even stronger magnets. And wow! I'm glad I did. I had been using one of my 10 count wheels with one switch. The magnets on that wheel (3/16") were too big for a dual switch but was spot on for a stock count setup. I dropped in a wheel with 10 1/8 x 1/8 N52 magnets, the strongest ones I've tested so far and installed a dual reed switch (normally closed in series). The VBox likes it! 1600 counts for 83° of arc Been running a few days now, I like it!
It was a nice fall day and I have had some new magnet wheels I wanted to try out even though I still have not replaced the VBox. I built another 16 magnet wheel to use with a single switch. But bench tests had proved it would not function. While I was getting promising results with a 10 magnet wheel and dual reed switches, it would not run with acceptable performance on the VBox. I was sure I needed a better controller. But I still built some more wheels with even stronger magnets. And wow! I'm glad I did. I had been using one of my 10 count wheels with one switch. The magnets on that wheel (3/16") were too big for a dual switch but was spot on for a stock count setup. I dropped in a wheel with 10 1/8 x 1/8 N52 magnets, the strongest ones I've tested so far and installed a dual reed switch (normally closed in series). The VBox likes it! 1600 counts for 83° of arc
Been running a few days now, I like it!Attachments


Exactly. I wanted to make sure the dish ring and dish were parallel. I ended up using a couple of washers for spacers on two of the attaching points.If you wouldnt mind, could you elaborate on what you did to align the " dish to the dish-ring"? Do you mean alignment to ensure the dish face plate is parallel to the dish ring?
Posted Via The SatelliteGuys Reader App!
Exactly. I wanted to make sure the dish ring and dish were parallel. I ended up using a couple of washers for spacers on two of the attaching points.
So i have this visual image of your wife and six kids all holding the dish in place while you adjust the bolts, right?
Posted Via The SatelliteGuys Reader App!
Hmmm, LOL. I know my wife and kids and I can't visualize that at all. Actually I have a "project pole" where I can preassemble and adjust satellite dishes. It has wheels and different diameter pole adapters. I just cranked the dish to point straight up and walked around underneath and made my measurements and set it up. You can see where and how the dish attaches in the picture. I also made sure it was centered as well.So i have this visual image of your wife and six kids all holding the dish in place while you adjust the bolts, right?
Posted Via The SatelliteGuys Reader App!
Attachments
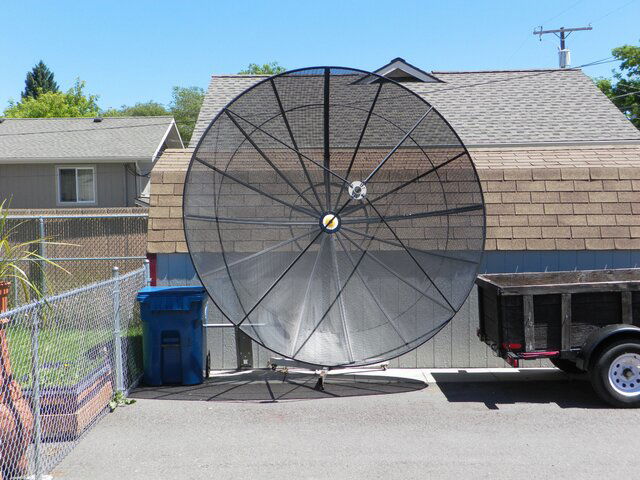
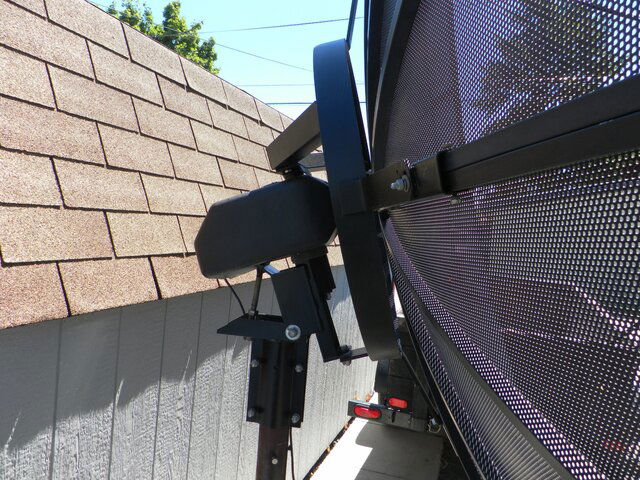
Hmmm, LOL. I know my wife and kids and I can't visualize that at all. Actually I have a "project pole" where I can preassemble and adjust satellite dishes. It has wheels and different diameter pole adapters. I just cranked the dish to point straight up and walked around underneath and made my measurements and set it up. You can see where and how the dish attaches in the picture. I also made sure it was centered as well.
thank you. Interesting idea. Its these little concepts thrown out there that really help save Hrs of settup in the long run. Took me two months of tweaking and adjusting to settup my first C band dish and Im still learning basics a few years later.
It was a nice fall day and I have had some new magnet wheels I wanted to try out even though I still have not replaced the VBox. I built another 16 magnet wheel to use with a single switch. But bench tests had proved it would not function. While I was getting promising results with a 10 magnet wheel and dual reed switches, it would not run with acceptable performance on the VBox. I was sure I needed a better controller. But I still built some more wheels with even stronger magnets. And wow! I'm glad I did. I had been using one of my 10 count wheels with one switch. The magnets on that wheel (3/16") were too big for a dual switch but was spot on for a stock count setup. I dropped in a wheel with 10 1/8 x 1/8 N52 magnets, the strongest ones I've tested so far and installed a dual reed switch (normally closed in series). The VBox likes it! 1600 counts for 83° of arc
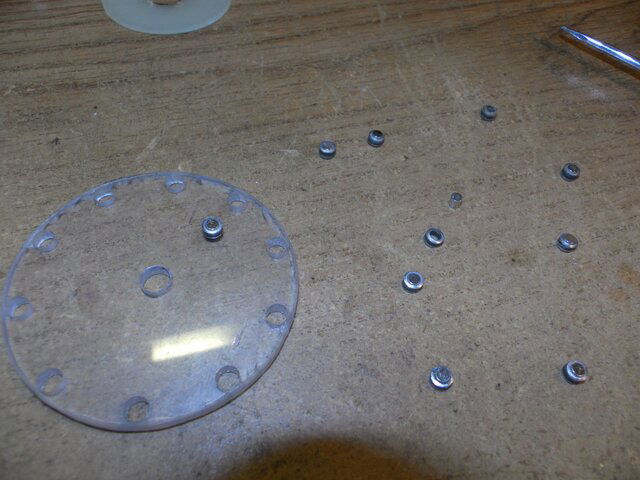
Upon closer examination of this setup I realized the math didn't work. That is to say I started with 10 counts per revolution (10 magnets) and installed a second switch. I then ended up with 17.25 counts per revolution. And it was consistent . Well out comes the lab scope and I had a look at this. When I installed the sensor I hit it just right, like flipping a coin and having it land on its edge. Touch the reed switches and I'll never get back to the way it is now. The odd count was due to a couple of the magnets on the wheel being just a touch closer together than the rest. They were counted as one. !0 magnets on the wheel is just a little tight for two switches. I need more space between the magnetic fields. And I think I have the answer right here in my pocket. My pocket magnet uses a focused magnetic field by installing a metal ring around the magnet leaving just the end showing. I will install rings around the magnets in the wheel to reduce the size of the field around them. Now how to fabricate the rings?
Moving right along I found that a 3/16" brake line cut into 1/8" lengths makes perfect fitting rings for my 1/8" magnets. I should have a wheel ready to test this evening
I found that a 3/16" brake line cut into 1/8" lengths makes perfect fitting rings for my 1/8" magnets. I should have a wheel ready to test this evening The shielded magnet test
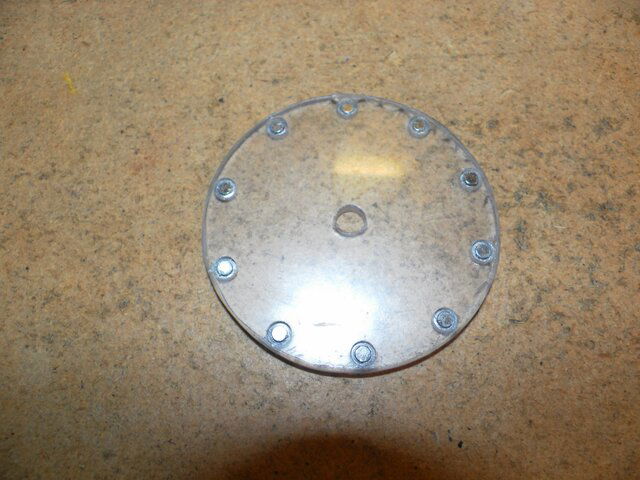
I have a test wheel completed. Bench testing shows positive results. I tested several configurations of the ring and magnet to see how they needed to fit to each other to get the results I want. I have the magnet protruding a very small amount from the ring.
I have a test wheel completed. Bench testing shows positive results
. I tested several configurations of the ring and magnet to see how they needed to fit to each other to get the results I want. I have the magnet protruding a very small amount from the ring.Attachments
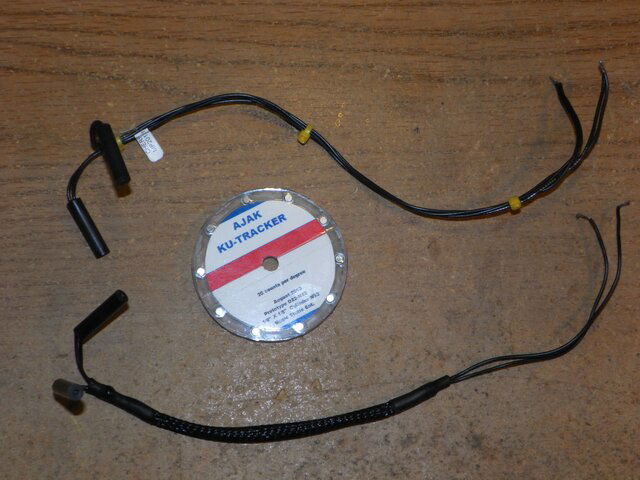
Installed and testing. Programmed in @ 20 counts per revolution/degree. Looks good on the scope I'll watch it a while and see how it does.
I'll watch it a while and see how it does.Observations: The VBox will overrun the count but it backs up to the correct position. The VBox will only count to 1999. With a 20 count wheel I can only cover 100° of arc. Fortunately I live in the West and can only see 85° of arc, 55.5W ~ 139W. I start at 150 count @55.5W and go to 1860 count @ 139W. 97W is my centerline @1000. The increased tracking accuracy was what I needed for the Luken MUX on 87W. Talk about splittin hairs. One click either way = No Signal, but great signal when right on the money.
AJAK H180 is made in USA, and, of course, not so easy to find some over the pond. After seeing pictures and reading treads like this I already like it and would like to get one. Would be very interested if somebody have spare one and ready to sell it. No problem if it in bad shape, I like to renovate stuff.
- Status
- Please reply by conversation.
Similar threads
- Replies
- 12
- Views
- 1K

- Replies
- 27
- Views
- 3K
- Replies
- 5
- Views
- 1K