Had a Super Sensor II go bad on me and had sticker shock when I went looking for a replacement. It has been about a week now and still working well. Below is a write up of my repair.
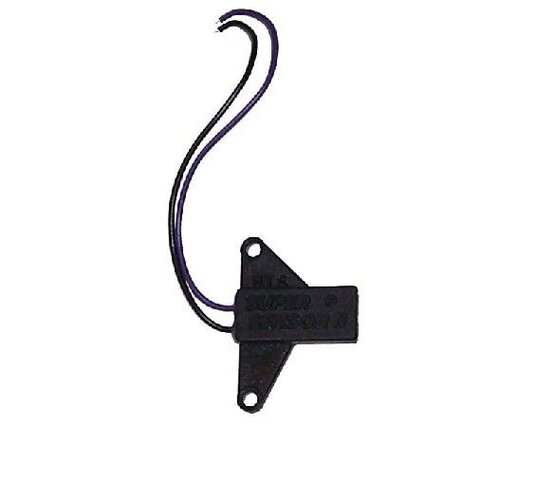
First I want to apologize for not taking pictures of my actual repair. Found the image below on the internet and will refer to it in the repair text.
The portion that says "Super Sensor II" is actually just a lid. I got mine off by first running an exacto knife between the lid lip and the body, on the portion I could get at, then inserting the exacto knife into the end on the right in the photo and LIGHTLY prying up. It then came right off. You might have an easier or harder time.
On the inside you will find a chamber filled with Hot Glue and a defunct glass tube reed switch attached to the two wires exiting the chamber. There is a divider running down the long axis that does not run the entire length. Both ends are open without the divider. Now the reed switch is made of glass, so be sure to wear eye protection, as I am pretty sure you will end up breaking the glass.
Now the fun begins. I ran the exacto knife along the outside long edge edges and the right end. Then started picking and prying with a SMALL straight screwdriver. I was able to get most all of the hot glue out of the chamber. This all took 1 to 1 1/2 hours, didn't keep real good track of time. I was able to salvage and re-use the two wires.
I happened to have a glass tube reed switch from a Jameco grab bag from years ago, so no parts shopping here. I did put a caliper on it and it measured 15.76 mm long and 2.55 mm diameter for the glass part. Should be able find similar on everybody's favorite, flea bay.
For the end facing the right hand part in the image, you will need to bend the lead into a U shape back around into the top part of the chamber, into the part on the other side of the divider. The glass portion goes into the part of the chamber that would be under the "Sensor II" in the image. You need to be careful bending the leads, as you can break the seal of the glass around the lead. I use a small pair of needle nose pliers to hold the lead just outside of the glass, so all the stress is fed into the pliers.
Now that you have the reed switch fit to the chamber, solder your wire to the leads. Place it all into the chamber with wires exiting to the left, with glass part in the proper place. Now we affix the new reed switch into the chamber. I used hot glue, but only glued 3 points with JUST ENOUGH to hold in place. I would guess if one could stand the smell and the cure time, you could use silicone. Now replace the lid. I put a tiny amount of hot glue on both the right and left end of the assembly to hold the lid on.
I would recommend testing the switch at various stages, just to make sure you didn't break it. Especially after the final stage, before replacing it in the actuator.
Be careful with the exacto knife and the screwdriver, as it is very easy to slip and injure yourself. Always try to do it all pointing away from yourself and other hand.