Well, now you're just rubbing salt in the wound! -. . . but I ended up with an 8 ft Channel Master SMC to be used for KU...
 -
-  -
-
Well, now you're just rubbing salt in the wound! -. . . but I ended up with an 8 ft Channel Master SMC to be used for KU...
- -...and here I am stuck with a BirdView HH mount, and nothing to do with it....
Here is a draft for a magnet wheel punch template, if anyone has any good ideas for revisions I can probably get them incorporated into a final version.")
hmmm, I already see one issue, looks like it is 3 1/2" instead of 3 1/4". Next?
Hey guys, this may have already been suggested before and found not to work, and I just missed it, (I'm sure Linuxman could tell us) but my thought here...
If instead of mounting magnets on the wheel, you just drill holes in it and mount a single fixed magnet behind the wheel? I would think the metal would block enough of the mag pull to cycle the switch... but, I may be wrong...

How did you intend to attach the disc to the shaft with the worm ?Here is a draft for a magnet wheel punch template,
")
How did you intend to attach the disc to the shaft with the worm ?
I envisioned a collar about 1/2 or 3/4 inch in diameter (as required to fit), with a setscrew in the side.
Then, three or four tapped holes in one end would take small screws passing through the disc.
I hadn't thought about the disc attachment yet, good point. I like your idea, once we had a collar size I could add some punch locations on the template.
Did you find a source of magnets that would fit your 24X 1/4 inch holes?
Might want to document that.
When Linuxman went down this road, I thought he had some troubles finding suitable (and inexpensive) magnets.
I've found a source on 'Bay (Applied Magnets), Linuxman found his at Michael's (art/hobby store), they were fairly inexpensive. Not sure if these are acceptable, here's a link:
1/4 in x 1/8 in Thick, Grade N45, Rare Earth Neodymium Disc Magnets - Applied Magnets
Should be an easy disc to drill.
I have a punch, but not sure it'd work unless you used a soft (non-shattering) plastic... maybe Lexan??
I liked Lone Cloud's idea of using a PVC end cap, that stuff is super tough and drills well.
For bonding the magnets to their holes in the plastic disc, let me suggest: Elmer's Polyurethane Ultimate Glue.
Unless we have a material's expert with a better suggestion, I'd try this stuff.
It'll bond most anything, and won't shatter like those crap cyanoacrylate super glues.
Yes, it's expensive.
Sounds good, I'll try it.
edit: Ya need to locate inexpensive reed switches.
I don't think spending $10 on one is the best idea, when the actual item is a 50¢ value.
. . . and as a last thought, let me throw this out.
If it took a new cover to deal with a larger magnet wheel, but that larger wheel could easily handle 32 or more magnets, I might prefer it.
What are the down sides to this larger wheel idea?
Concerning the 32 (or more) magnet idea, is there a maximum count number limitation in the V-box/G-box controllers, so that once you got past a certain number of counts any additional "accuracy" would be wasted??
I'm totally ignorant of their parameters, never had one or set one up.
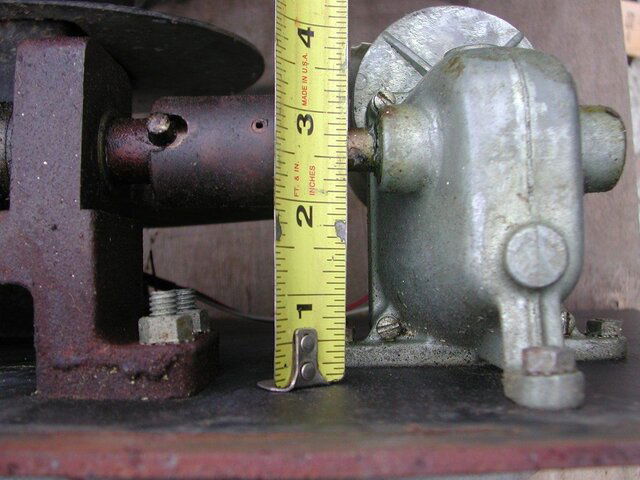
You could cut a slot in the plastic cover. The 3-1/4" wheel only has a 1/4" clearance or so.
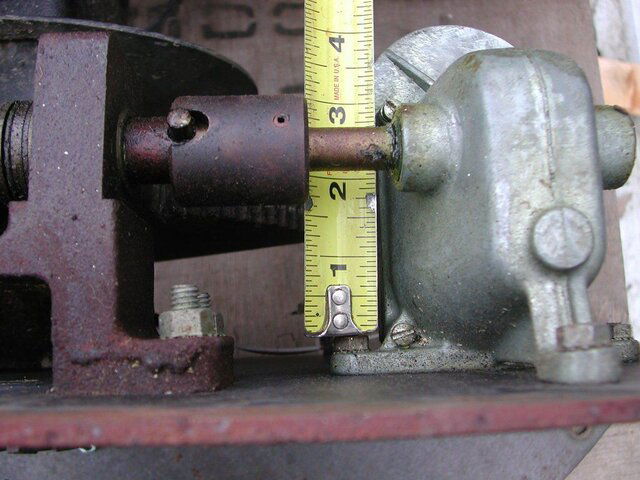
The problem with anything much bigger is the clearance on the other side where the worm gear shaft mounts. The steel plate that holds everything in place. Lone Cloud might be at the max with his 4" wheel at that point. Don't know if that is enough spacing for 32 magnets or not.
Phlatwound can plot it out at 4 inches.
It looks like you could easily go 4 1/2" without hitting anything on mine, 5" would be pushing it though.
Is there anything "magic" about the number of magnets? Is a multiple of 8 preferred for any reason?
It looks like you could easily go 4 1/2" without hitting anything on mine, 5" would be pushing it though.
Is there anything "magic" about the number of magnets? Is a multiple of 8 preferred for any reason?
i got a ten pack off ebay for $5 still waiting to test them maybe this weekendAnole said:edit: Ya need to locate inexpensive reed switches.
I don't think spending $10 on one is the best idea, when the actual item is a 50¢ value.
You guys are way more into this than me, but in my experience, the number of magnets needs to be cooperative with the type of motor being used. For example, I tried using the 24 magnet wheel with the orignal (and faster) 36:1 motors....and wow, the dish numbers raced faster than you could blink. Just way too many pulses for the receiver to accurately count.
A few years back, I replaced our original motor with a replacement that Skyvision was selling, a slower 70:1 motor. The catalog even stated that it MUST be used with the 24 magnet wheel. Together, they work and count perfectly. We rarely have to "bump" the dish to get it locked on a bird.
Basically, if you have the original Birdview motor, use an 8 magnet wheel. If you have the replacement 70:1 motor, use the 24 magnet wheel.