
Paraclipse 3.8 on H to H mount restoration/installation
- Thread starter martin-f
- Start date
- Latest activity Latest activity:
- Replies 83
- Views 14K
You are using an out of date browser. It may not display this or other websites correctly.
You should upgrade or use an alternative browser.
You should upgrade or use an alternative browser.
Is the sensor a reed switch? If not, use the optional OHR adapter to interface with Hall effect or optical sensors.
Are sensor switch cycles present? Reed switches are often magnetized during long periods of inactivity (parked against a magnet) and could require replacement.
If a reed switch, use an analog tester in resistance (continuity mode) or a scope to see if the sensor switch is opening/closing. Might use a 12Vdc battery to slow down the motor movement and make the switch cycle observation easier.
Also note: The HH motors are often quite RF noisy especially as the motors age. Be sure that the motor has a capacitor installed across the terminals, use shielded sensor and servo distribution wire, if needed, reroute the sensor wires away from the motor inside the housing and make sure the sensor terminals are located on the far side of the strip away from the motor.
Last edited:

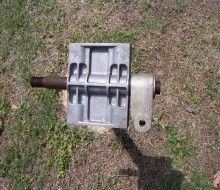
Hi a bit of an update, i am just about ready for building the H-H back up.


Hi Brian I picked these 100 Volt ones up today I just want to make sure I have the correct item for the job ?,
I'm presuming I could get a little circuit board to plug them into and solder up to keep things nice and neat, any pictures how others have connected them would help if possible please.


I'm presuming I could get a little circuit board to plug them into and solder up to keep things nice and neat, any pictures how others have connected them would help if possible please.
I'm presuming I could get a little circuit board to plug them into and solder up to keep things nice and neat, any pictures how others have connected them would help if possible please.
Forget about that, looking more closely I will splice it in inside the motor probably best place for it.
The capacitor could be placed anywhere on the motor leads. Either as the last photos depicts or even as simple as across the terminal strip connections.
Speaking of terminal strip. Magic Static and I discussed long ago that some terminal strips were installed with the reed switch lead terminals placed next to the motor and the motor leads on the far end. This routed the sensor leads against the motor and exposed the circuit to increased electrical noise. Got into the habit of flipping the terminal strip so the motor leads are nearest the motor and the sensor lead are routed to the reed switch further away from the motor.
Speaking of terminal strip. Magic Static and I discussed long ago that some terminal strips were installed with the reed switch lead terminals placed next to the motor and the motor leads on the far end. This routed the sensor leads against the motor and exposed the circuit to increased electrical noise. Got into the habit of flipping the terminal strip so the motor leads are nearest the motor and the sensor lead are routed to the reed switch further away from the motor.
The capacitor could be placed anywhere on the motor leads. Either as the last photos depicts or even as simple as across the terminal strip connections.
Speaking of terminal strip. Magic Static and I discussed long ago that some terminal strips were installed with the reed switch lead terminals placed next to the motor and the motor leads on the far end. This routed the sensor leads against the motor and exposed the circuit to increased electrical noise. Got into the habit of flipping the terminal strip so the motor leads are nearest the motor and the sensor lead are routed to the reed switch further away from the motor.
Many thanks for getting back to me Brian I will place it inside the motor the closer I get it the better,
I will replace the thermal strip for something more modern and only use one side furthest away from the motor to connect the wires thanks again.
Excellent project!
Well done!
I've always lusted after the big Paraclipse Dishes.
Maybe I'll have to talk the wife in to cruising some of the back roads with me around out new house in NM
Many thanks i do hope you find one, a very rare dish here in the UK probably the only one.
Hi ive been busy with other projects but managed to find time to jet wash most of the dish down today,


Next job is fabricating a wind up/down tilt over tower, something similar to this,

Obviously the up/down movement needs to be rigid unlike a radio ham tower, i have devised a method on how i will do this, basically i will be using 20 stainless steel roller bearings

These will hold a 6x6 inch box section a winch will raise and lower the dish.
Next job is fabricating a wind up/down tilt over tower, something similar to this,
Obviously the up/down movement needs to be rigid unlike a radio ham tower, i have devised a method on how i will do this, basically i will be using 20 stainless steel roller bearings
These will hold a 6x6 inch box section a winch will raise and lower the dish.
Hi managed to find time to get the motor up and running shes doing the arc in about 3 minutes from end to end, i did want it a little slower but pleased with it and will leave it at this, a few little tweaks to do and i can move onto the next stage raising and tilting mechanism.
DSC 0040
Small steps
DSC 0043
DSC 0040
Small steps
DSC 0043
i can move onto the next stage raising and tilting mechanism.
Over the last few months ive been collecting suitable used steel for the job in hand, basically the black box section will be made into a square cage using threaded rod, a bearings will be installed on every threaded rod x20 for the raising mechanism, the dish will be attached to the bigger square box section and slide up/down on the bearings.
I thought I went through mine before I put it up....you sir are a beast for tearing that motor housing apart...I hope mine outlives me, that doesn't look like fun at all!
Hi many thanks for your kind offer via PM very much appreciated, lol i had to check it out so she needed stripping like you would strip a lady of course nice and gentle lol, no the next step is not really fun but here in the uk your only allowed a 1mtr without planning the way round it is make a movable base and put her on that, the other issue i have i need the bottom of the dish needs to be a minimum of 5ft from the floor for the extreme ends of the arc i don't want the dish stuck up 18ft in the air all the time and i can also work on the lnb stood on the ground when its folded down so ive decided to make it how i want it so it folds down when not it use and rises when in use
") .
.Hi spent a few hours on this project today, cut the box section to 7ft lengths cleaned it up then started drilling the many holes, ive decided to have a spacing of 3ft holding the dish pole i will double up on bearings top and bottom and single bearings in the centre,
This is as far as i got today, i need to drill same again x2 for the bearings then at a later date after testing another set at the bottom for the tilting mechanism winch to attach to, this part of the meccano set will bolt to extra steel concreted in the ground for extra stability when the dish is up high for extreme DX at the ends of the arc.
A few pictures of today's progress.
Can't wait until you get it up and running I want to see the signal output.
Hi thanks my reports wont give you much idea unless you are familiar with UK signals, the UK might see some DX never seen before though.
Similar threads
- Replies
- 9
- Views
- 2K
- Replies
- 24
- Views
- 5K
- Replies
- 5
- Views
- 2K