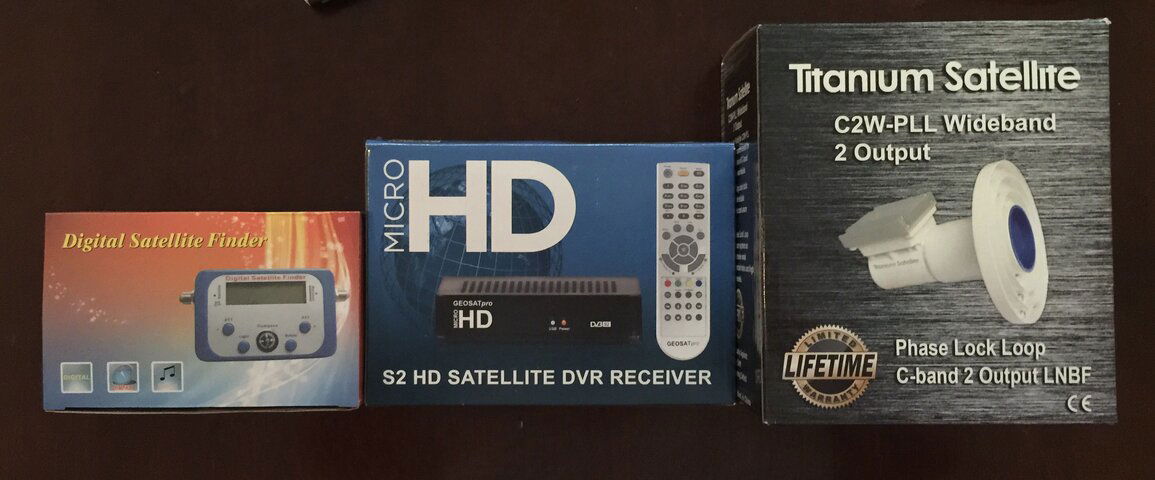
UPDATE: We've got a pole! Now I'm just waiting for my receiver (GEOSATpro Micro HD) and LNBF (Titanium C2-PLL) to arrive at my door then we will assemble the dish! It won't be long!

A Newbie with a 10' Dish
- Thread starter TheBUDGuy
- Start date
- Latest activity Latest activity:
- Replies 133
- Views 11K
You are using an out of date browser. It may not display this or other websites correctly.
You should upgrade or use an alternative browser.
You should upgrade or use an alternative browser.
SatelliteGuys Fund Raiser
100%
- Total amount
- $785.00
- Goal
- $350.00
Donation ends:
- Status
- Please reply by conversation.

Believe it or not, an old C-Band dish pole! My uncle had it. He used to have an old C-Band dish in the 1980's, which is now gone. However, the pole was the only thing left.What did you get for a pole?
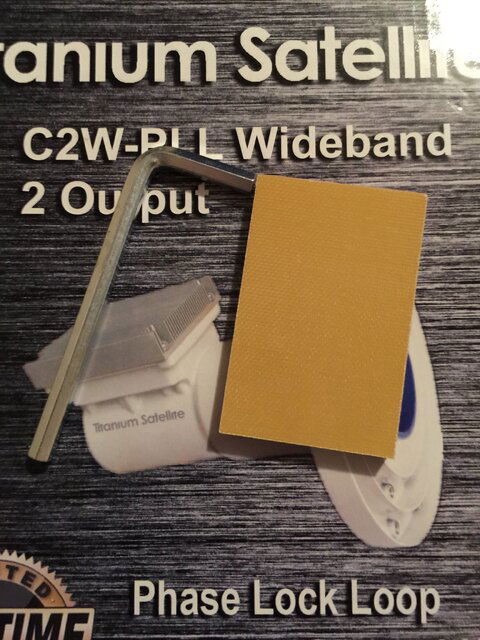
The brown piece is a dielectric plate to slide into the feed throat, you would only use it for circularly-polarized signals (not likely).
And the allen wrench, not sure what it's for unless it's to tighten the scalar?
I don't have any Titanium LNBFs yet but they are on my must-have short list.
And the allen wrench, not sure what it's for unless it's to tighten the scalar?
I don't have any Titanium LNBFs yet but they are on my must-have short list.
To expand on Phlatwound's excellent posting...
If you ever swing the dish East to receive the Atlantic C-band satellites with circular polarity signals, this dielectric slab will be inserted inside the feedhorn into the slots positioned at 45 degree angle to the horizontal and vertical probes. Do not insert the dielectric to receive the linear C-band satellite signals as this will attenuate the linear signals by 3dB. Each 3dB is a doubling in signal strength!
The Titanium Satellite PLL C-band LNBFs (except the "lite" model) are provided with Allen head screws (zinc coated) and a hex tool for attaching the scalar to the feedhorn and also for the feed support legs or buttonhook.")
Edit: add fred55's informative post to my delayed reply...
If you ever swing the dish East to receive the Atlantic C-band satellites with circular polarity signals, this dielectric slab will be inserted inside the feedhorn into the slots positioned at 45 degree angle to the horizontal and vertical probes. Do not insert the dielectric to receive the linear C-band satellite signals as this will attenuate the linear signals by 3dB. Each 3dB is a doubling in signal strength!
The Titanium Satellite PLL C-band LNBFs (except the "lite" model) are provided with Allen head screws (zinc coated) and a hex tool for attaching the scalar to the feedhorn and also for the feed support legs or buttonhook.
Edit: add fred55's informative post to my delayed reply...
You need a spot with a clear view of the southern sky (no trees, buildings, etc blocking the arc). Go to dishpointer.com and enter your location. It will allow you to zoom in and evaluate potential spots. Select different satellites you want to get in the drop down box and the line will point in the direction and provide the elevation your dish will be looking to see that sat. If there is an obstruction you can use the height checker to see if the dish will be able to see over it. Verify locations of gas, water and electric lines and also consider where the entry point for your cables will be in relation to dish location (you don't want to run cables under the driveway if you can avoid itHow would I find a location to place my dish? What would I need to do?
 ). Good luck!
 PLEASE LOG IN TO GET RID OF THESE ADS!
Another great tool, if you have one, is an iPad, or a smartphone. Just download a free app and you can actually see the sat locations/arc in the sky, from anywhere.
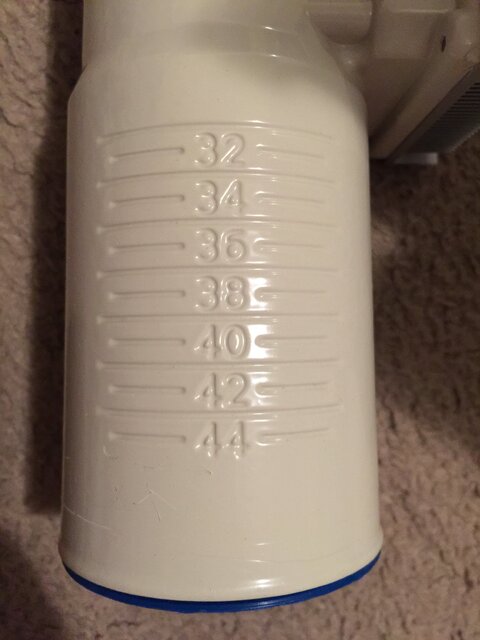
Today may be the day!! Though there is one thing: On the C2-PLL LNBF, what are the markings on the top and sides?
Would that be Focal Distance or Focal Depth? Also, how would j set my LNBF if my dish was, for example, 118" in diameter? Also, about the skew on the top, do the numbers need to be straight down like in the photo? None of this may not make any sense. I may need some explaining about this.Top markings is the skew
side markings is the f/D
PLEASE LOG IN TO GET RID OF THESE ADS!
Attachments

FL / FD Ratio Calculator: http://www.satsig.net/focal-length-parabolic-dish.htm
The scale on the side is the FD ratio. The FD ratio scale is set to align with the back ring of the scalar. The FL (Focal Length) is measured from the center of the reflector surface to 1/4" inside the feedhorn throat.
If the focal length measurement is incorrect with the FD set, move the scalar towards or away from the reflector until the FL measurement is correct. The movement of the scalar towards or away from the reflector is often done by moving the complet buttonhook arm assembly in/out or if your dish has support legs, by using washers to shim the scalar in/out.
The "0" skew marking on the back of the housing is aligned with the vertical polarity probe inside the feedhorn. To set the polarity/skew on a motorized dish, the "0" Skew scale mark is aligned with the vertical axis of the dish when it is aimed true South (the top of the arc). The "o" mark may be positioned at the 12 o'clock or 6 o'clock position.
Be sure that both the scalar and the feedhorn are aimed directly to the center of the reflector. I use a 8" level with right angle laser pointers to center the scalar and feedhorn.
This goes for anyone: When installing the dish, which is best:
•1.) Assembling the dish, attaching it to the polar mount, putting it all on the pole, then placing it in the ground.
•2.) Placing the pole in the ground, assembling he dish, attaching it to the polar mount, then placing it on the pole.
•1.) Assembling the dish, attaching it to the polar mount, putting it all on the pole, then placing it in the ground.
•2.) Placing the pole in the ground, assembling he dish, attaching it to the polar mount, then placing it on the pole.
I would get the pole cemented in the ground before attaching the mount. That way its lighter to work with and won't tilt while the concrete is drying.This goes for anyone: When installing the dish, which is best:
•1.) Assembling the dish, attaching it to the polar mount, putting it all on the pole, then placing it in the ground.
•2.) Placing the pole in the ground, assembling he dish, attaching it to the polar mount, then placing it on the pole.
Newbie Question: Since the actuator for my dish doesn't work (for now), will I still be able to move the dish from side-to-side? If not, is there any other way?
PLEASE LOG IN TO GET RID OF THESE ADS!
- Status
- Please reply by conversation.
Similar threads
- Replies
- 10
- Views
- 234
- Replies
- 12
- Views
- 1K
- Replies
- 27
- Views
- 4K
- Replies
- 8
- Views
- 713
- Replies
- 5
- Views
- 1K