Phlat's Birdview Install

Status
Please reply by conversation.
Well I realize that my eyes are going bad, what you see on the outside of Phlat's mast will be above ground. Those tabs were put on by my welder for my NPRM structure.

Phlat cut the bottom tabs off to slide his pipe on. :)

So I repeat, he needs a bolt through the pipe that goes underground in the concrete. :eek:


uhhh okay. :eek:

Looks like the right hand portion of the pic would be going above ground....:confused:
 
Stogie, I'm going to have to side with my esteemed colleague (Professor Birdview...aka linuxman) from the Great State Of MOzoury on this one. ;)

The angles that you can see are on the top of the pole....not the bottom. Those were put on there by the Professor for adaptation to one of his NPRMs. I have a couple of angles on the bottom that you can't see in the pic. :)

I hope I don't put the wrong end in the ground when it's time for concrete!!!

:eek:

Dang Show-Me Staters....LOL

Put on your glasses! :D

attachment.php


Your welder is correct. That pole will never give. Looks good. :D:up

Now if we could get the Head-Knocker at The Birdview Reclamation and Education Center to put his glasses on....:D:):D:D:):D:):D:rolleyes:;):)
 
Long as all you Missouri fellas have it all straight....LOL

Carry on! :D

With a little (LOT!) help from y'all, all should work out in the end.

I hope I can get that thing plumb, there's not really a flat spot around my whole place......all my cows have longer legs on one side from standing on the hillsides! :D
 
With a little (LOT!) help from y'all, all should work out in the end.

I hope I can get that thing plumb, there's not really a flat spot around my whole place......all my cows have longer legs on one side from standing on the hillsides! :D


4' level is your friend. I bought a brand new one when I first got into FTA and its all I use that level for. Well, that and my carpentry skills are about as good as my comprehension skills....LOL ...but I am able to keep my poles to within about 3/32 inches...close as the level can show you...

Have a look at my B'view pole thread, what you see there is how I do ALL my poles. Dig hole, pour concrete in hole, level pole, brace pole with 1X2's and vise grip clamps. Then have a smoke and wait. A few days.

Just keep the bovine away from the braces until the concrete sets! :D
 
Last edited:
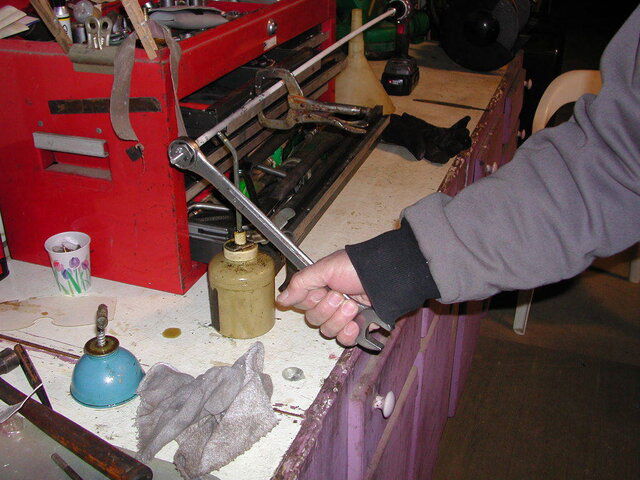
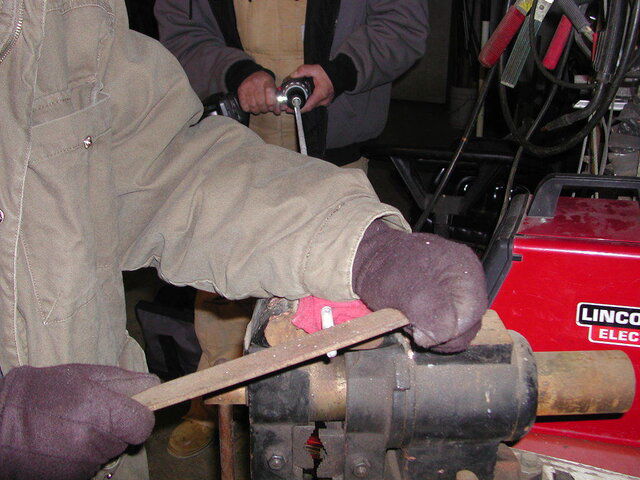
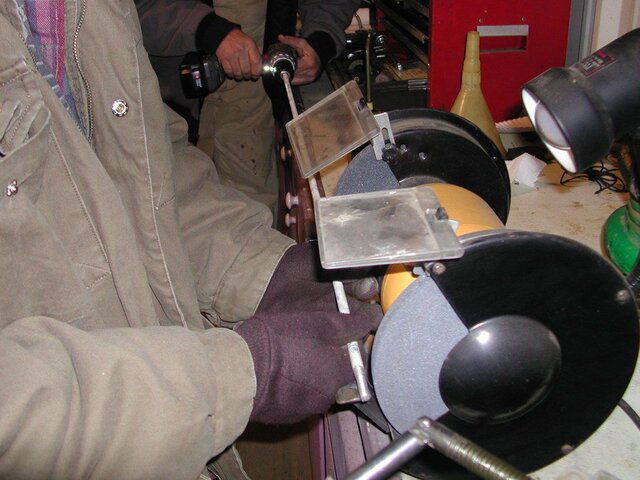
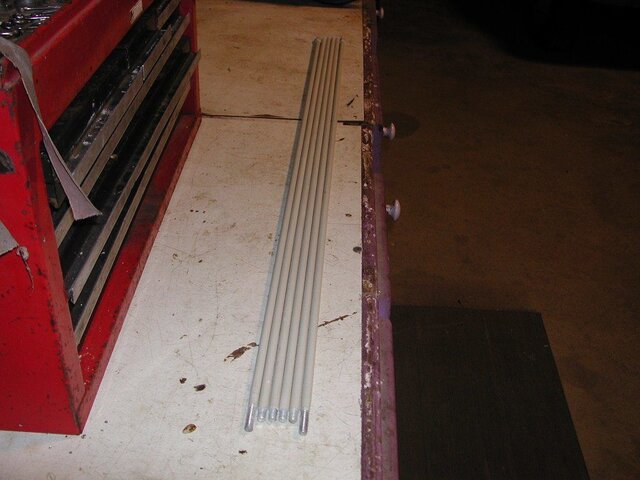
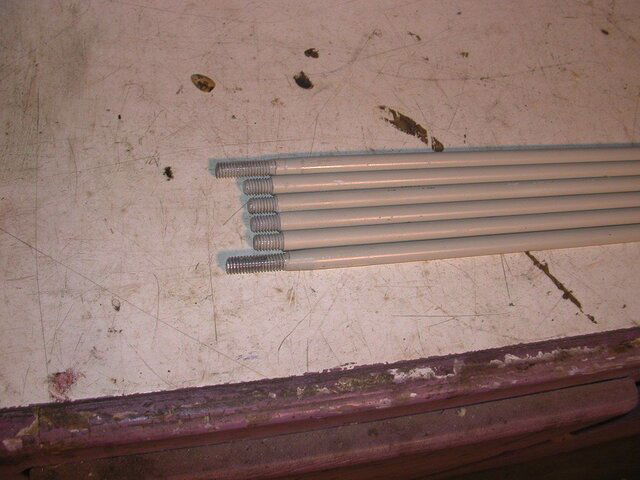
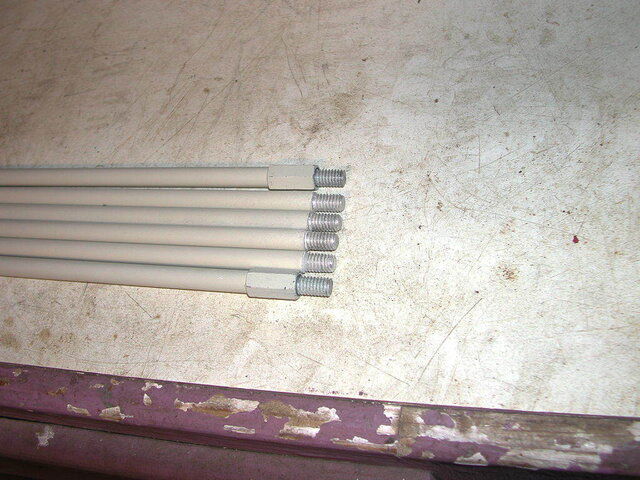
When I got this dish most of the threads on the scalar end of 2 of the 6 support arms were broken. Linuxman had already procured a couple of pieces of all thread w/splice nuts to get the additional length required, so now it was up to me to figure out how to get some more threads on the other end......I had 2 options:

1.) Take the parts to a machine shop, hope they did them right and pay the big buck$.........:rolleyes:

or:

2.) DIY!!

A cordless drill was the "lathe motor", the first one we took off most of the excess material with my bench grinder, then cleaned it up with 60 grit sandpaper.....the second one we used a file instead of the grinder, it was faster, easier to control and didn't need any cleanup. Then, a 1" wrench, 5/16-18 NC die, plus a little oil and, voila, done deal! :)
 

Attachments

  • Sat Birdview Support Arms6.JPG
    Sat Birdview Support Arms6.JPG
    127 KB · Views: 192
  • Sat Birdview Support Arms5.JPG
    Sat Birdview Support Arms5.JPG
    126.8 KB · Views: 205
  • Sat Birdview Support Arms4.JPG
    Sat Birdview Support Arms4.JPG
    121.6 KB · Views: 223
  • Sat Birdview Support Arms3.JPG
    Sat Birdview Support Arms3.JPG
    109.4 KB · Views: 178
  • Sat Birdview Support Arms2.JPG
    Sat Birdview Support Arms2.JPG
    118.4 KB · Views: 215
  • Sat Birdview Support Arms.JPG
    Sat Birdview Support Arms.JPG
    129.8 KB · Views: 211
That was a great idea. I broke two off when I started restoring mine, I ended up drilling and tapping 1/4" bolts into them and cutting off the heads.
 
That was a great idea. I broke two off when I started restoring mine, I ended up drilling and tapping 1/4" bolts into them and cutting off the heads.

Thanks, N0EXE, it went pretty good once I got a tapered die (the first one I tried was just a thread chaser, with no taper).

That aluminum works pretty easily, just need to be patient, keep the die cleared out and use lots of oil. :)
 
Thsi may have already been explained, but......

If I understand correctly the Birdview dish has approximately 5 degrees of declination "built-in".

How is the declination allowed for in the construction of the dish?

Is the center (about 3' diameter) "ring" (that the dish mounting bosses reside in) slightly asymetrical?

Or is that ring welded slightly "off-center" onto the main dish? :confused:

The declination is built into the elevation bar. The top part of the bar sticks out slightly further than the bottom does.
 
The declination is built into the elevation bar. The top part of the bar sticks out slightly further than the bottom does.

Ah so, thanks!

That is why I wasn't able to detect it in the measurements I made on the dish. :rolleyes:

Do you know what the factory declination amount is?
 
The declination is built into the elevation bar. The top part of the bar sticks out slightly further than the bottom does.

Alright....what happens if you need LESS than 5 degrees? Put washers underneath he TOP bolts? :confused:

Mine is 4.37 degrees IIRC. So I need to subtract .63 degrees from my elevation? Or do I set the elevation and use the washers, where do I measure the declination from?
 
Alright....what happens if you need LESS than 5 degrees? Put washers underneath he TOP bolts? :confused:

Mine is 4.37 degrees IIRC. So I need to subtract .63 degrees from my elevation? Or do I set the elevation and use the washers, where do I measure the declination from?

Good question....if you need less than the factory declination wouldn't you put washers between the mount and dish at the bottom bolts?

I think you measure the declination by the total angle of the dish at it's zenith, elevation minus declination, with a string protractor or angle finder, of course after setting the elevation of the mount.

Phlatwound is correct!

You must first determine if your declination is actually 5 degrees.

Declination is determined by total elevation measured on the back of the dish right in the middle hole. Then measure the elevation at the elevation bar and subtract that from the total elevation.

That is your declination.

You may have to add washers on the bottom or top. It depends. :)

Gotcha. This is gonna be funnnnnnnn chit! :D
 
A little more progress today, inserted 3/8" helicoils in the 2 lower right dish-to-mount holes.

The nuts that are welded to the underside of the "tub" were gone on both of these, I think they fell off when I drilled out the broken bolts. Not a problem though, there's plenty of beef in the steel shouldered sleeves.

The outer one went without a hitch, the one immediately to it's left gave me a little grief, because the sleeve that I was tapping wanted to spin in the dish.

Of course :rolleyes: that particular sleeve was the roughest one on the dish and barely had enough shoulder sticking up to grab, but finally I found a good set of Vise Grips to hold it, and was able to tap it and insert the helicoil.

It's a good idea to put some Loctite on helicoils to keep them from turning out, especially in a "bottomless" hole. :)
 
Status
Please reply by conversation.

Users Who Are Viewing This Thread (Total: 0, Members: 0, Guests: 0)

Who Read This Thread (Total Members: 1)

Latest posts