The neat thing about the sprayer I have is that it uses standard canning jars which of course can be sealed so you can save the paint for the next job without having to dump it back into the can (not desirable if you've thinned it). All you have to clean up is the gun itself which is very simple because it doesn't use a bunch of complicated parts. Only problem I had with it was when I released the trigger it didn't always return to the completely off position, leaving just a light mist coming out. I think that can be corrected though. I sure seemed to get good coverage with it compared to spray cans!

Solid Spun Aluminum 8.5 footer - Maybe Regency
- Thread starter linuxman
- Start date
- Latest activity Latest activity:
- Replies 144
- Views 15K
You are using an out of date browser. It may not display this or other websites correctly.
You should upgrade or use an alternative browser.
You should upgrade or use an alternative browser.
SatelliteGuys Fund Raiser
100%
- Total amount
- $905.00
- Goal
- $350.00
Donation ends:
- Status
- Please reply by conversation.
Hey Inno,
I looked in 5 different places and called another trying to find a sprayer like yours and no dice. I went ahead and bought a standard sprayer and the paint I am going to use. I'll put it all together and give it a shot tomorrow.
By returning the 10 spray cans of Rustoleum I had bought, I got almost enough money back to pay for the sprayer, but then had to buy a couple of quarts of paint.
But at least now I have a sprayer. I did like the idea of your sprayer and the quart jars. Quick and easy clean-up.
Thanks for the link, and maybe I'll buy one later.
Edit: I found one just like yours out of Nevada, but with shipping it is $62.00 and change to my location. I guess I will wait a while on that.
Fred
It's neat but I'm sure something like a Wagner power painter would be very good as well.......and no need to worry about a compressor or water in the air lines etc. so likely it would do a better job. Is that what you got?
It's neat but I'm sure something like a Wagner power painter would be very good as well.......and no need to worry about a compressor or water in the air lines etc. so likely it would do a better job. Is that what you got?
Hey Inno,
No, I bought a Campbell Hausfeld DH4200. It is an ordinary spray gun. Seems like it is pretty well built, but will require lots of clean-up after each job.
It will do siphon or pressure, just have to reconfigure it with set screws. I hope to try it out tomorrow.
With my over 55 discount, it was $43.00 and change including sales tax.
Fred
Did the final clean-up of the front side this morning with vinegar before painting. Got out my compressor and the new paint sprayer and followed the directions to prepare, adjust, and make some trial swipes at a piece of cardboard.
I painted my very first ever coat of paint with a compressor and spray gun on the front side of the dish. I still don't quite have the hang of it as you can see in the picture. I'm either not holding the spayer the same distance from the dish every time I spray each section, or moving too fast, or too slow.
I had never used the compressor for anything but blowing out computers and airing up a tire or two. It actually had a flow regulator that I adjusted down to a nice steady 40 psi for painting.
I'm hoping when I put the final coat on tomorrow, I can get it on evenly so that it will look nice.
I'll say this for the spray gun. It is ten times faster than with the cans, and uses ten times less paint. I only used about a pint of paint for the first coat on the dish. It is harder to clean up, but so much easier. I may take everything up on the roof a little later in the fall and go on a painting spree. I will definitely paint the Pinnacle before winter.
Here are the pics both before and after:


Fred
I painted my very first ever coat of paint with a compressor and spray gun on the front side of the dish. I still don't quite have the hang of it as you can see in the picture. I'm either not holding the spayer the same distance from the dish every time I spray each section, or moving too fast, or too slow.
I had never used the compressor for anything but blowing out computers and airing up a tire or two. It actually had a flow regulator that I adjusted down to a nice steady 40 psi for painting.
I'm hoping when I put the final coat on tomorrow, I can get it on evenly so that it will look nice.
I'll say this for the spray gun. It is ten times faster than with the cans, and uses ten times less paint. I only used about a pint of paint for the first coat on the dish. It is harder to clean up, but so much easier. I may take everything up on the roof a little later in the fall and go on a painting spree. I will definitely paint the Pinnacle before winter.
Here are the pics both before and after:
Fred
PLEASE LOG IN TO GET RID OF THESE ADS!
A little dark for my taste, but that's just a personal preference
.
As to the painting, for a first attempt, I'd say you're doin' great.
...especially compared to your previous can-work.
Let us know how the 2nd coat goes.
.
As to the painting, for a first attempt, I'd say you're doin' great.
...especially compared to your previous can-work.
Let us know how the 2nd coat goes.
Thanks for the encouragement Anole!
I am going to do my best to get a nice uniform final coat on it today.
Fred
I am going to do my best to get a nice uniform final coat on it today.
Fred
I got the paint all ready, and thought I had more than enough to paint the dish this afternoon, but as you can see in the picture below, I started at the center, painted towards the bottom, tilted the dish the other way, went back to the center and painted towards the bottom on that side.
So far so good, and the big wide swath down the center looks pretty decent. I then tilted the dish to the original side and started painting at the top going down the left side. You can see where I ran out of paint on the lower left corner.
I got more paint, and added acetone to thin, and stirred it up. By the time I had it ready to paint again, I started having problems with the gun. I had to eventually put the tube into straight acetone and run some through it to get it going again. I had to adjust the setting etc, and finally got it going.
You can see the lower left and right side are all screwed up again. I've got plenty of paint, so I could try another coat tomorrow. I'm just pi$$ed off and fed up with it right now.
Here's a pic of the @!#%#$$#:

Fred
So far so good, and the big wide swath down the center looks pretty decent. I then tilted the dish to the original side and started painting at the top going down the left side. You can see where I ran out of paint on the lower left corner.
I got more paint, and added acetone to thin, and stirred it up. By the time I had it ready to paint again, I started having problems with the gun. I had to eventually put the tube into straight acetone and run some through it to get it going again. I had to adjust the setting etc, and finally got it going.
You can see the lower left and right side are all screwed up again. I've got plenty of paint, so I could try another coat tomorrow. I'm just pi$$ed off and fed up with it right now.
Here's a pic of the @!#%#$$#:
Fred
comin' right along
So, did you RTFM ? -
And do we have any experienced painters in the house?
Maybe they could add some secrets of their success.
I'm usually one to dust on a light coat, then come back later for another.
Every time I've put paint on heavy or even medium coats, it screws up.
I watch some car shows and see 'em putting down a decent coat, and just wonder how they do it!?
I'm thinking' the secret is in the six light coats...
Actually, as best I could tell from your picture, it looked like 75% of the dish was fine*.
Think about it this way ... after this learning curve, you'll be able to paint everything beautifully!
We'll all be bringing you our dishes!
* . . . or is it just time to break out the ScotchBrite pads and call it done?
You are correct Anole.
The 75% you mentioned was a nice light coat, and it does look decent enough to keep.
It was after the problem that I had to adjust the paint flow and of course it was heavier and for some reason I couldn't get it back to where I had it originally so this is what I ended up with.
I am going to try one more time tomorrow. The third time is supposed to be the charm.
I bet I don't run out of paint in the siphon can tomorrow, and if I do, I'll have some more pre-mixed and ready to just dump in.
Fred
PLEASE LOG IN TO GET RID OF THESE ADS!
Looks like from the pic (and it's hard to see the detail) that the majority of the dish is sprayed too lightly, the bottom right corner looks like it's had a sufficient amount. It's a really tough balance to strike between having not enough paint and seeing lines and having too much and having it run.
Keep trying, it is looking better!
Keep trying, it is looking better!
I talked to a guy at one of my clients this morning whose Father is a retired body man, and who taught this guy how to paint. He has painted 3 of his own cars.
He gave me specific instructions about painting from the outside in as far as I could and to feather it out towards the middle. Then go to the middle, and start feathering in before I got to the unpainted part, then paint across to the other side and feather back out.
I did that as well as I could, but it still left light and dark spots as you can see. I moved the dish into the sun trying to get a better picture, but for some reason the camera doesn't like extra light or dark pictures.
I did make one change today. I originally was going to paint the dish with the charcoal gray rustoleum auto primer. I stopped and picked up a small can of flat white rustoleum, same paint as I have in flat black and turned the color into a dark charcoal gray.
The guy above also gave me strict instructions about mixing and thinning. Pour more paint into a larger can than you think you will possibly need. Thin that by measuring the proper amount of thinner vs the amount of paint. Add any colors, and stir well. Then if the hopper runs out, all you have to do is pour some more in. (Not wait until the gun dries out while mixing and thinning some more)
This is it. Good, bad, or other, I ain't painting it again.
Here are the pics:


I called and talked to the guy before posting and had sent the pictures by email. He said some of the over-spray may wash off, and it might look a little different, but he can't figure out why, unless it just is a characteristic of the paint used.
Fred
He gave me specific instructions about painting from the outside in as far as I could and to feather it out towards the middle. Then go to the middle, and start feathering in before I got to the unpainted part, then paint across to the other side and feather back out.
I did that as well as I could, but it still left light and dark spots as you can see. I moved the dish into the sun trying to get a better picture, but for some reason the camera doesn't like extra light or dark pictures.
I did make one change today. I originally was going to paint the dish with the charcoal gray rustoleum auto primer. I stopped and picked up a small can of flat white rustoleum, same paint as I have in flat black and turned the color into a dark charcoal gray.
The guy above also gave me strict instructions about mixing and thinning. Pour more paint into a larger can than you think you will possibly need. Thin that by measuring the proper amount of thinner vs the amount of paint. Add any colors, and stir well. Then if the hopper runs out, all you have to do is pour some more in. (Not wait until the gun dries out while mixing and thinning some more)
This is it. Good, bad, or other, I ain't painting it again.
Here are the pics:
I called and talked to the guy before posting and had sent the pictures by email. He said some of the over-spray may wash off, and it might look a little different, but he can't figure out why, unless it just is a characteristic of the paint used.
Fred
It looks good to me Fred. It could only look better if it was sitting on a pole in "My Backyard"!!!!
Al
Al
Thanks Al!
I know it would look good in your back yard, but I think it will look better on my roof.")
I finally figured out why the camera is taking such crappy pictures lately. The lens is filthy! I have to find my lens cleaning cloth for my rifle scope and give it a good cleaning this evening.
I'll rinse the dish off tomorrow after the paint dries tonight, then move it back out into the light and see if I can get some better detail on the pictures.
Fred
I know it would look good in your back yard, but I think it will look better on my roof.
I finally figured out why the camera is taking such crappy pictures lately. The lens is filthy! I have to find my lens cleaning cloth for my rifle scope and give it a good cleaning this evening.
I'll rinse the dish off tomorrow after the paint dries tonight, then move it back out into the light and see if I can get some better detail on the pictures.
Fred
congratulations
Sometimes it's good to just say, "I'm done", and move on!
The dish is well protected. I'm sure it'll take the next 10+ years of sun in stride.
Maybe get a big decal from your kid's high school football team, and put it on the dish!
Good time to make a stencil and paint some personal ID on the backside.
You can now concentrate on other phases of the project.
Were you going to paint any other area, like the LNB arm or supports?
Perhaps parts of the mount?
You're happy with the back?
I do like the idea of mixing my own paint to get the desired color.
Standard primer gray is a little light for my taste, though it does seem to pretty much match many of my LNBs and Dish antennas.
When I got the 3ABN 36" in "charcoal", I was worried how dark it might really be?
Turned out to be about the same as all the rest.
I could have handled considerably darker and been just as happy.
Wonder why you chose to go so dark?
So it doesn't show against your black roof, when they take the next set of satellite photos?
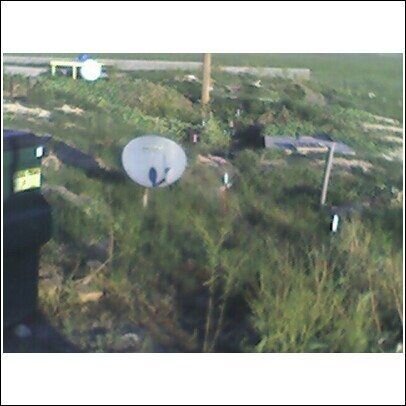
Oh, and speaking of crappy pictures, look what a buddy sent me from his vacation trip last week.
He went to the Grand Canyon, and found a lone Primestar to taunt me with.
Bastage didn't even bring it home for me! Some friend, huh?
Claimed he didn't have any tools to take it apart.
Took this with his cell phone camera. Could it be much worse or fuzzier?
I'm buying him some lens-cleaning cloths, and a set of spare tools!
Sometimes it's good to just say, "I'm done", and move on!
The dish is well protected. I'm sure it'll take the next 10+ years of sun in stride.
Maybe get a big decal from your kid's high school football team, and put it on the dish!
Good time to make a stencil and paint some personal ID on the backside.
You can now concentrate on other phases of the project.
Were you going to paint any other area, like the LNB arm or supports?
Perhaps parts of the mount?
You're happy with the back?
I do like the idea of mixing my own paint to get the desired color.
Standard primer gray is a little light for my taste, though it does seem to pretty much match many of my LNBs and Dish antennas.
When I got the 3ABN 36" in "charcoal", I was worried how dark it might really be?
Turned out to be about the same as all the rest.
I could have handled considerably darker and been just as happy.
Wonder why you chose to go so dark?
So it doesn't show against your black roof, when they take the next set of satellite photos?
Oh, and speaking of crappy pictures, look what a buddy sent me from his vacation trip last week.
He went to the Grand Canyon, and found a lone Primestar to taunt me with.
Bastage didn't even bring it home for me! Some friend, huh?
Claimed he didn't have any tools to take it apart.
Took this with his cell phone camera. Could it be much worse or fuzzier?
I'm buying him some lens-cleaning cloths, and a set of spare tools!
PLEASE LOG IN TO GET RID OF THESE ADS!
Attachments
Last edited:
Hey Anole,
Yes it is time to move on. Yes I'll probably paint the support arms. They are next on the agenda. I have to make them out of spares off the Unimesh that was hit by the tractor. The originals were made out of steel and rusted pretty badly. Doubt if I'll paint the feed-horn cover. Depends on which one I use. I will finish up painting the "mounting ring" too. I have 3 or 4 cans left to use on all that.
I am going to leave the back like it is just to remind me of just how badly I can screw something up using paint cans.
The reason I want them dark is because last year we were hit with some pretty heavy duty ice. We get that a lot around here. We also had a pretty heavy snow storm followed by more ice. I want something that will catch what little sun there is here in the winter and use it.
I also hate that dove gray color that most dishes are painted with. The flat black is fine on mesh dishes and smaller solids like the Primestars, but something as big as this solid needs to be just a hair lighter.
As far as decals and graffiti, my 17 year old daughter would love for me to give her a free hand with it as long as she could put what she wants on it and choose the color.
Don't be afraid to jump in on your white dish. If I could paint this one from one side to the other in one swipe, it would look totally different now. Besides, "God hates a coward".
It's a shame about your buddy's picture. I know the feeling. I have been wondering why my camera has been doing such a poor job here lately. I finally remembered that my daughter mentioned above took it to a school function about three weeks ago. Who knows what they spilled on it or in it. I may have more surprises yet to come. Yeah, what kind of buddy takes a picture of a dish hanging out over a cliff and doesn't climb out and get it for you.
If you are going to do much painting, the sprayer is the way to go. It is the fastest and most economical way of getting paint onto an object.
Fred
actually i think it looks good a few months in the weather and i don't think you will notice. so chauk it up as a good job
as for the camera i always have to check mine cause , i might have set the settings lower or something lol i can always resize down from a pig pixel picture ..... its hard to do that to a low res one.
as for the camera i always have to check mine cause , i might have set the settings lower or something lol i can always resize down from a pig pixel picture ..... its hard to do that to a low res one.
So that's what they weigh?People are taking the copper wiring and aluminum from our expressway lights that are knocked down.
Luckily they can't carry away a 600 pound 40ft pole.
I'd had my eyes on a few!
Luckily, I put in a 40' wooden telephone pole about 20 years ago, else I might've found out how much those metal ones weigh!
actually i think it looks good a few months in the weather and i don't think you will notice. so chauk it up as a good job
Thanks George, that's what I am hoping!
Fred
So that's what they weigh?
I'd had my eyes on a few!
Luckily, I put in a 40' wooden telephone pole about 20 years ago, else I might've found out how much those metal ones weigh!
Be glad you didn't find out. I have tried to roll a couple of them over by the luminaire arm if it is still attached, looking for the id number that always get buried on the face down side. Definitely look for a used one. A 40' one is just under $5,000.00 new down to 25' for $3,000.00 and new or used you need a pole cat to handle them.
PLEASE LOG IN TO GET RID OF THESE ADS!
- Status
- Please reply by conversation.
Similar threads
- Replies
- 12
- Views
- 1K

- Replies
- 0
- Views
- 824
- Replies
- 5
- Views
- 1K

- Replies
- 15
- Views
- 3K
Users Who Are Viewing This Thread (Total: 1, Members: 0, Guests: 1)
Who Read This Thread (Total Members: 1)
Latest posts
-
T
-
T